There was an announcement on the Visual Studio Code blog about the public preview of Live Share. This enables you to easily collaborate on code by securely sharing your coding session.
It is remarkably easy to set up 🙂
Installation
Open Visual Studio Code, open the Extensions side bar (CTRL + SHIFT + X)

Search for Live Share

Click Install and then reload when it has done

You will notice in the bottom bar it will say finishing the installation and if you open the terminal (CTRL + ‘) and click on Output and change the drop down on the right to Visual Studio Live Share you can see what it is doing

It is installing the dependancies as shown below
[Client I] Installing dependencies for Live Share…
[Client I] Downloading package ‘.NET Core Runtime 2.0.5 for win7-x86’
[Client I] Download complete.
[Client I] Downloading package ‘OmniSharp for Windows (.NET 4.6)’
[Client I] Download complete.
[Client I] Installing package ‘.NET Core Runtime 2.0.5 for win7-x86’
[Client V] Extracted packed files
[Client I] Validated extracted files.
[Client I] Moved and validated extracted files.
[Client I] Finished installing.
[Client I] Installing package ‘OmniSharp for Windows (.NET 4.6)’
[Client V] Extracted packed files
[Client I] Validated extracted files.
[Client I] Finished installing.
[Client I] No workspace id found.
Incidentally, this will also show the location of the log file
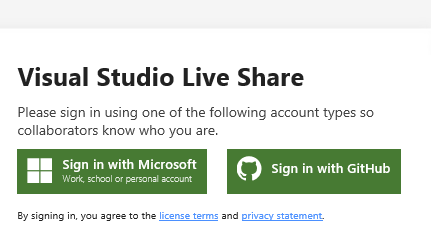
You will see in the bottom bar it will now say sign in

Clicking that will open a browser and give you a choice of accounts to sign in with, your GitHub or your Microsoft ID

Choose the one that you want to use and do your 2FA.

You do have 2FA on your Microsoft and GitHub (and all the other services)? If not go and set it up now – here for Microsoft and here for GitHub
Once you have signed in you will get this notification which you can close

The icon in the bottom will change and show your account name and if you click it it will open the menu

Sharing
To share your session you click on the Share icon in the bottom bar or the Start collaboration session in the menu above. The first time you do this there will be a pop-up as shown

You can decide which way you (or your organisation) want to share. I chose to accept the firewall exception.

The invite link is in your clipboard ready to share with your friends and colleagues (other open source contributors ??)
They can either open the link in a browser

or by using the Join Collaboration Session in the menu in VS Code

Once they do the sharer will get a notification

and the person who has joined will have the same workspace opened in their Visual Studio Code

You can then collaborate on your code and share the session. In the video below the left hand side is running in my jump box in Azure and the right hand side on my laptop and you can see that if you highlight code in one side it is shown in the other and if you alter it in one side it is changed in the other. I also saved that file in the joined session rather than from the session that initialised the sharing and it then saved in both sessions 🙂
So that shows how easy it is to install and to use. You can dive deeper using the documentation.
Happy Collaborating 🙂