
A different method for my own site
This blog post is for Mikey Bronowski t - b and Jonathan Allen t - b after a twitter discussion a few weeks ago.
How can I see my GitHub Pages site locally when I use a remote theme?
Do you need to?
My first answer is do you need to see them? Once you have your theme set up as you like, you can view your blog in Visual Studio Code using the keyboard shortcut CTRL + K, V and you can see a live preview of your post as you type.
However, I appreciate that at some point you will probably want to see what your site looks like locally, so I decided to look at the blog posts in the theme locally for this blog. My last post showed how I do this with the Data Saturdays web-site but I get an error when running this for my site because it cant find the gem sources. This is because I am using a remote theme for my blog.
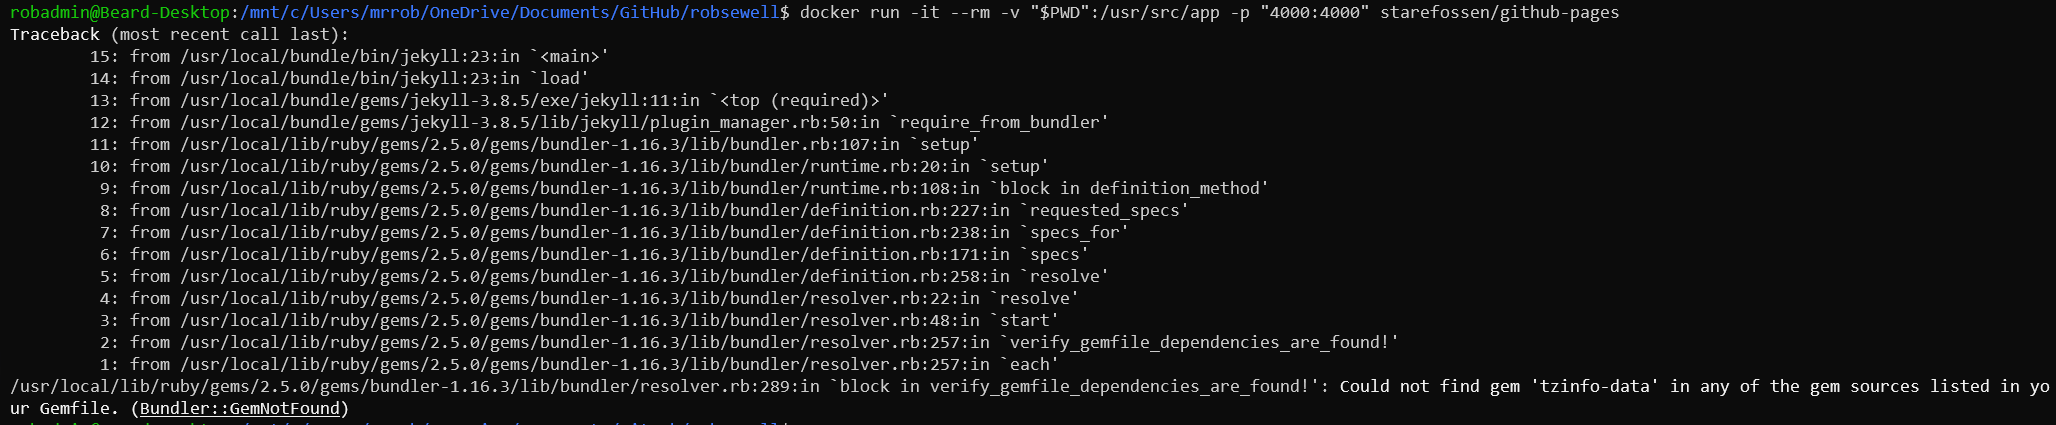
What I could do is work out how to get these in the right place, but I am lazy! Whilst researching for the Data Saturdays site, I had found another docker container, the official Jekyll one https://hub.docker.com/r/jekyll/jekyll. I wondered if I could use that.
Which version to use?
First we need to know which version of Jekyll GitHub Pages is using. You can find all of that information here https://pages.github.com/versions/
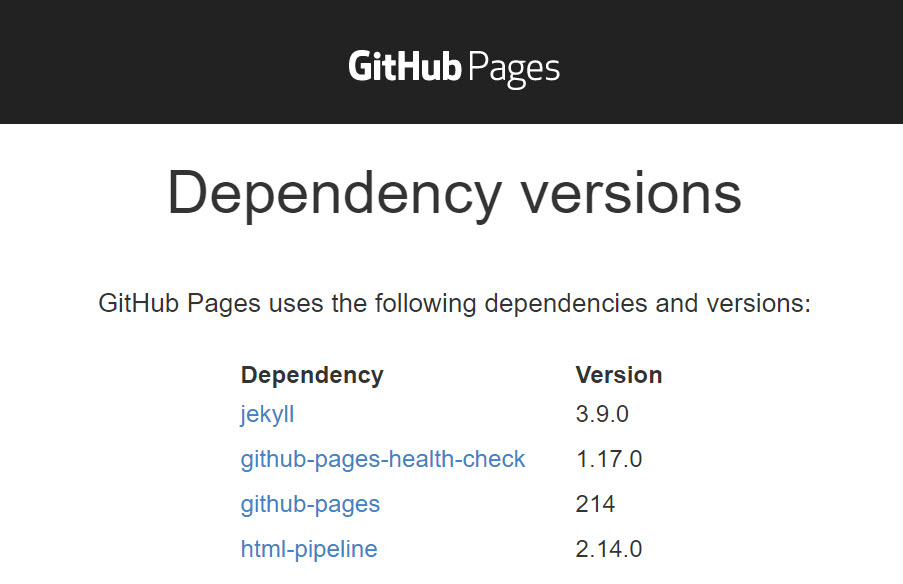
So we need to use 3.9.0
so I ran
docker pull jekyll/jekyll:3.9
but

so I tried 3.8.6 and it worked for me.
docker pull jekyll/jekyll:3.8.6
Set up
Let’s back up a bit and set the environment up. I am using Docker on Windows Subsystem for Linux 2 (WSL2) I installed it using this guide. I believe this will work using native Docker, you would just need to replace the $PWD in the example below with a dot .
Once that is installed and the image is pulled, I can then run my blog locally using
docker run --rm --volume=$PWD:/srv/jekyll -p 4001:4000 jekyll/jekyll:3.8 jekyll serve
or if not using WSL2
docker run --rm --volume=.:/srv/jekyll -p 4001:4000 jekyll/jekyll:3.8 jekyll serve
The --rm means that the container will be removed when it is stopped, --volume="$PWD:/srv/jekyll" maps the current directory locally to the /srv/jekyll directory in the container so I need to change the directory to my local repository for my blog. -p 4001:4000 says map port 4001 on my machine to port 4000 on the container. This means that I can view the blog locally at https://localhost:4001. jekyll serve will build the site and run it for me.
Of course, there is tweaking
We have to make a few changes to make this work easily. When I run the site locally with this command I get the following error and the site would not build.
Liquid Exception: No repo name found. Specify using PAGES_REPO_NWO environment variables, ‘repository’ in your configuration, or set up an ‘origin’ git remote pointing to your github.com repository. in /_layouts/default.html
ERROR: YOUR SITE COULD NOT BE BUILT:
No repo name found. Specify using PAGES_REPO_NWO environment variables, ‘repository’ in your configuration, or set up an ‘origin’ git remote pointing to yocom repository.

to fix this add the following to your _config.yml file
repository: GITHUBUSERNAME/REPONAME
mine is
repository: SQLDBAWithABeard/robsewell
Then when I run the container I get another warning
GitHub Metadata: No GitHub API authentication could be found. Some fields may be missing or have incorrect data.
This does not really matter as the site still builds but another warning
Auto-regeneration may not work on some Windows versions. Please see: https://github.com/Microsoft/BashOnWindows/issues/216 If it does not work, please upgrade Bash on Windows or run Jekyll with –no-watch.
means that the site will not auto-regenerate when you make a change and save the file.
We fix these errors by adding
github: [metadata]
to the _config.yml file
and running the container with an extra switch for the jekyll command --force_polling
So now it works?
So with the additional data in the _config.yml file and the new command
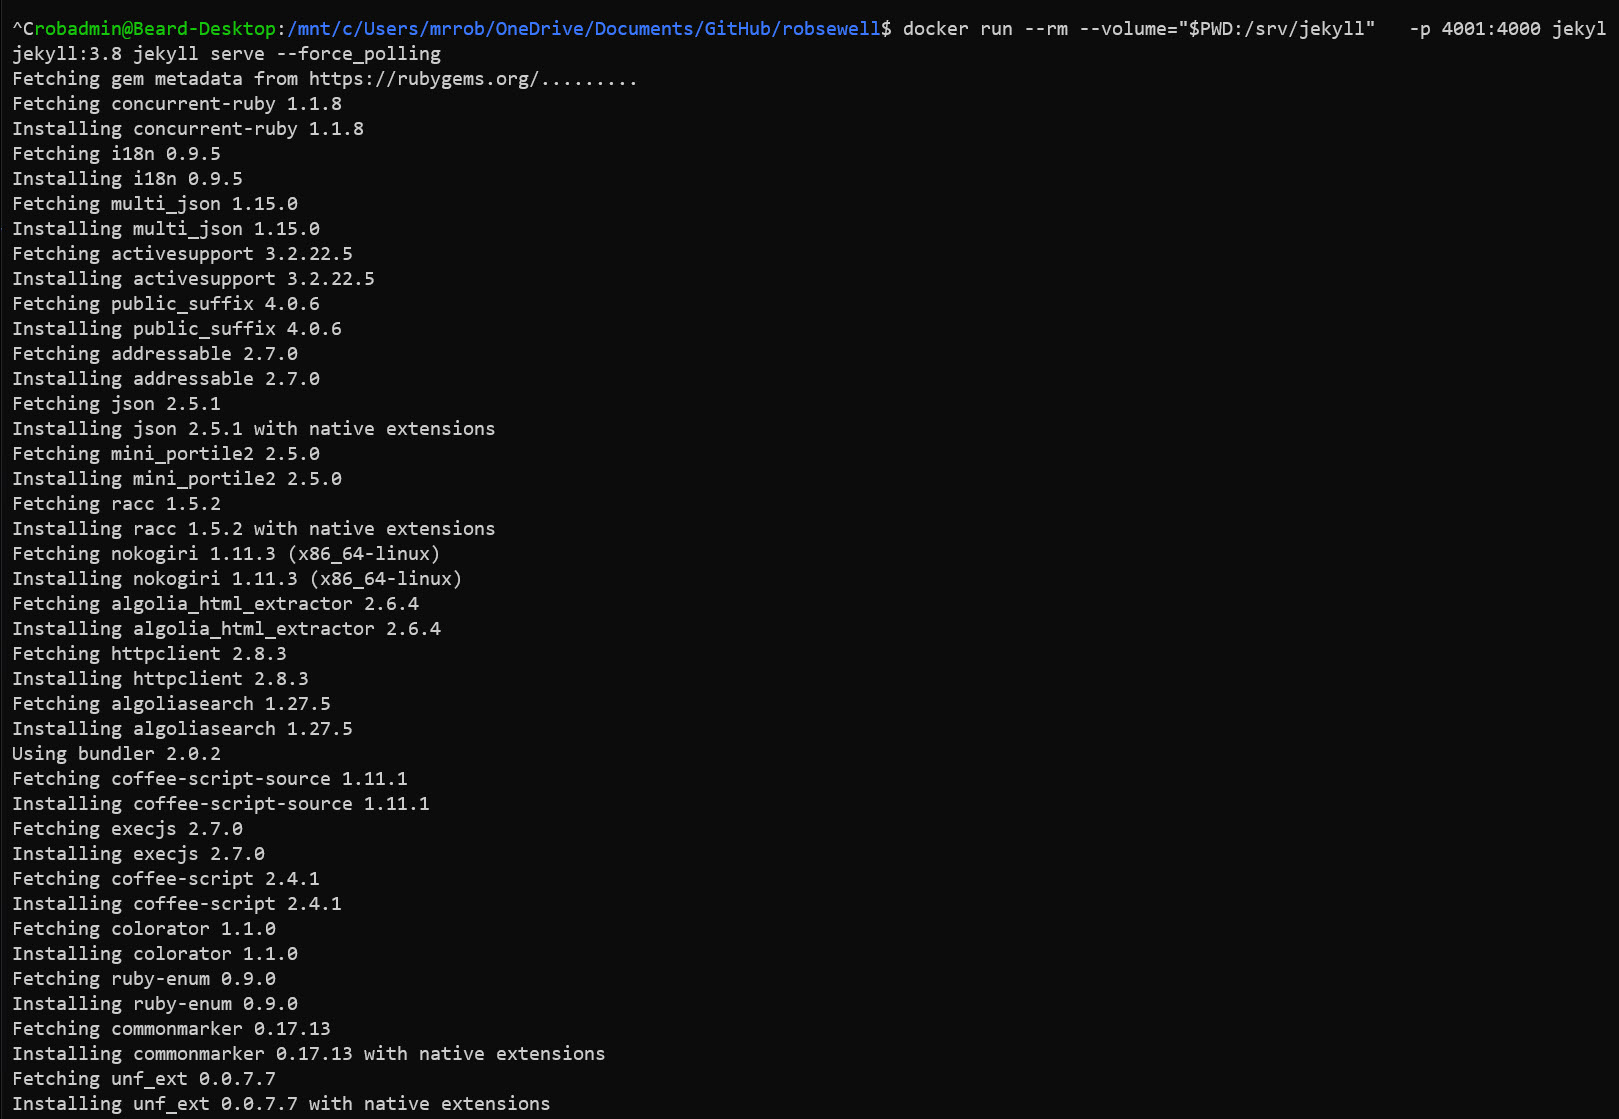
docker run --rm --volume="$PWD:/srv/jekyll" -p 4001:4000 jekyll/jekyll:3.8 jekyll serve --force_polling
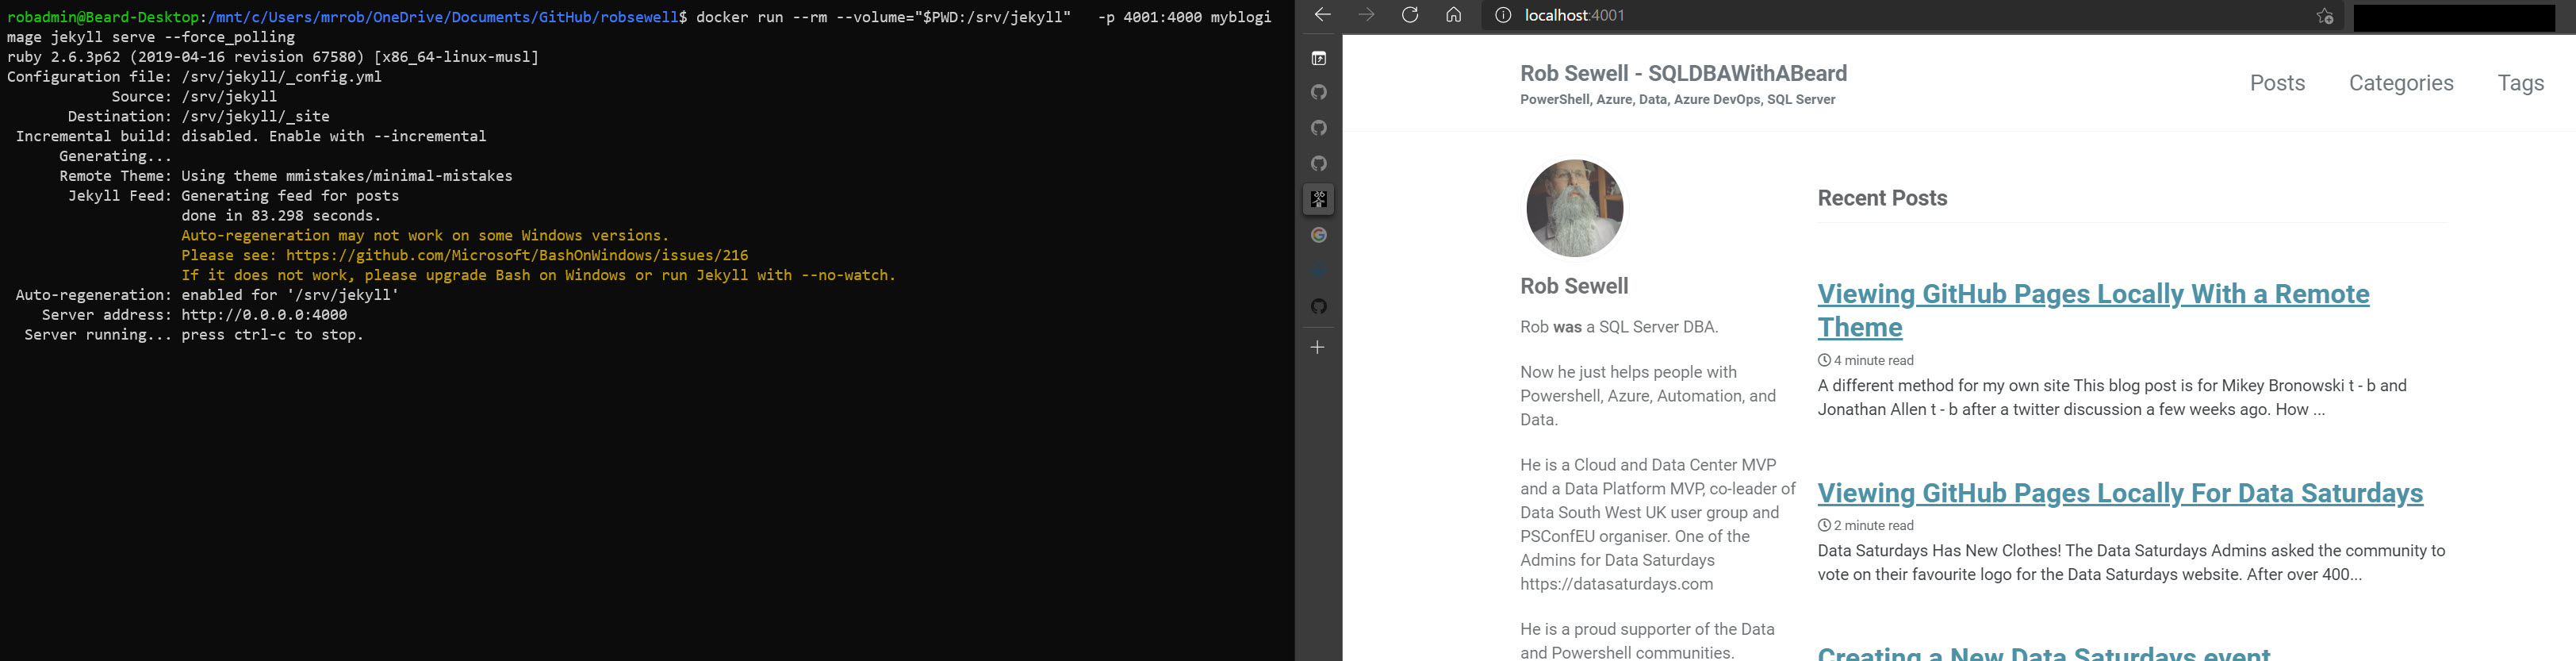
the site will build. You will still get the warning for auto-regeneration but it works. The purple arrow and the yellow box show the file that was changed and that it regenerated.
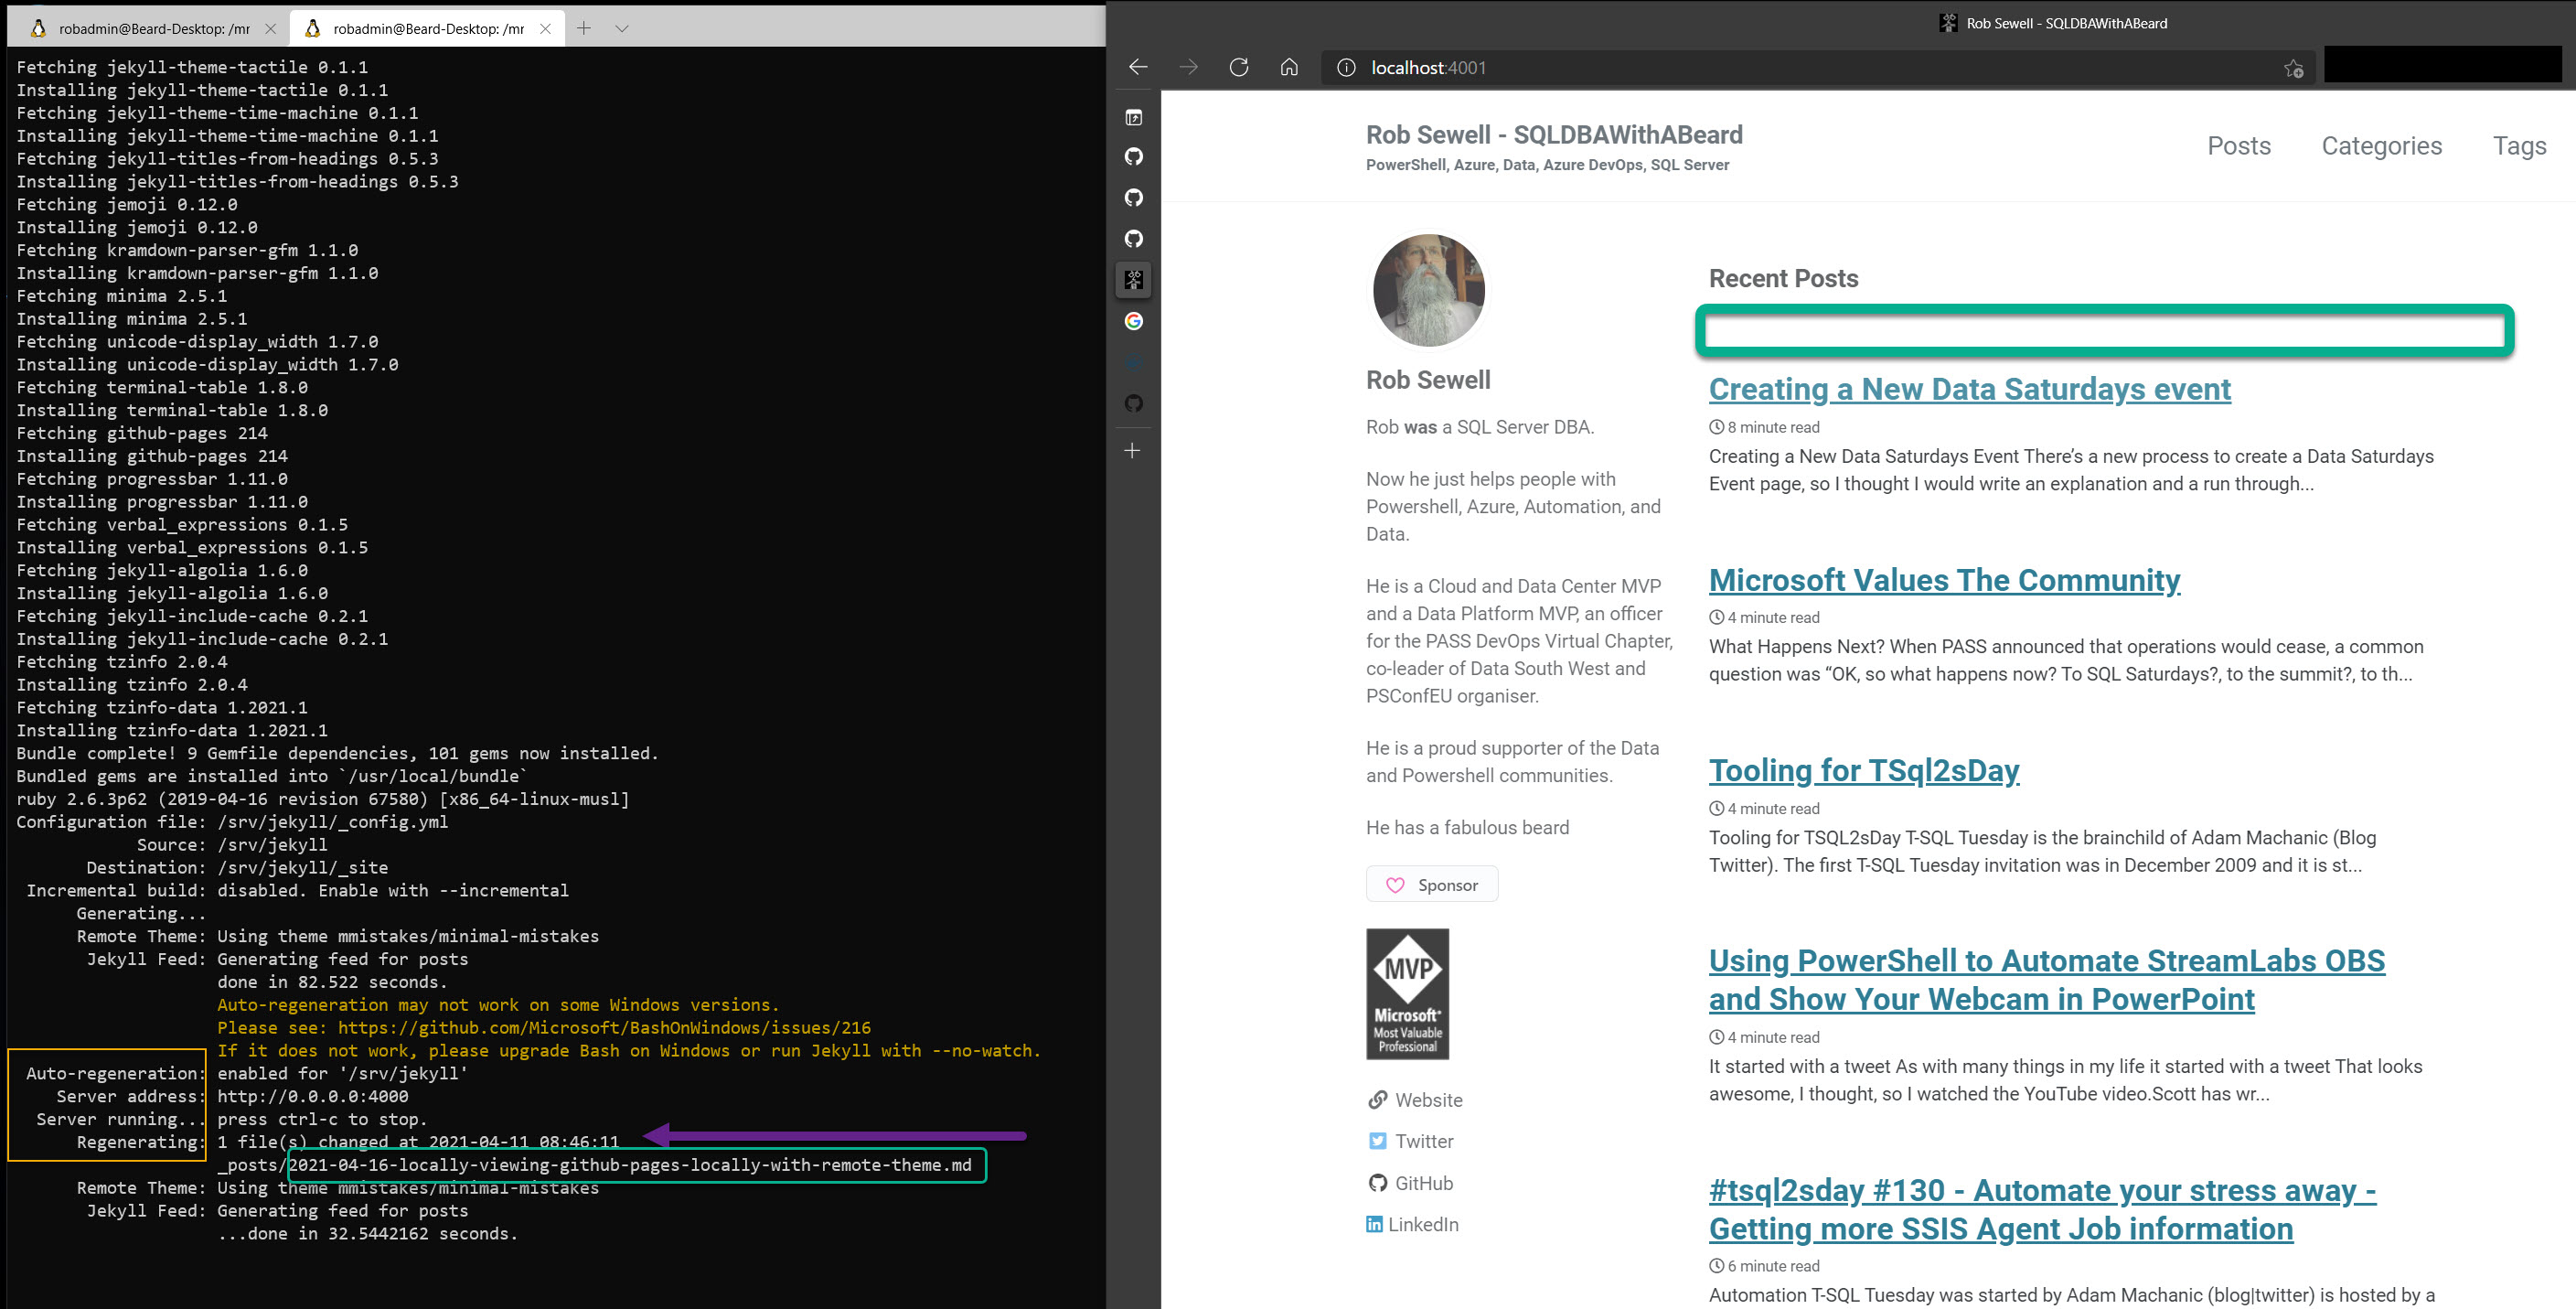
It will only regenerate whilst running for blog post changes and not for configuration changes, such as altering the _config.yml file. If you want to see those, you will have to stop the container and re-run it.
There is one last problem however. When you write your blog posts in Jekyll you name the file YYYY-MM-DD-Nameoffile.md this will give the post time of YYYY-MM-DD but the file for this blog post is named with a date in the future and by default it doesn’t show. The green box shows the file name but there is no corresponding blog post.
To fix this we add another entry to the _config.yml file
future: true
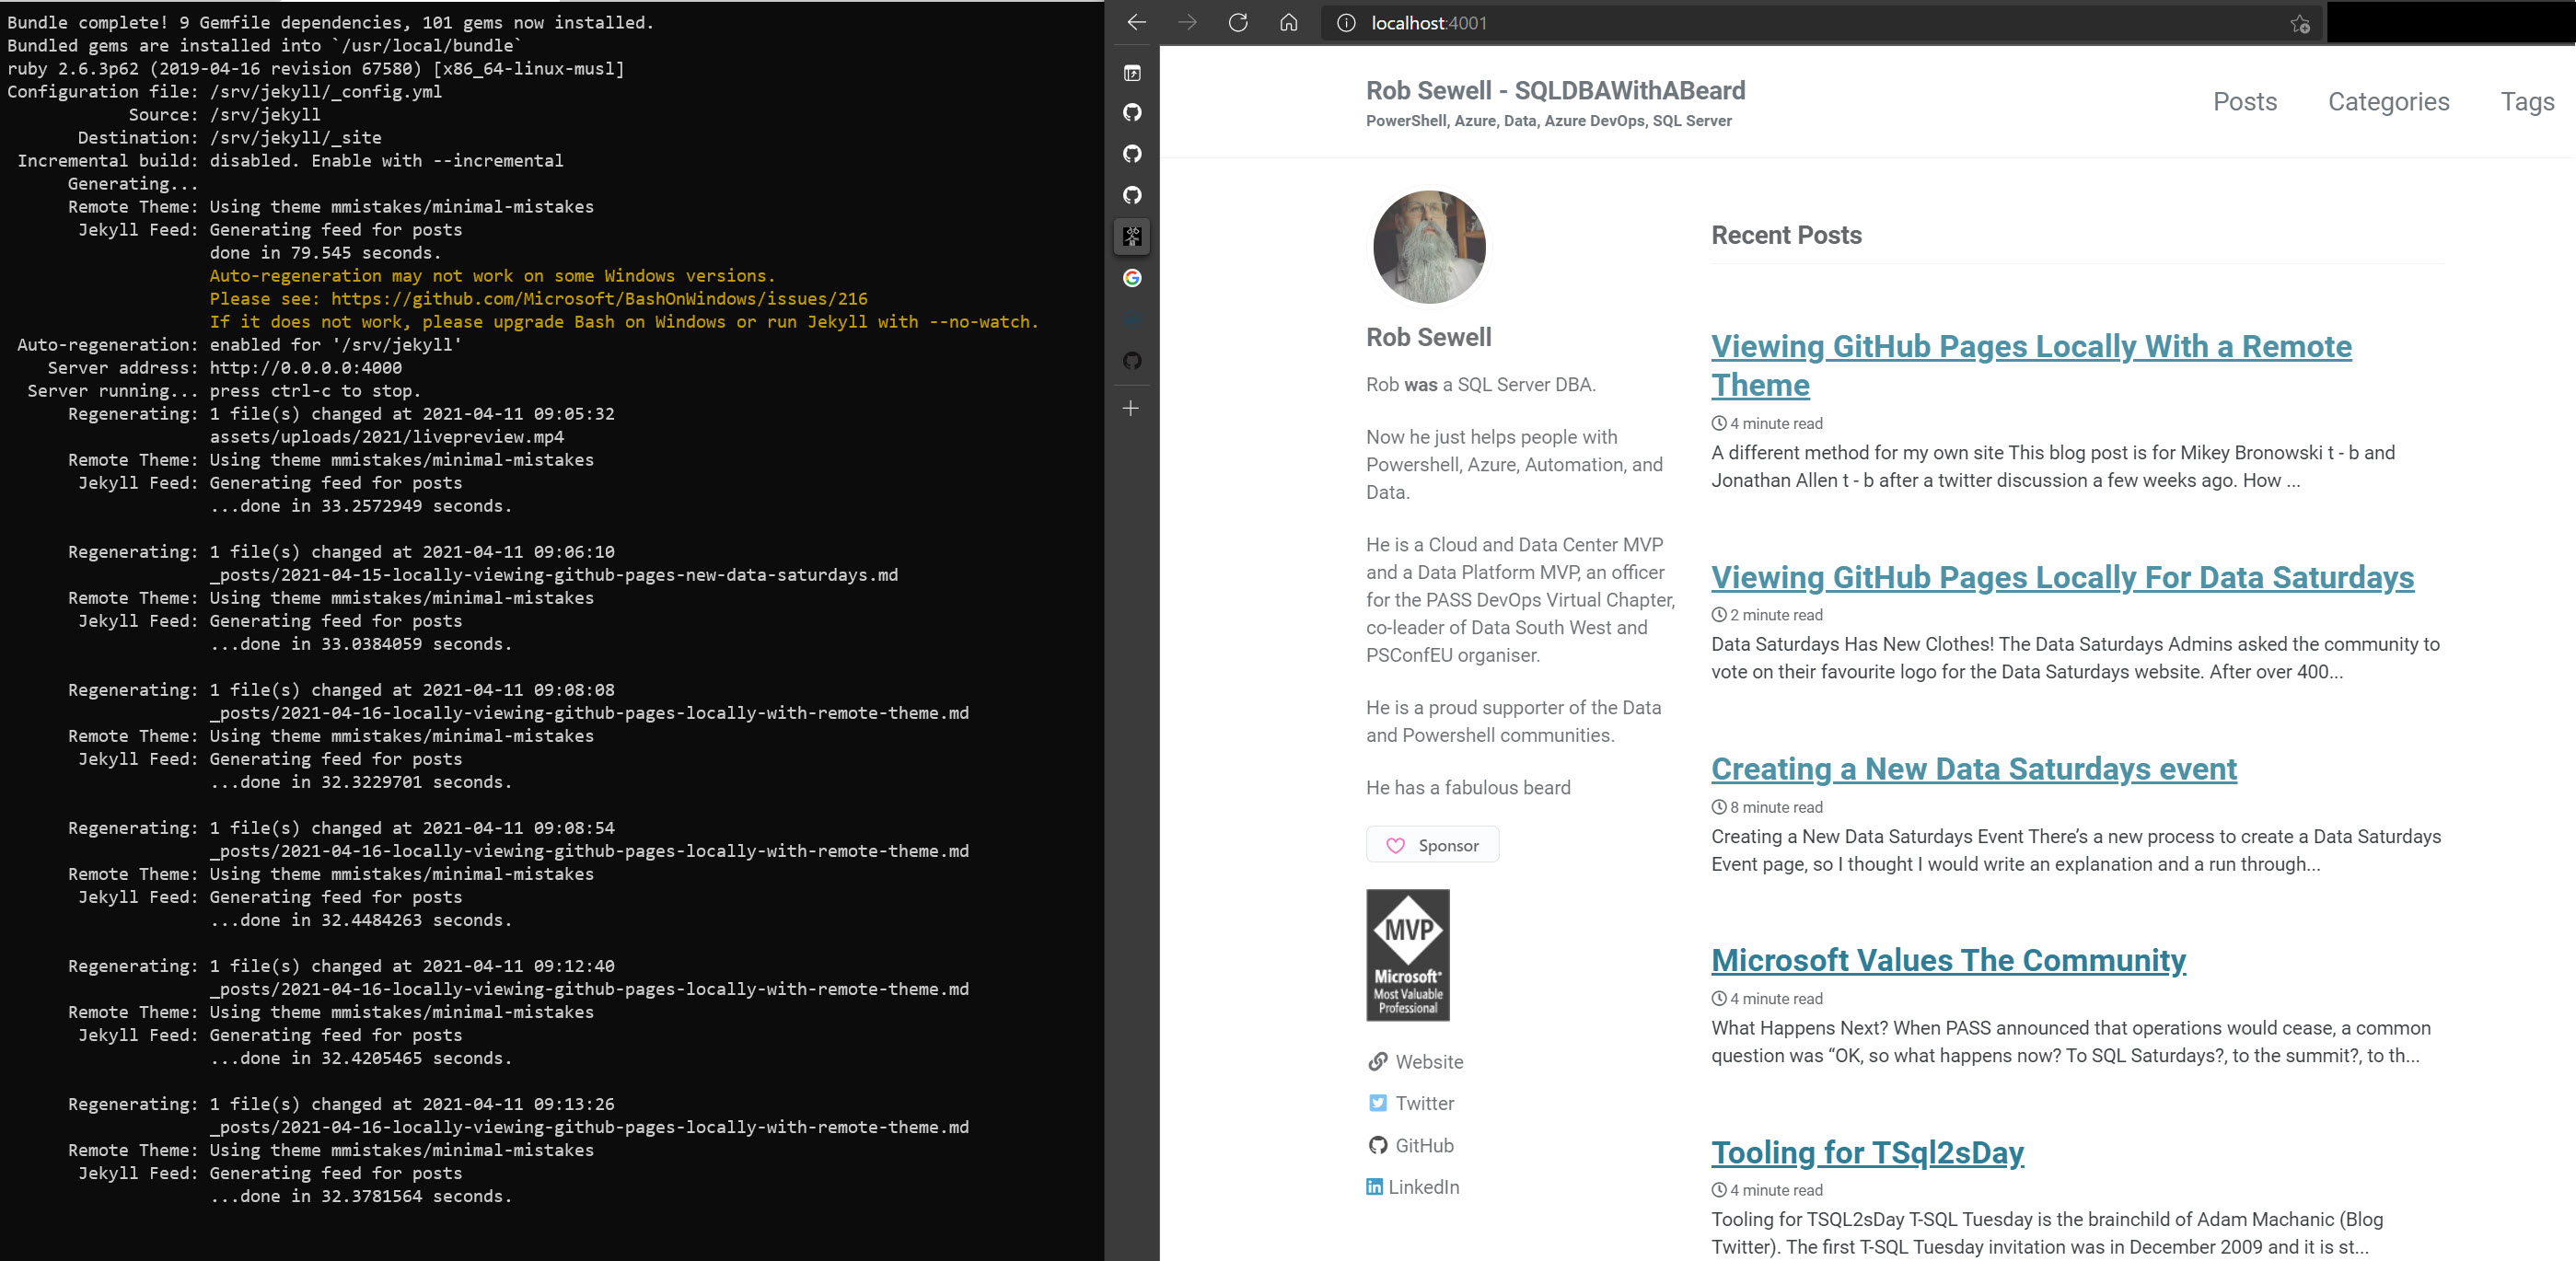
This will tell Jekyll to show the posts with a data in the future. Unless you wish to show future posts on your blog when it is live, you will have to remember to change this to
future: false
when you push your changes to GitHub so that your blog behaves as expected but now you can see your current blog post and write away and be able to see how it will look in your theme
Let’s make it even better
When you run the container, it will need to download all of the things it needs to run the site. This can take a little time.
It would be better if we had our own image that had all of those already downloaded for us. Let’s create our own image. We need to run our container without the rm option this time as we need it not to be removed when we stop it.
docker run -volume="$PWD:/srv/jekyll" -p 4001:4000 jekyll/jekyll:3.8 jekyll serve
Once it has finished downloading and installing all that it needs and generated the site press CTRL +C to stop the container and run
docker ps -a
which will show you all of containers.

Use the first 3 characters of the container. In my example it is 760. If you have more than one, look for the one with the jekyll/jekyll:3.8.6 as the image.
Then we can create our own image using
docker commit 760 myblogimage
replace 760 with your own container.
Once you have created the image, you can remove the stopped container with
docker rm 760
Again, replace 760 with your own container.
Quicker run
Now you can use your own image and the container will not need to download and install all of the things. Replace jekyll/jekyll:3.8 with myblogimage
docker run --rm --volume="$PWD:/srv/jekyll" -p 4001:4000 myblogimage jekyll serve --force_polling
Happy local blog writing.