The last post about Launching Azure VMs with PowerShell made someone ask me to explain how I start my Azure VMs normally so here goes.
When I decide to write a blog post or develop and test a script or run through demos from a presentation or blog post I fire up my Azure Virtual machines with PowerShell. This is how I do it
Open PowerShell and check that I am connected to my default subscription by running Get-AzureSubscription
Note – You must have installed Windows Azure PowerShell and installed the PublishSettingsFile or used Add-AzureAccount for your subscription following the steps here
http://www.windowsazure.com/en-us/manage/install-and-configure-windows-powershell/
Then I run the following three Cmdlets
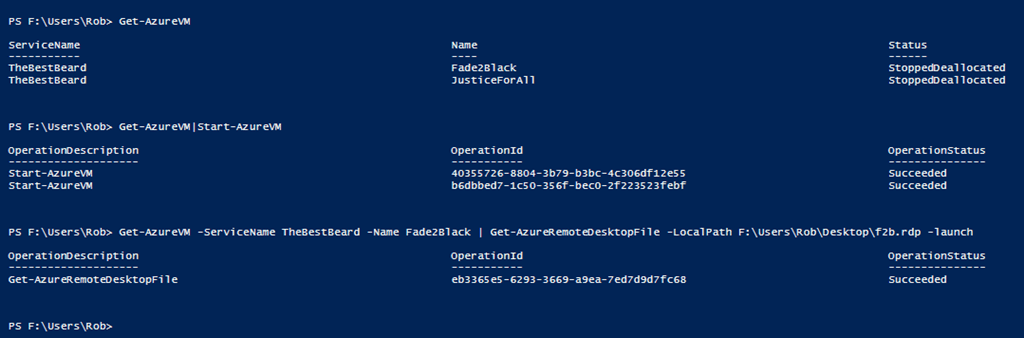
Get-AzureVM shows me the VMs associated with that subscription.
I then pipe to Start-AzureVM as I want to start both machines. If I only wanted one I would check that
Get-AzureVM -name Fade2Black -ServiceName TheBestBeard
returned the correct machine and then pipe that to Start-AzureVM
Once the VMs have started I use Get-AzureRemoteDesktopFile giving a local path for the rdp file and specifying –Launch to run the RDP session
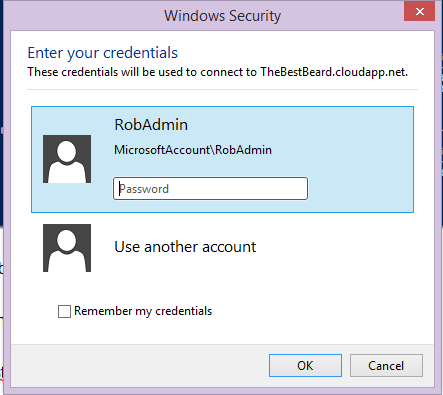
and away we go 🙂
Once I have finished simply run

and my machines are stopped and no longer running my credit down.