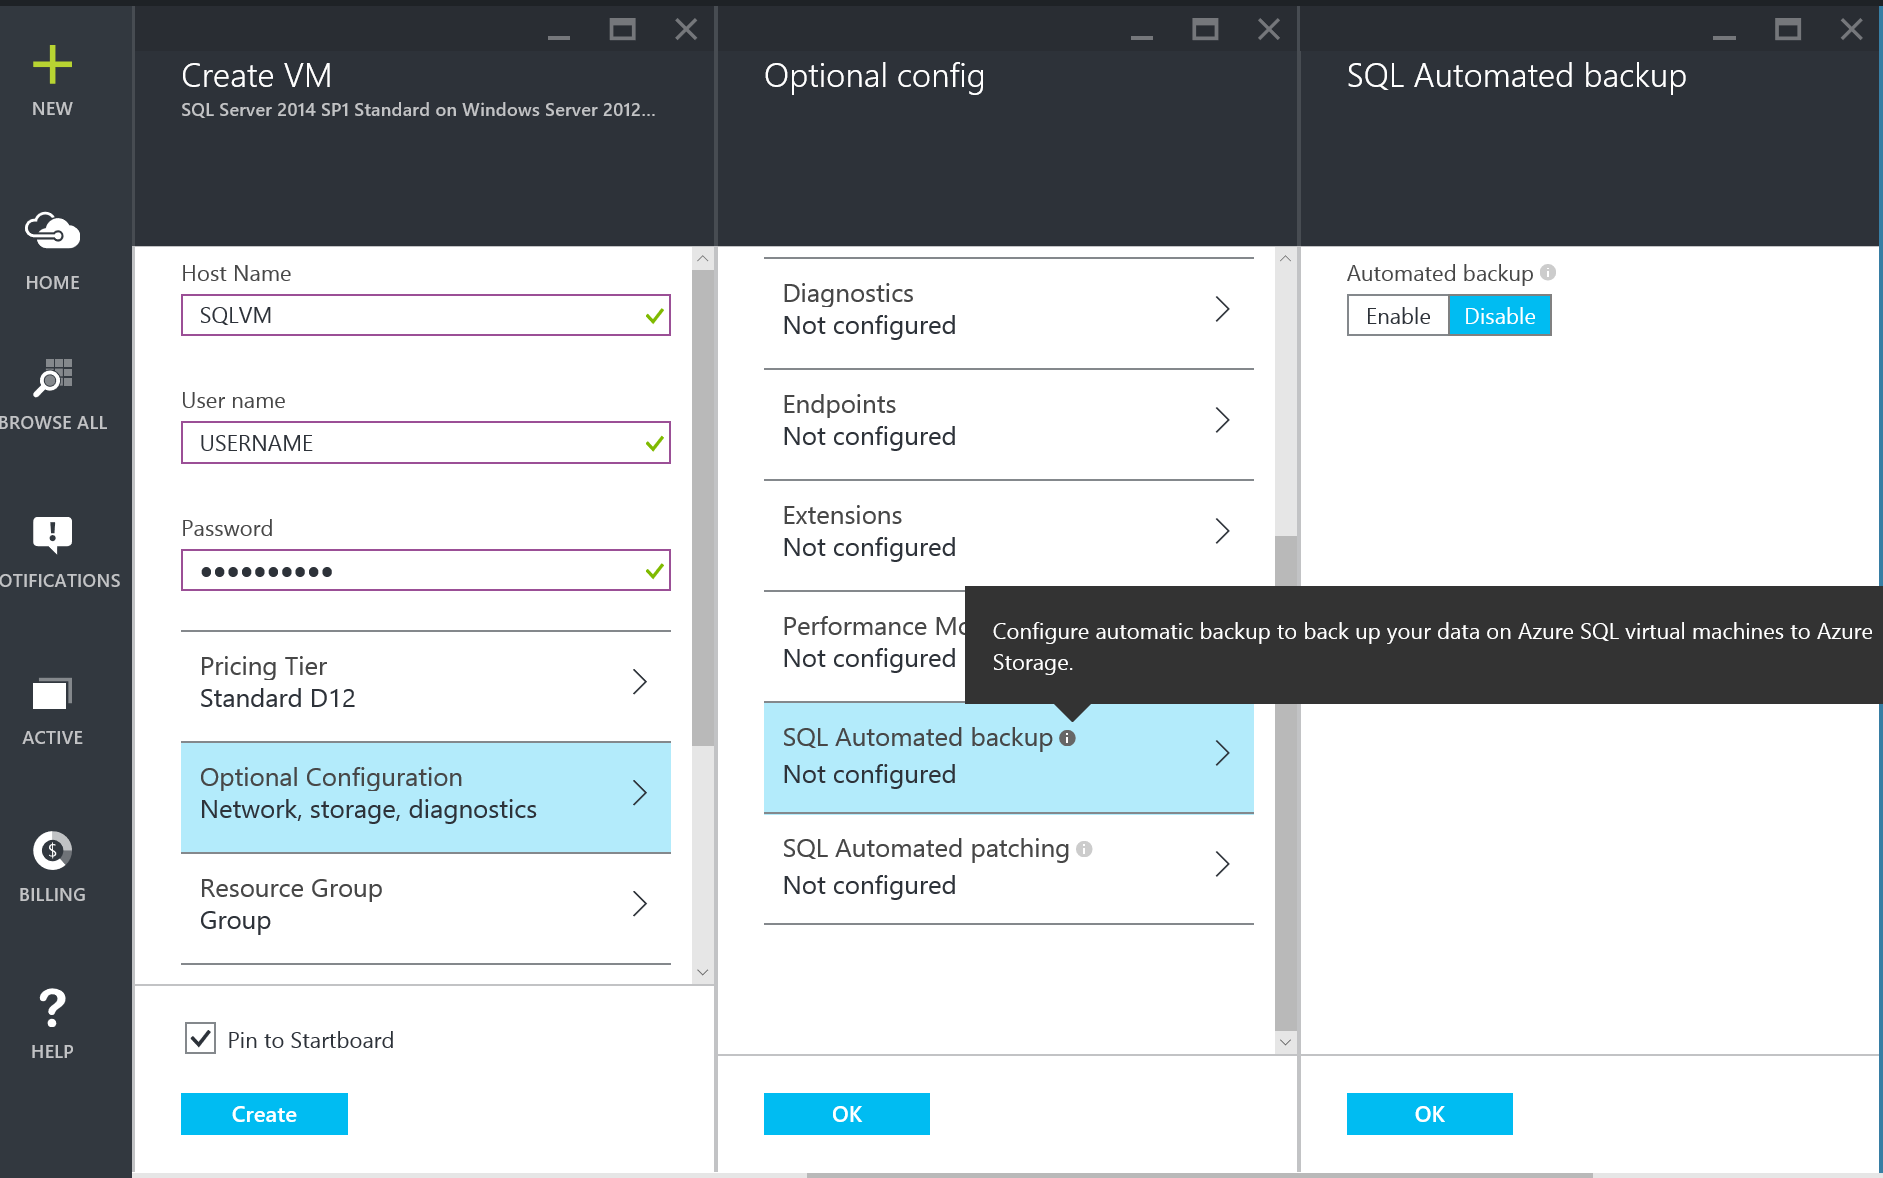
This weekend I was creating some Azure VMs to test and was required to use the GUI for some screenshots. I have always used my PowerShell scripts described here to create my test systems and with a new job taking up a lot of my time had missed the announcement about Azure SQL Automated Backup and Azure SQL Automated Patching so was surprised to see this screen
I read the announcement and also the details on MSDN https://msdn.microsoft.com/en-us/library/azure/dn906091.aspx which show that this requires the SQL Server IaaS Agent. This is a default option on new virtual machines.
There are some other considerations too. It is only supported for SQL Server 2014 and Windows Server 2012 and 2012R2 at present and you can set a retention period to a maximum of 30 days but it is automated. You do not have to decide upon the backup strategy Azure will decide the frequency and type of backups dependent upon the workload of the database and some other factors such as
A full backup is taken ○ when an instance is added to use Managed backup ○ When transaction log growth is 1Gb or more ○ At least once a week ○ If the log chain is broken ○ When a database is created
A transaction log backup is taken - If no log backup is found - Transaction log space used is 5Mb or larger - At least once every two hours - Any time the transaction log backup is lagging behind a full database backup. The goal is to keep the log chain ahead of full backup.
From https://msdn.microsoft.com/en-gb/library/dn449496(v=sql.120).aspx
There are some restrictions - Only database backups are supported - System databases are not supported so you need to back those up yourself - You can only back up to Azure storage - Maximum backup size is 1Tb as this is the maximum size for a blob in Azure storage - Simple recovery is not supported - Maximum retention is 30 days - if you are required to keep your backups for longer than 30 days for regulatory or other reasons you could simply use Azure Automation to copy the files to another storage account in Azure)
How to set it up.
If you are using the GUI then you will find SQL Automated Backup in the optional config blade of the set up. You can follow the steps here to set it up. If (like me) you want to use PowerShell then use the following code after you have created your Virtual Machine
| |
Once you have run the code, Azure will take care of the rest. Add a couple of databases to your instance and look in the storage account and you will see this


And in the automaticbackup container you will find the Certificates and master key backups

It will also create a credential

You can use the same credential to back up your system databases. If like me you use Ola Hallengrens excellent Maintenance Solution then simply change your systems backup job as follows
| |
If you need to restore your database then you can use the GUI and when you choose restore you will see this screen

Enter your storage account and the key which you can get from the Azure portal. You will notice that the credential has already been selected, click connect and

There are all of your backups ready to restore to any point in time that you choose. By clicking script the T-SQL is generated which looks like this
| |
There is an important note. Remember this when you have just set it up so that you don’t think that you have done it wrong (which is what I did!)
When you enable Automated Patching for the first time, Azure configures the SQL Server IaaS Agent in the background. During this time, the portal will not show that Automated Patching is configured. Wait several minutes for the agent to be installed, configured. After that the portal will reflect the new settings.
From <https://msdn.microsoft.com/en-us/library/azure/dn961166.aspx>
And also look out for this

The password I had chosen was not complex enough but the PowerShell script had succeeded and not given me the warning
To set up SQL Automated Patching you follow a similar steps. The setting is again on the OS Config blade and click enable and then you can choose the frequency and duration of the patching.
It is important to remember to choose your maintenance window correctly. If you have set up your SQL VMs correctly you will have them in an availability set and be using either mirroring or Availability Groups and have the VMs set up in the same availability set to ensure availability during the underlying host patching but I had it confirmed by Principal Software Engineering Manager Sethu Srinivasan t via Microsoft PFE Arvind Shyamsundar b | t that the SQL Automated Patching is not HA aware so you will need to ensure that you set the maintenance windows on each VM to ensure that they do not overlap