Azure Data Studio is a great tool for connecting with your data platform whether it is in Azure or on your hardware. Jupyter Notebooks are fantastic, you can have words, pictures, code and code results all saved in one document.
I have created a repository in my GitHub https://beard.media/Notebooks where I have stored a number of Jupyter notebooks both for Azure Data Studio and the new .NET interactive notebooks.
Another thing that you can do with notebooks is run them as Agent Jobs and save the results of the run.
Notebooks running T-SQL
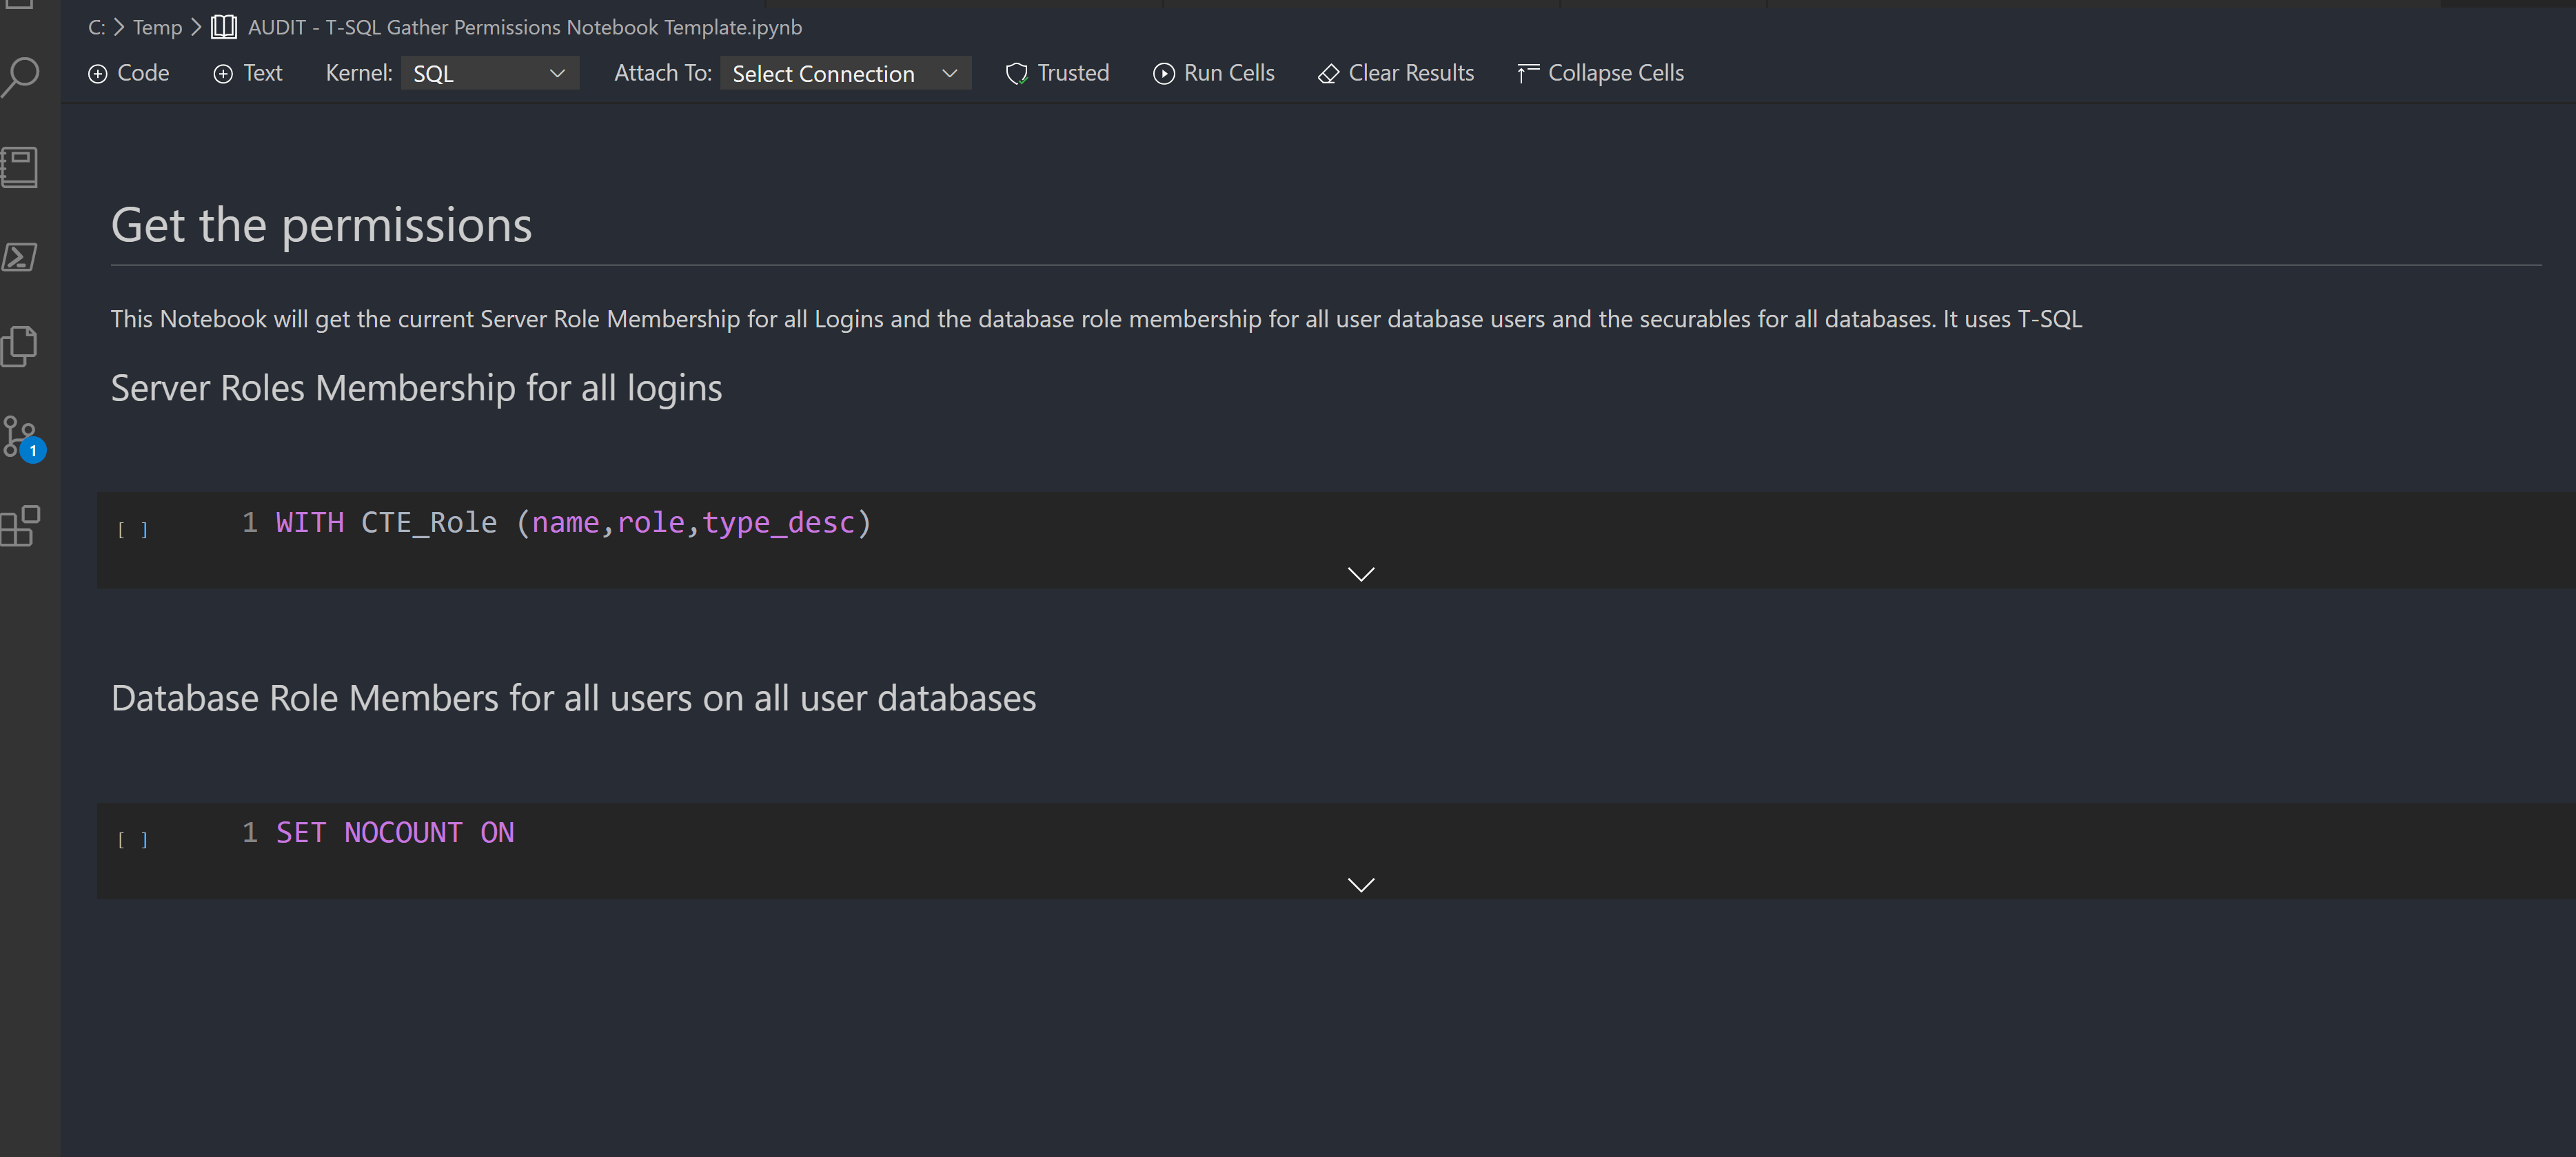
This works easily for T-SQL notebooks. I am going to use this one that I created that uses T-SQL to gather permissions using old code that was in a share somewhere. We can run the notebook and get the permissions and save the notebook and the results will be available for all time (unless you delete the notebook!)
SQL Agent Extension in Azure Data Studio
In Azure Data Studio, if you press CTRL + SHIFT + X it will open the Extensions tab
You can add extra functionality to Azure Data Studio. Search in the top bar for Agent and press the install button to install the extension. You can connect to and instance in the connections tab (CTRL + SHIFT + D) and right click on it and click Manage. This will open up the server dashboard (why isn’t it instance dashboard?)

and you will also have the SQL Agent dashboard available
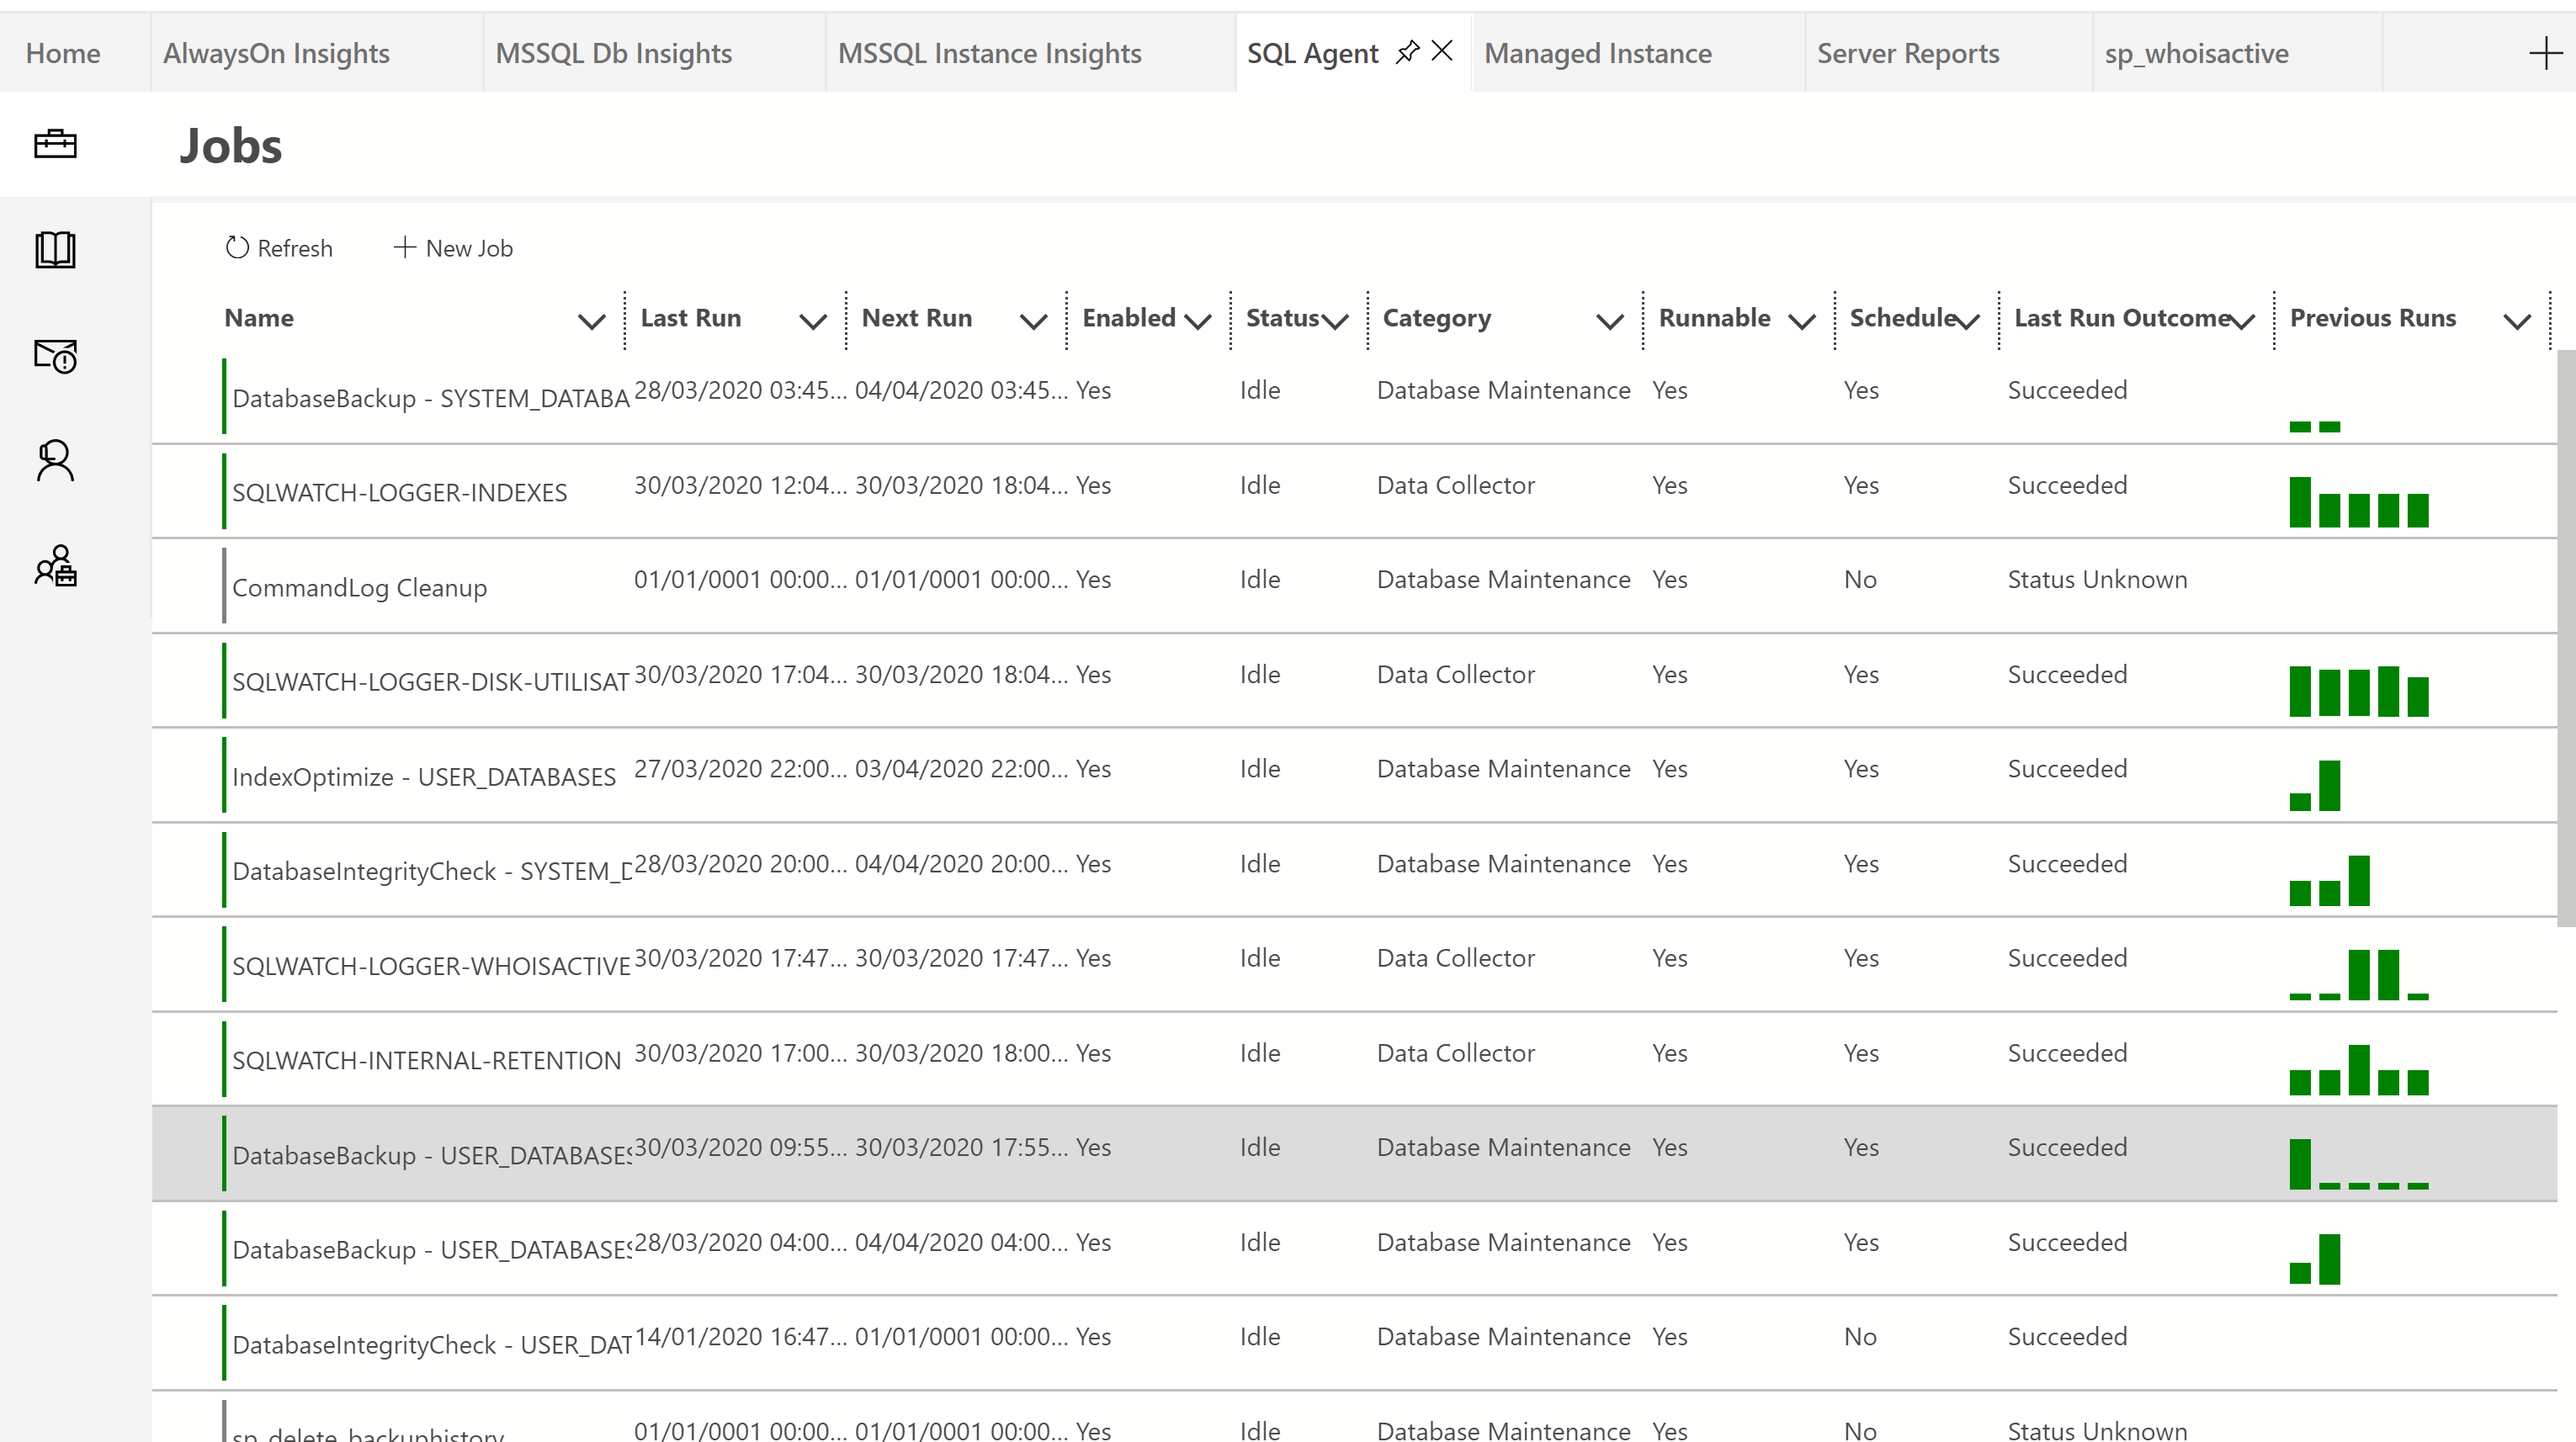
Its pretty neat, it has green and red bars against the jobs showing success or failure and the larger the bar the longer the run time. On the left you will see a book. Click that
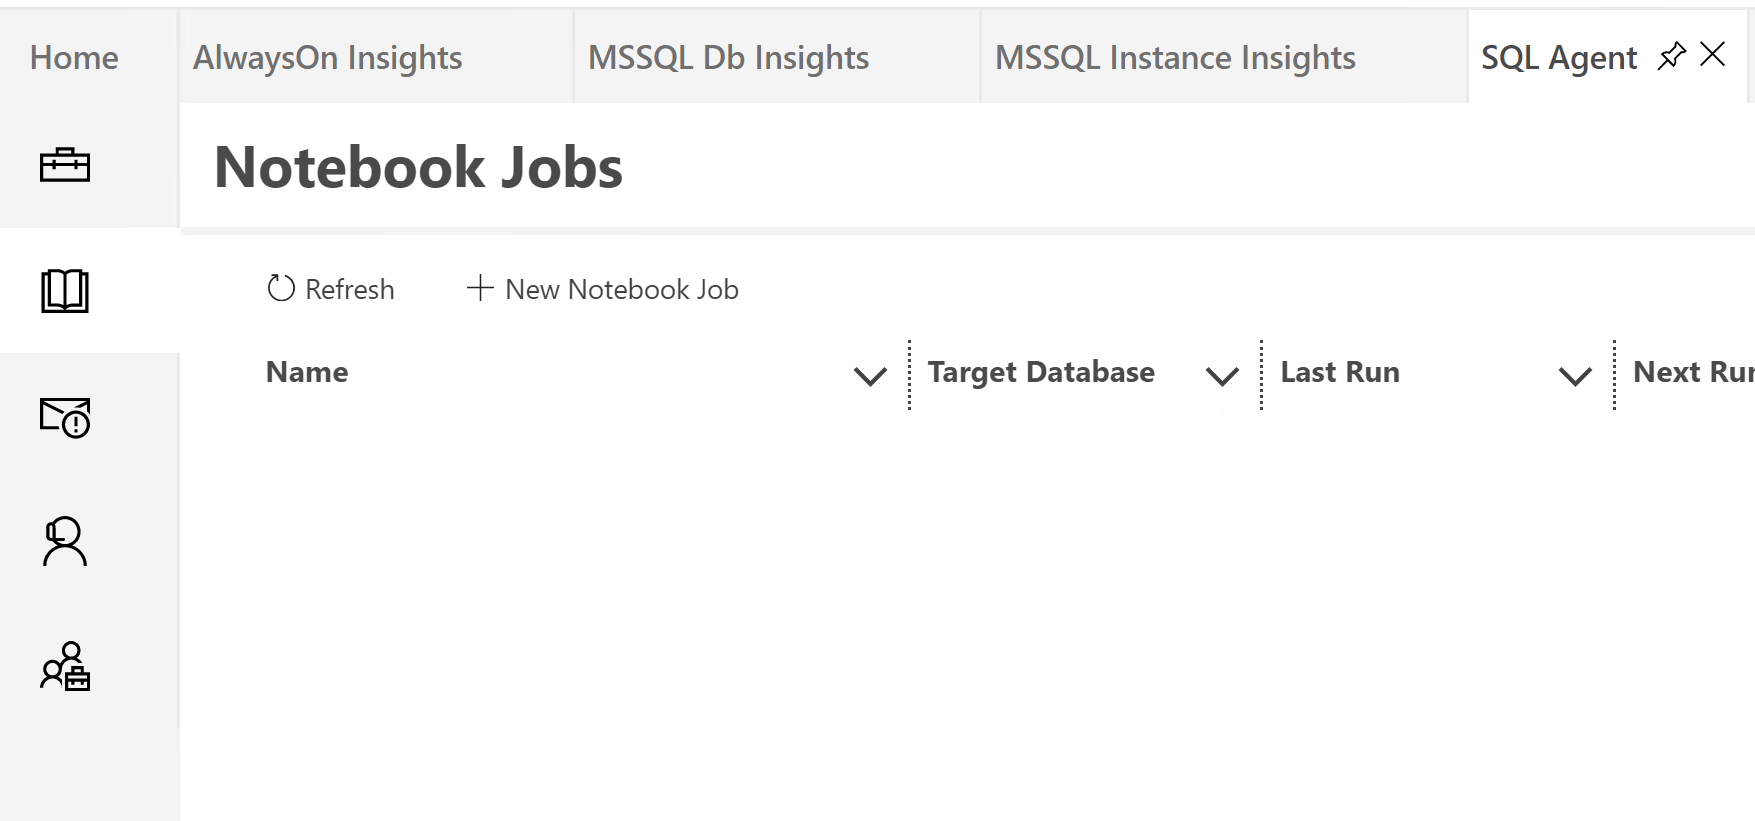
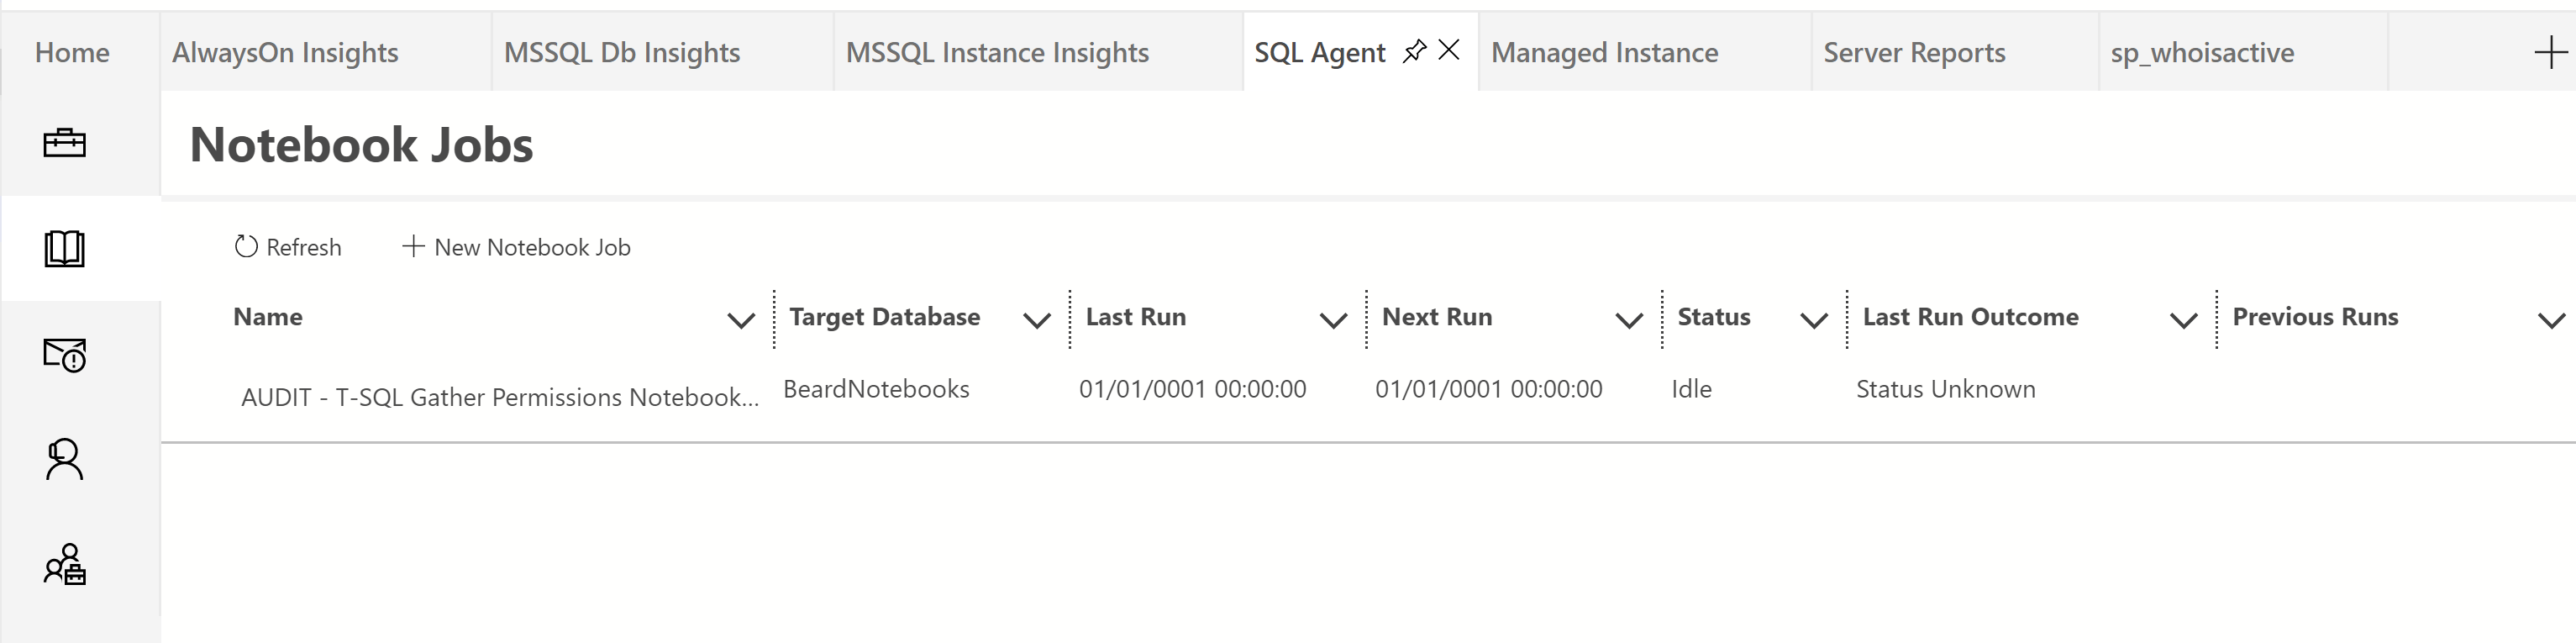
Notebooks in Agent Jobs
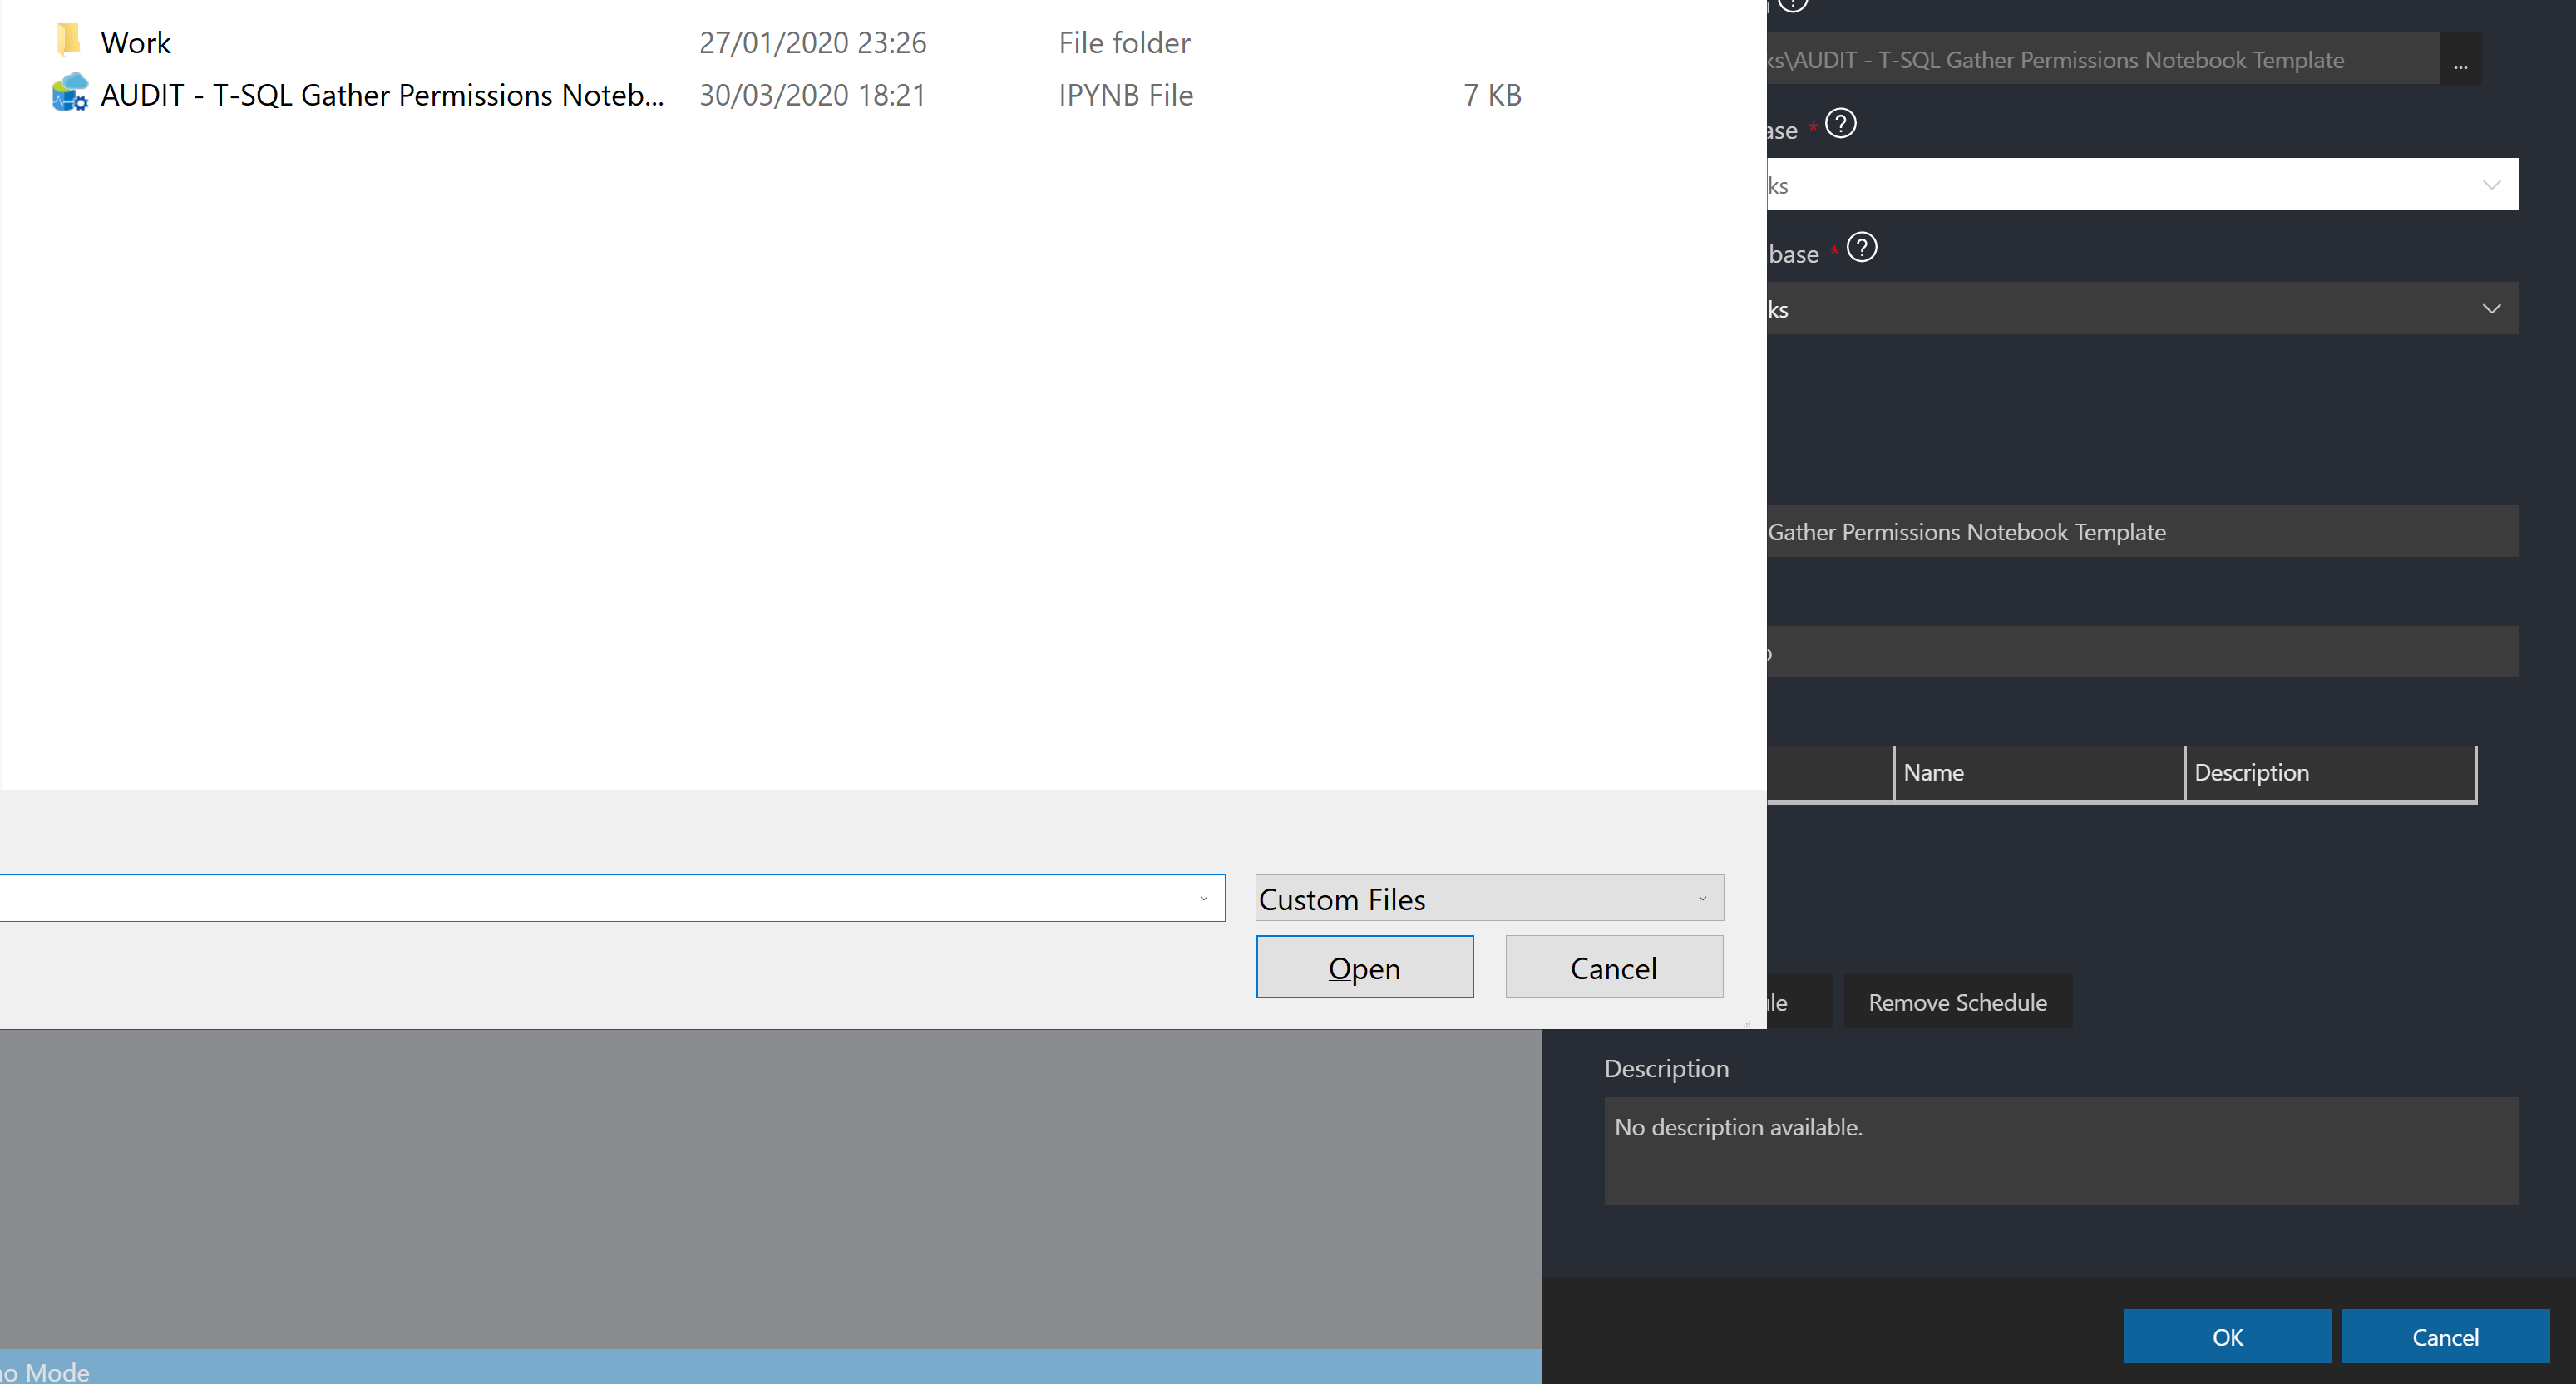
You can create an Agent Job to run a notebook. As a notebook is just a json file, it can be stored in a database table. This interface will create two tables one to store the templates and one for the results. Click New Notebook Job
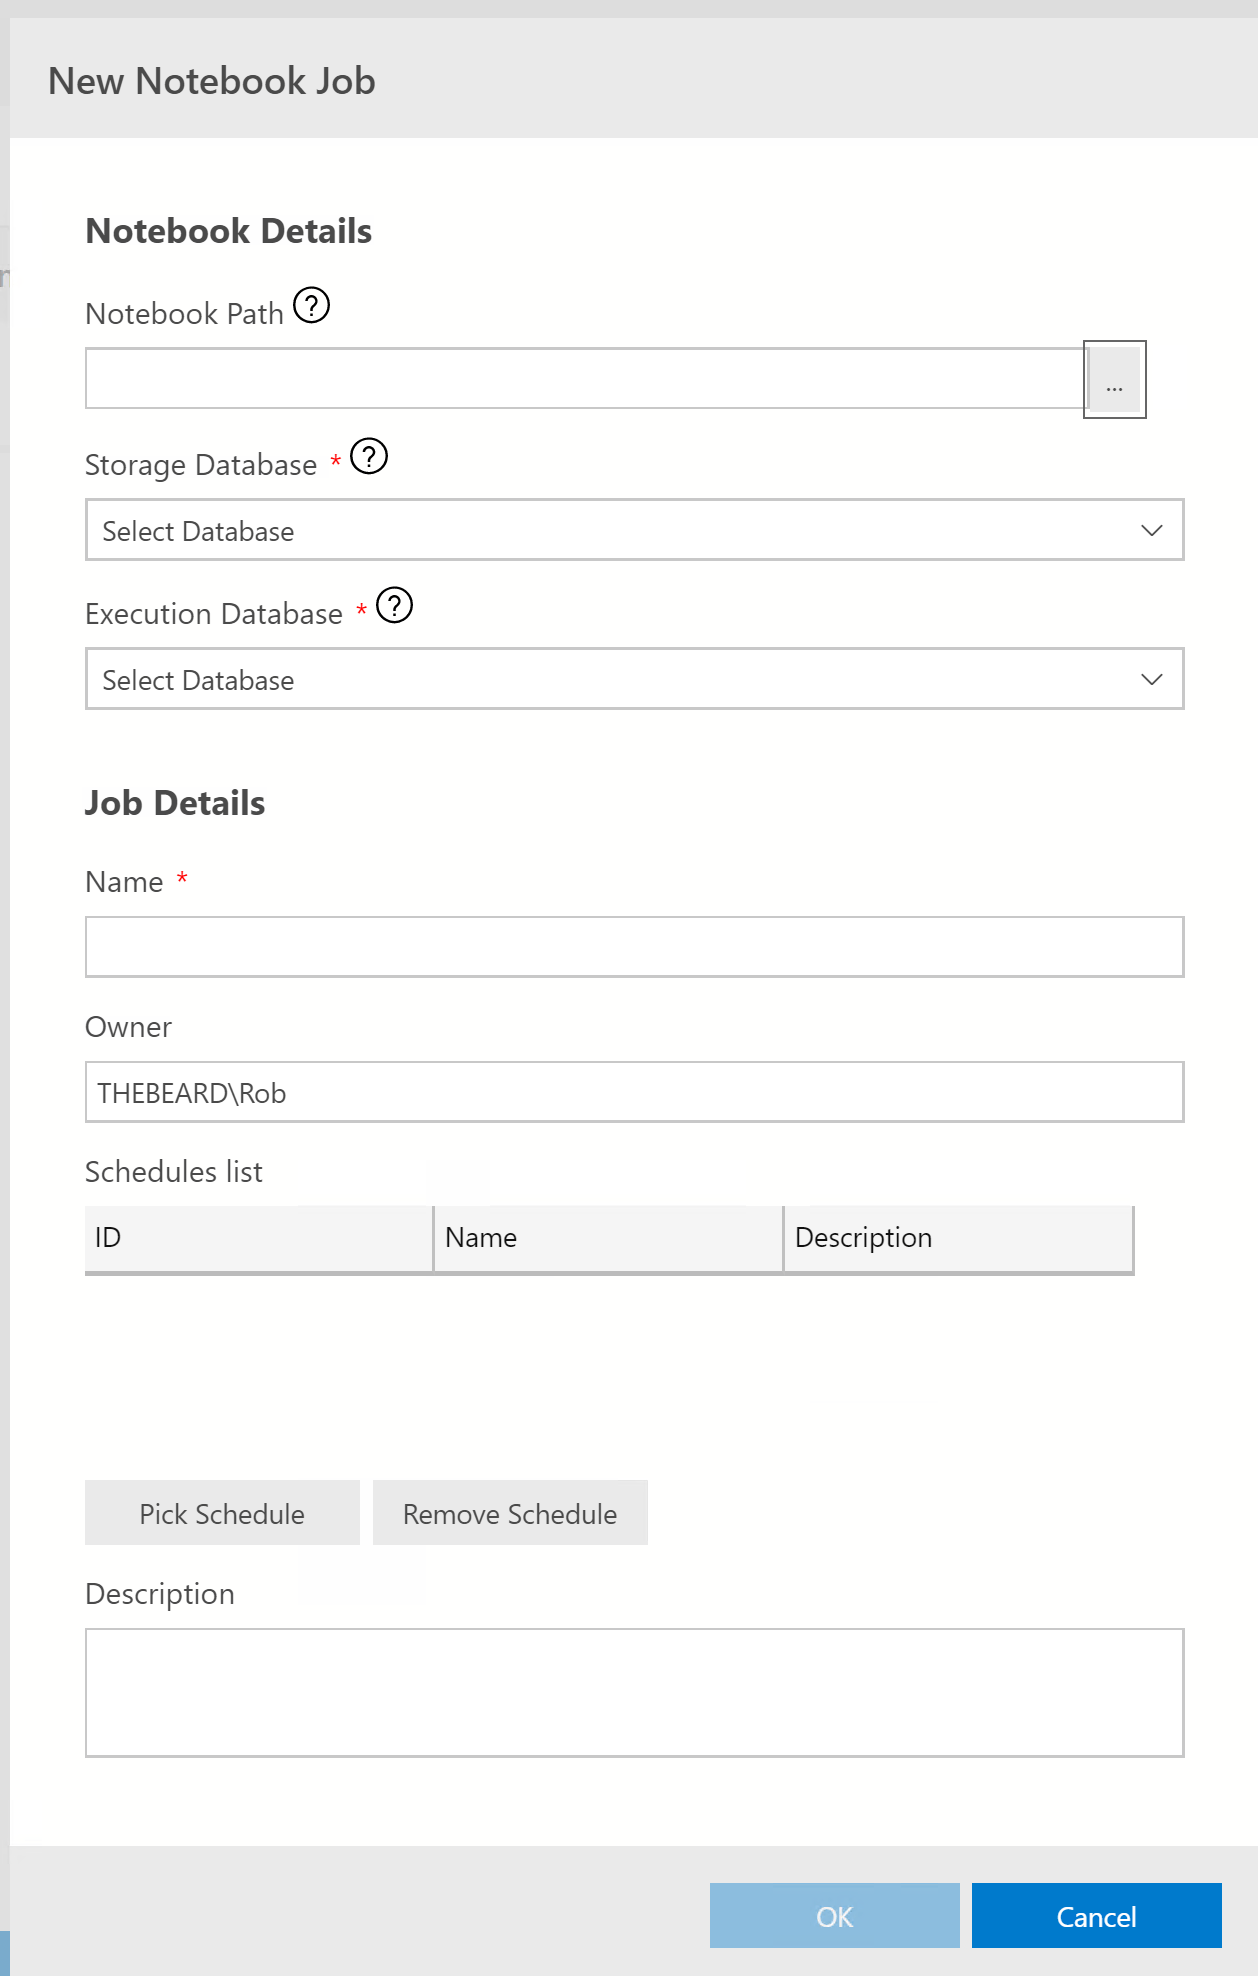
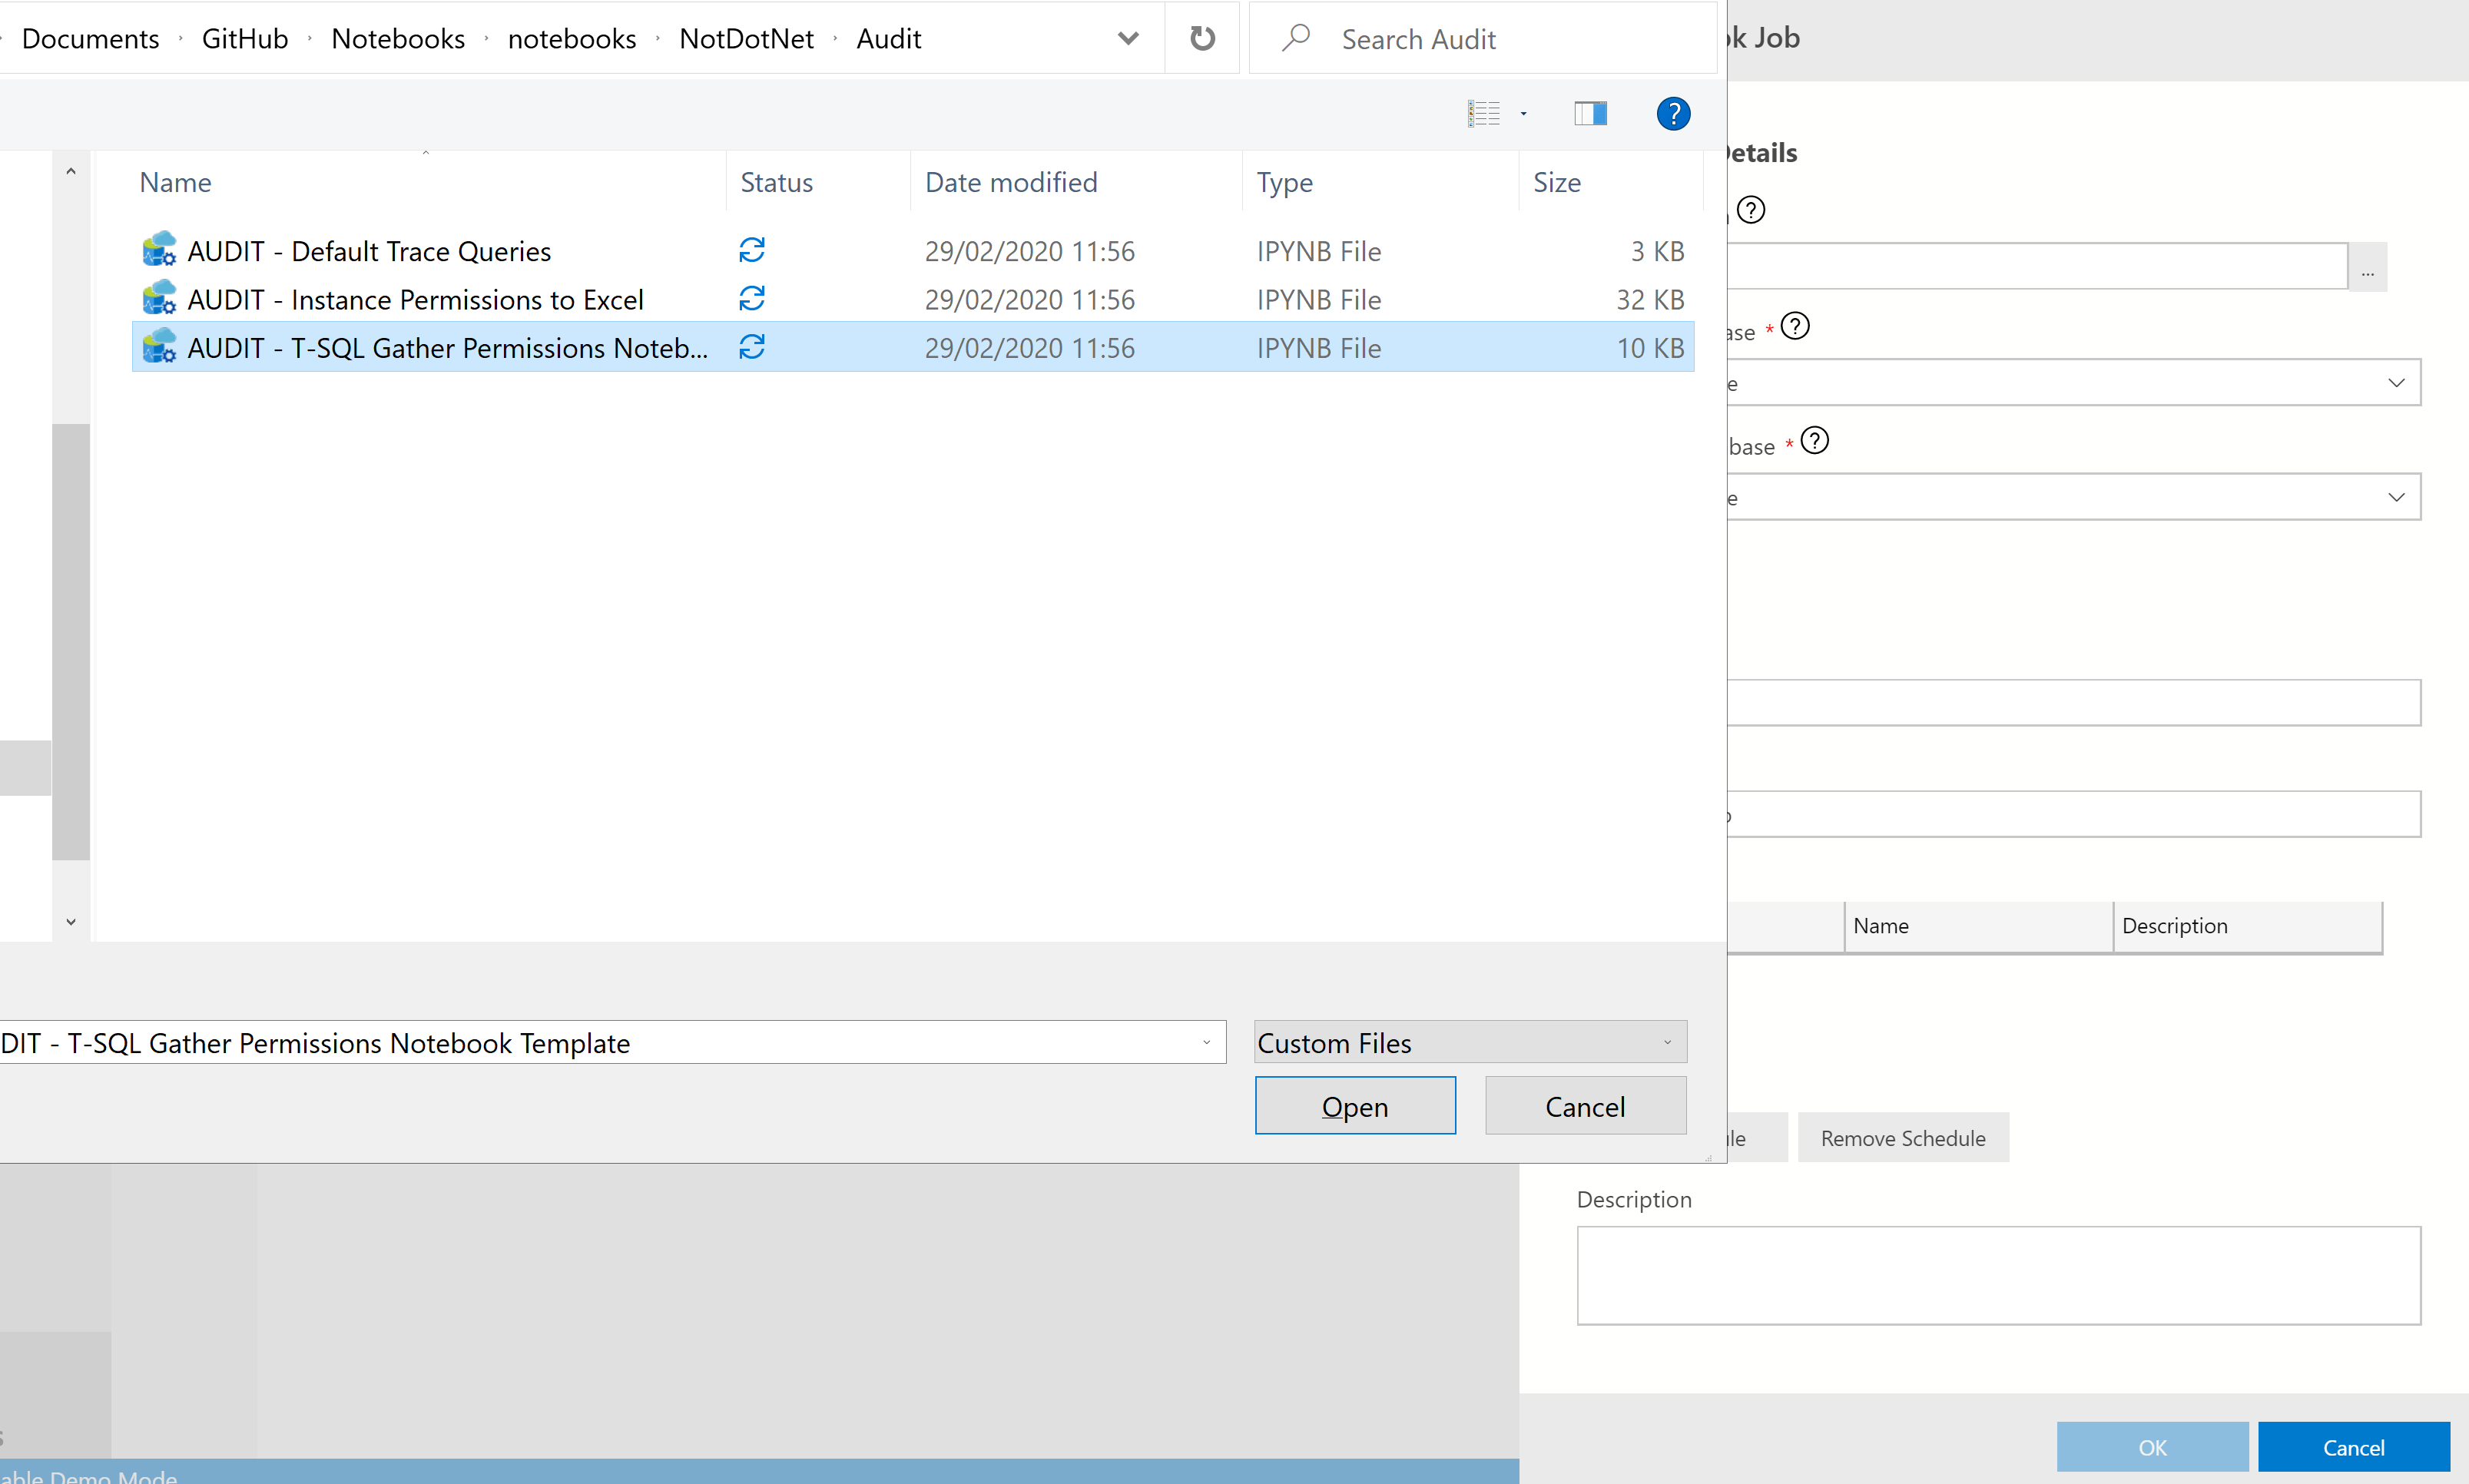
Then navigate to the notebook and select it.
Choose a database for the storage of the template and the results and one for the execution context.
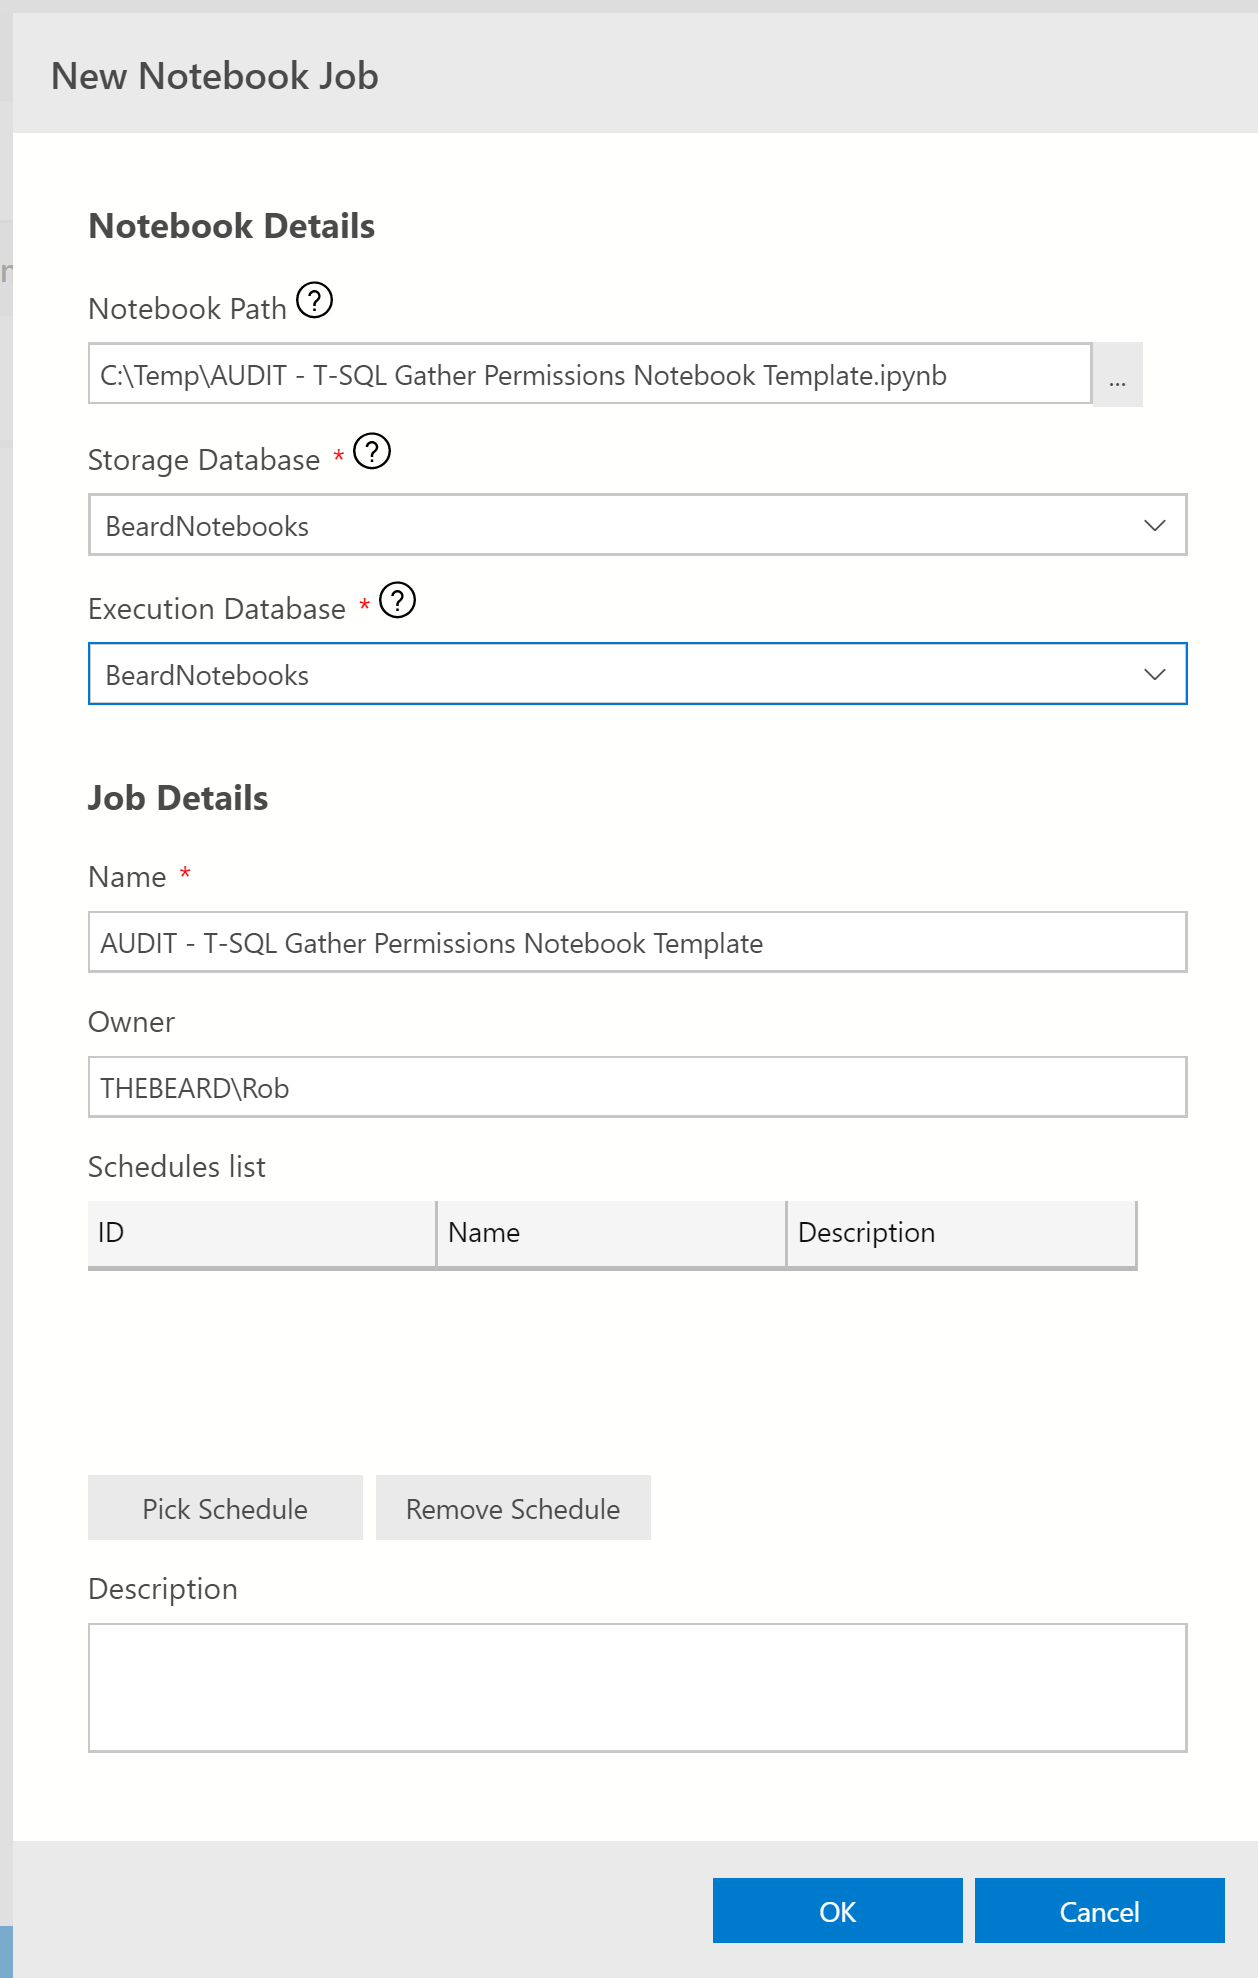
The name of the job will be the file name of the notebook. You can change this but there is a bug where you can only enter one character at a time in the name before it changes focus so beware!
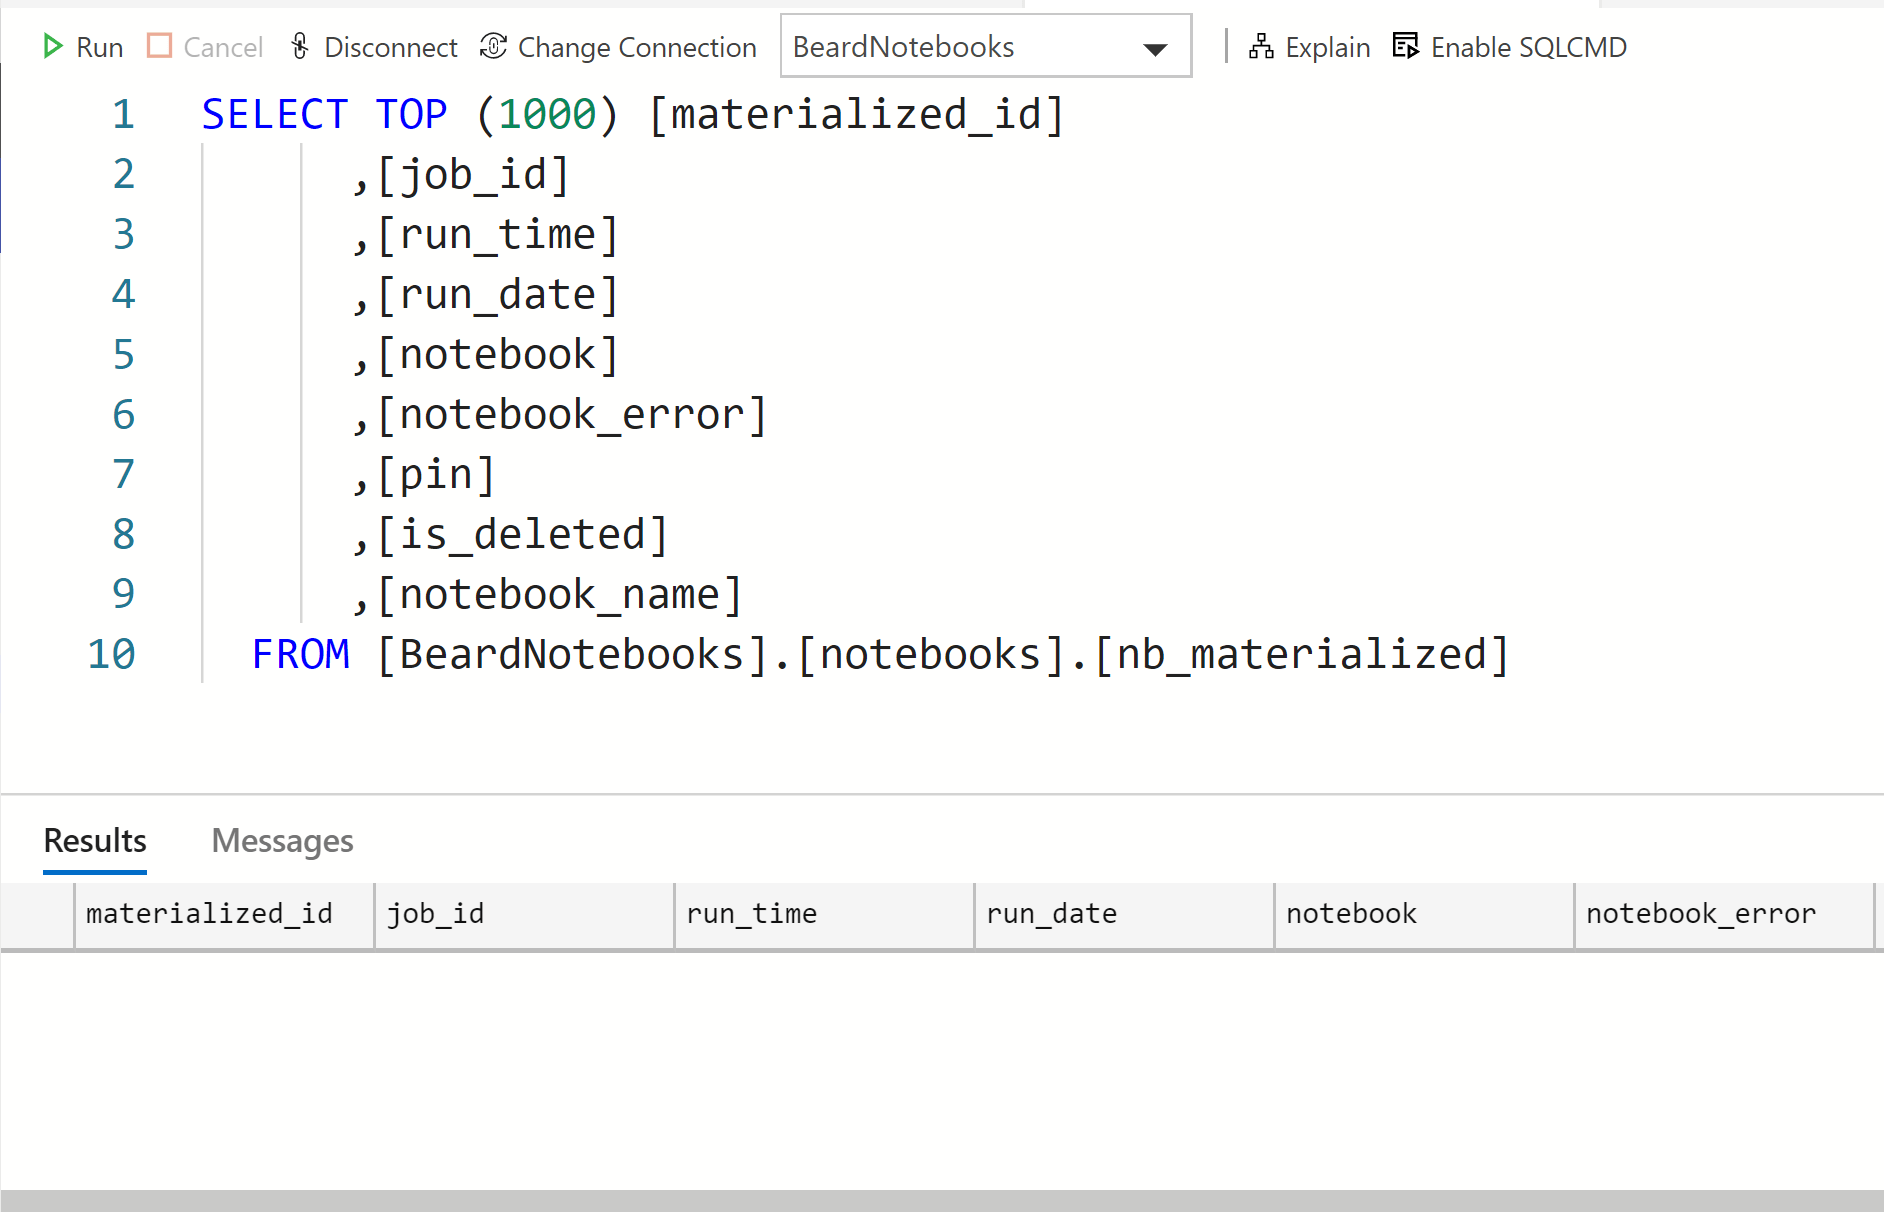
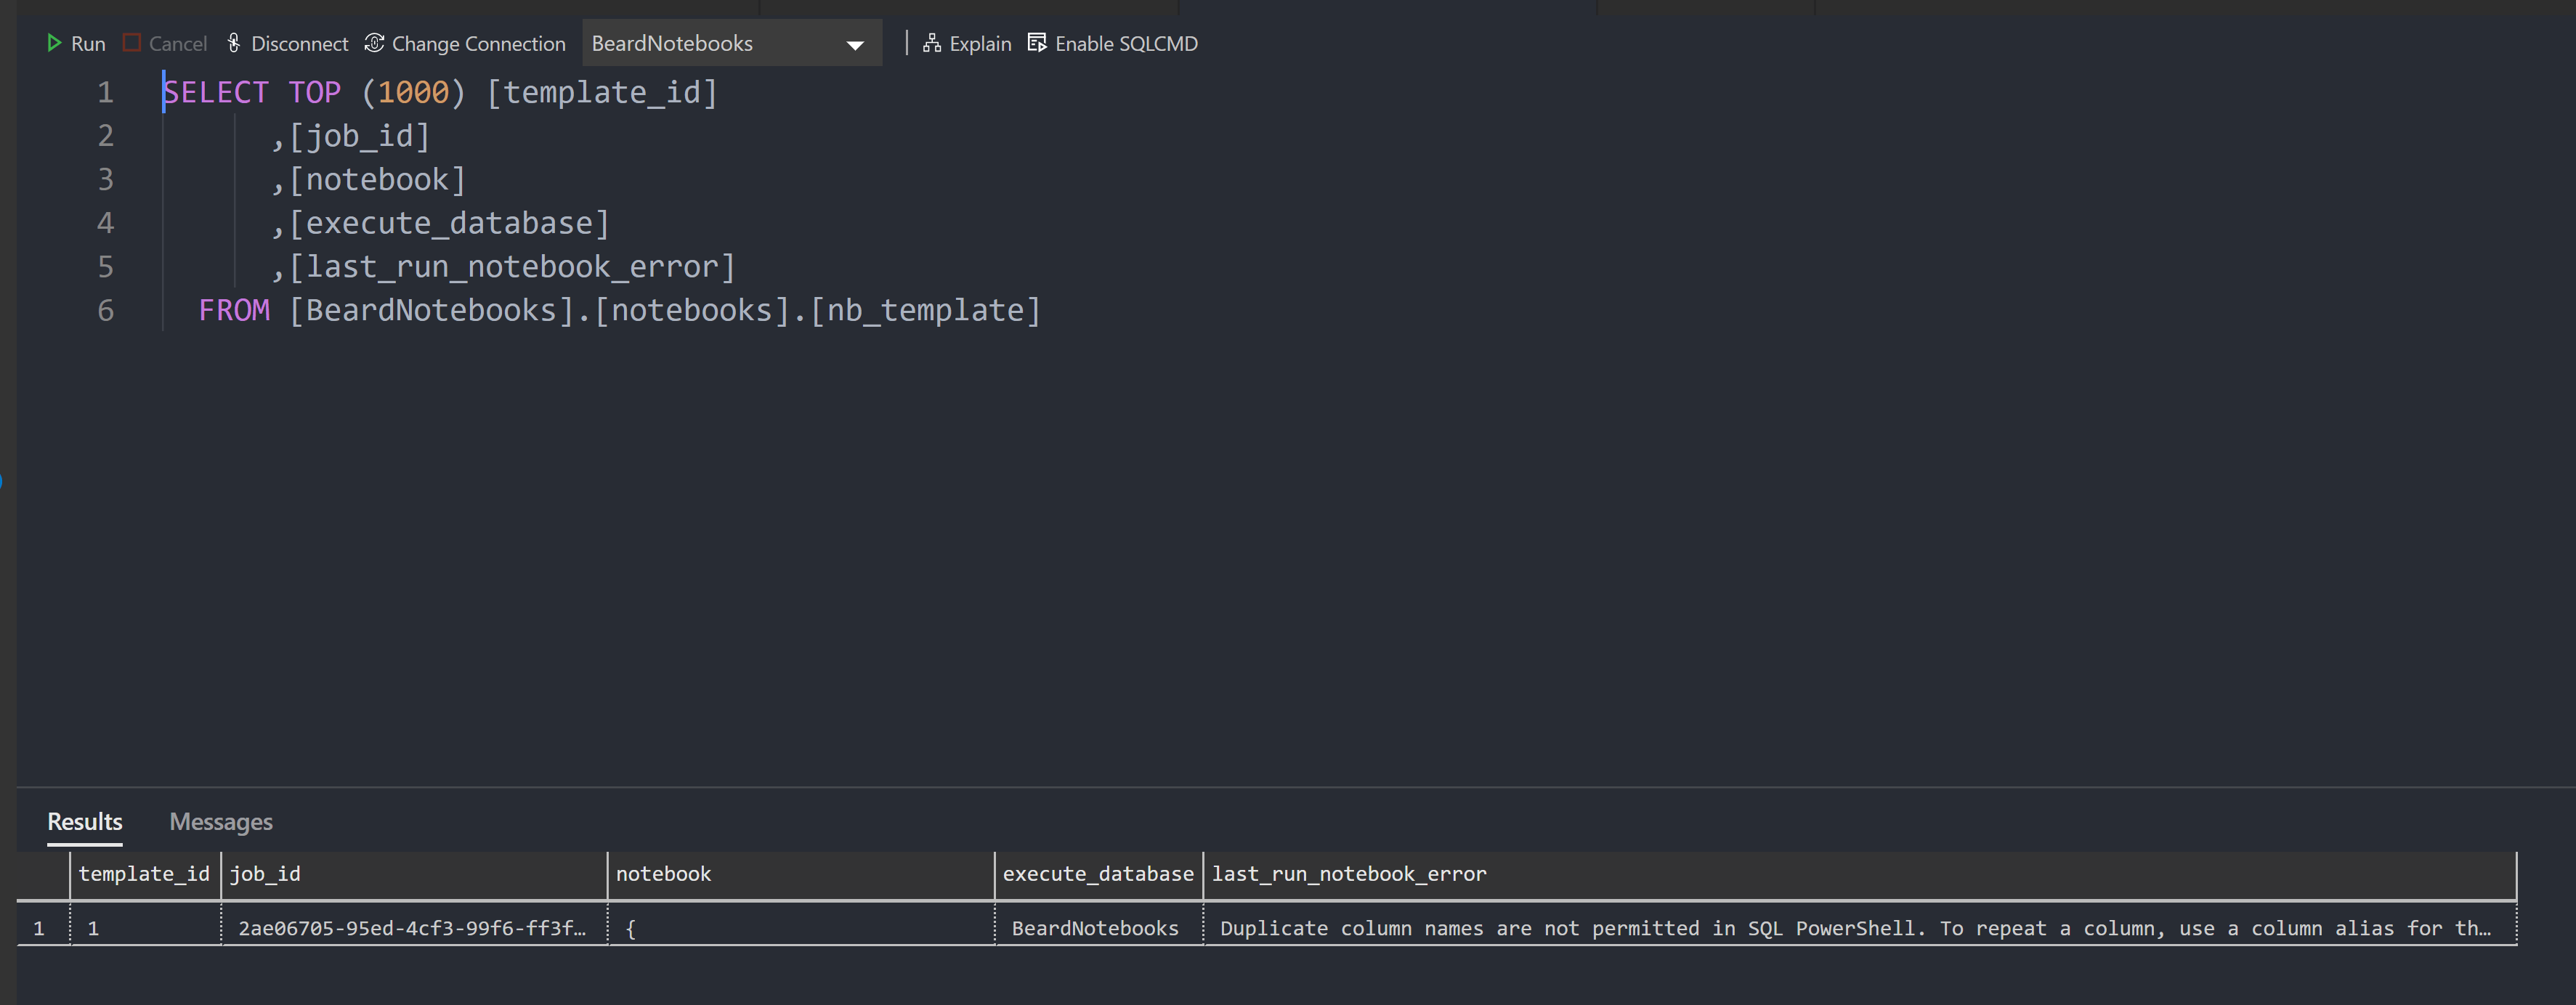
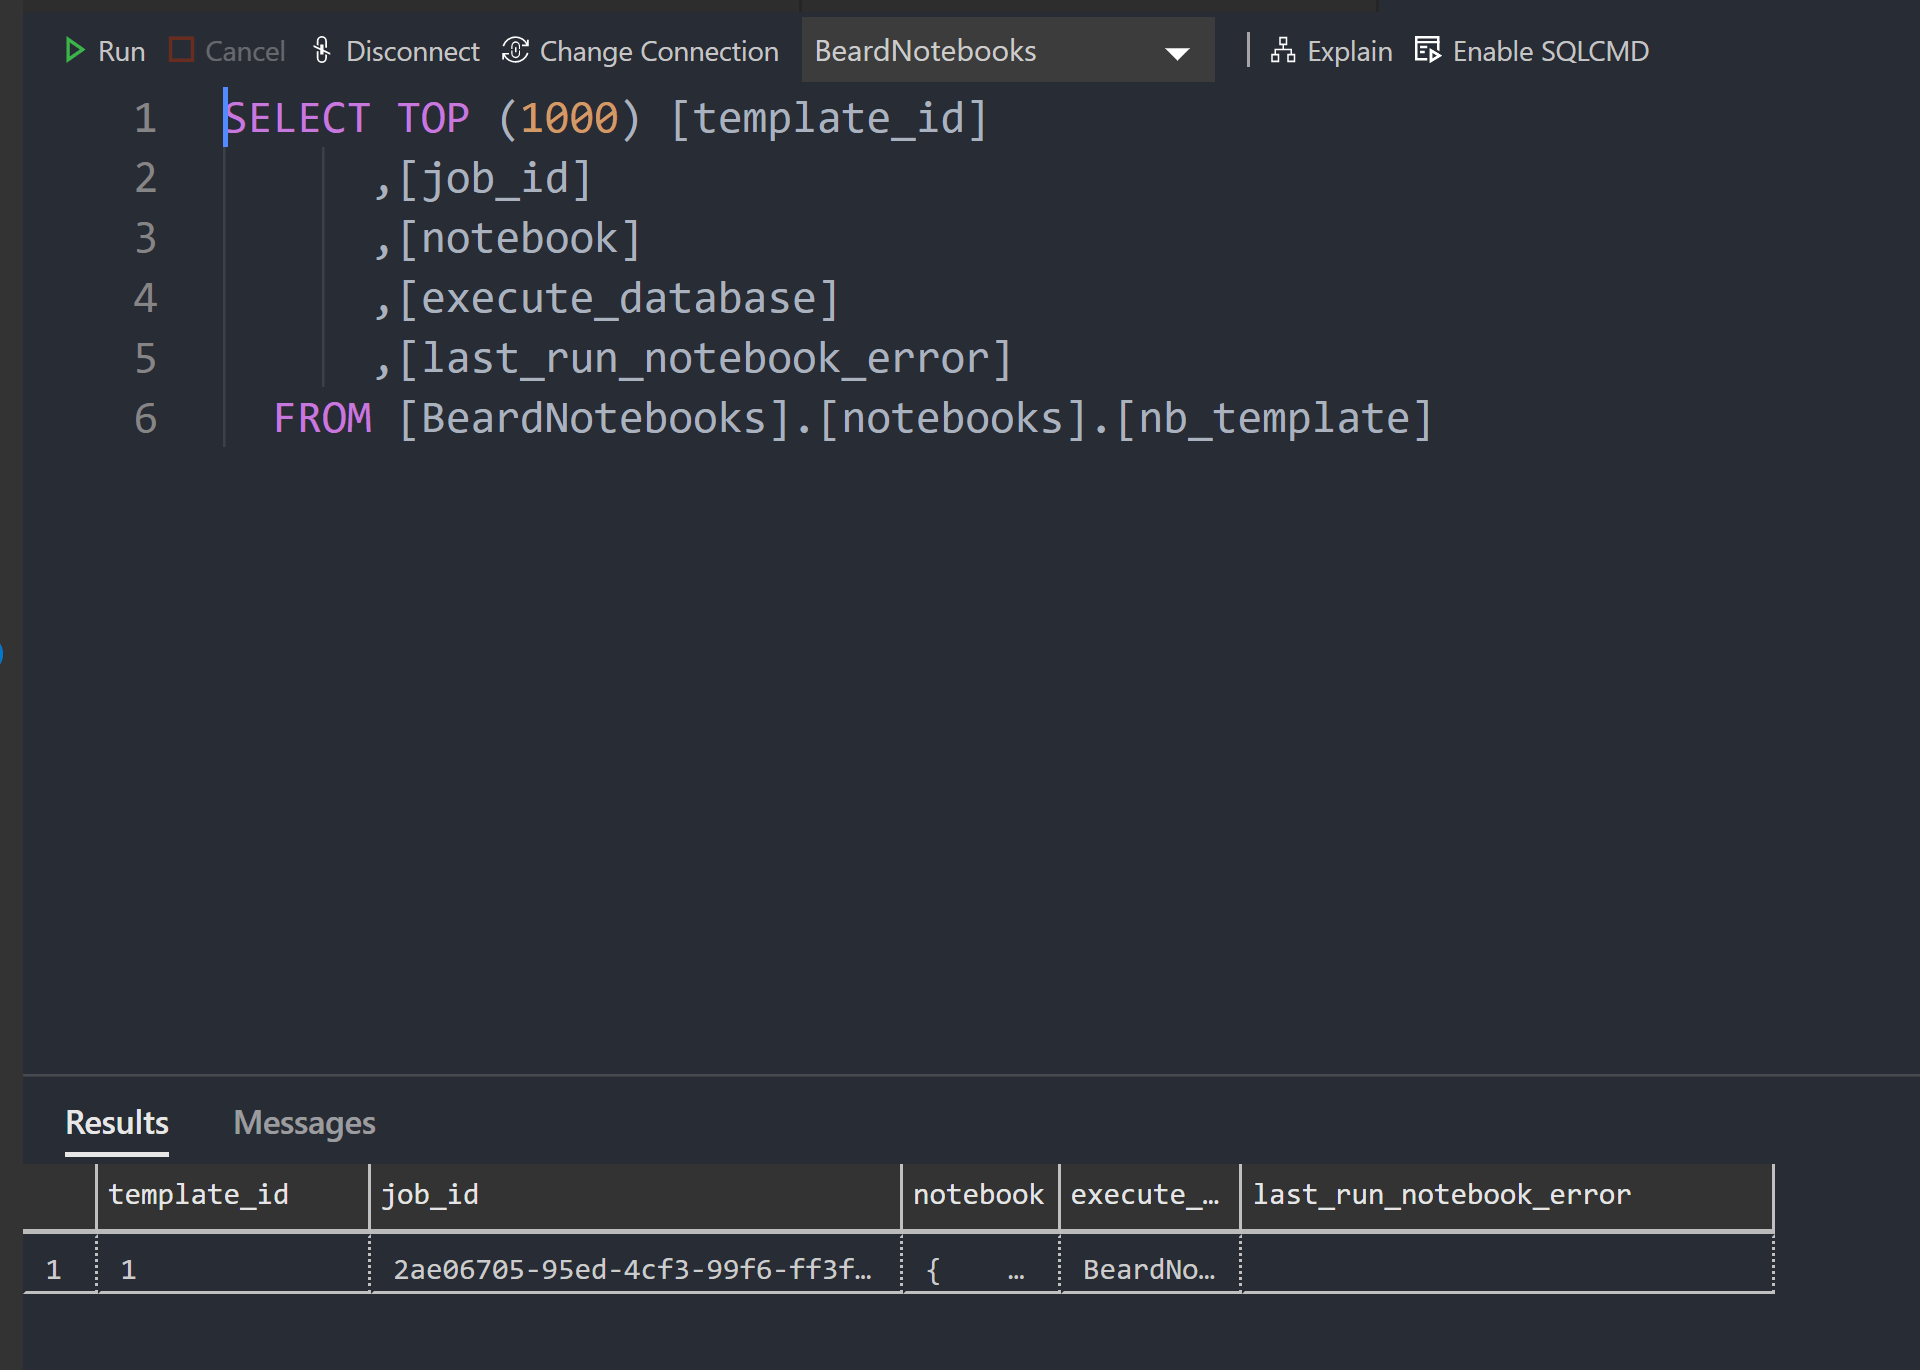
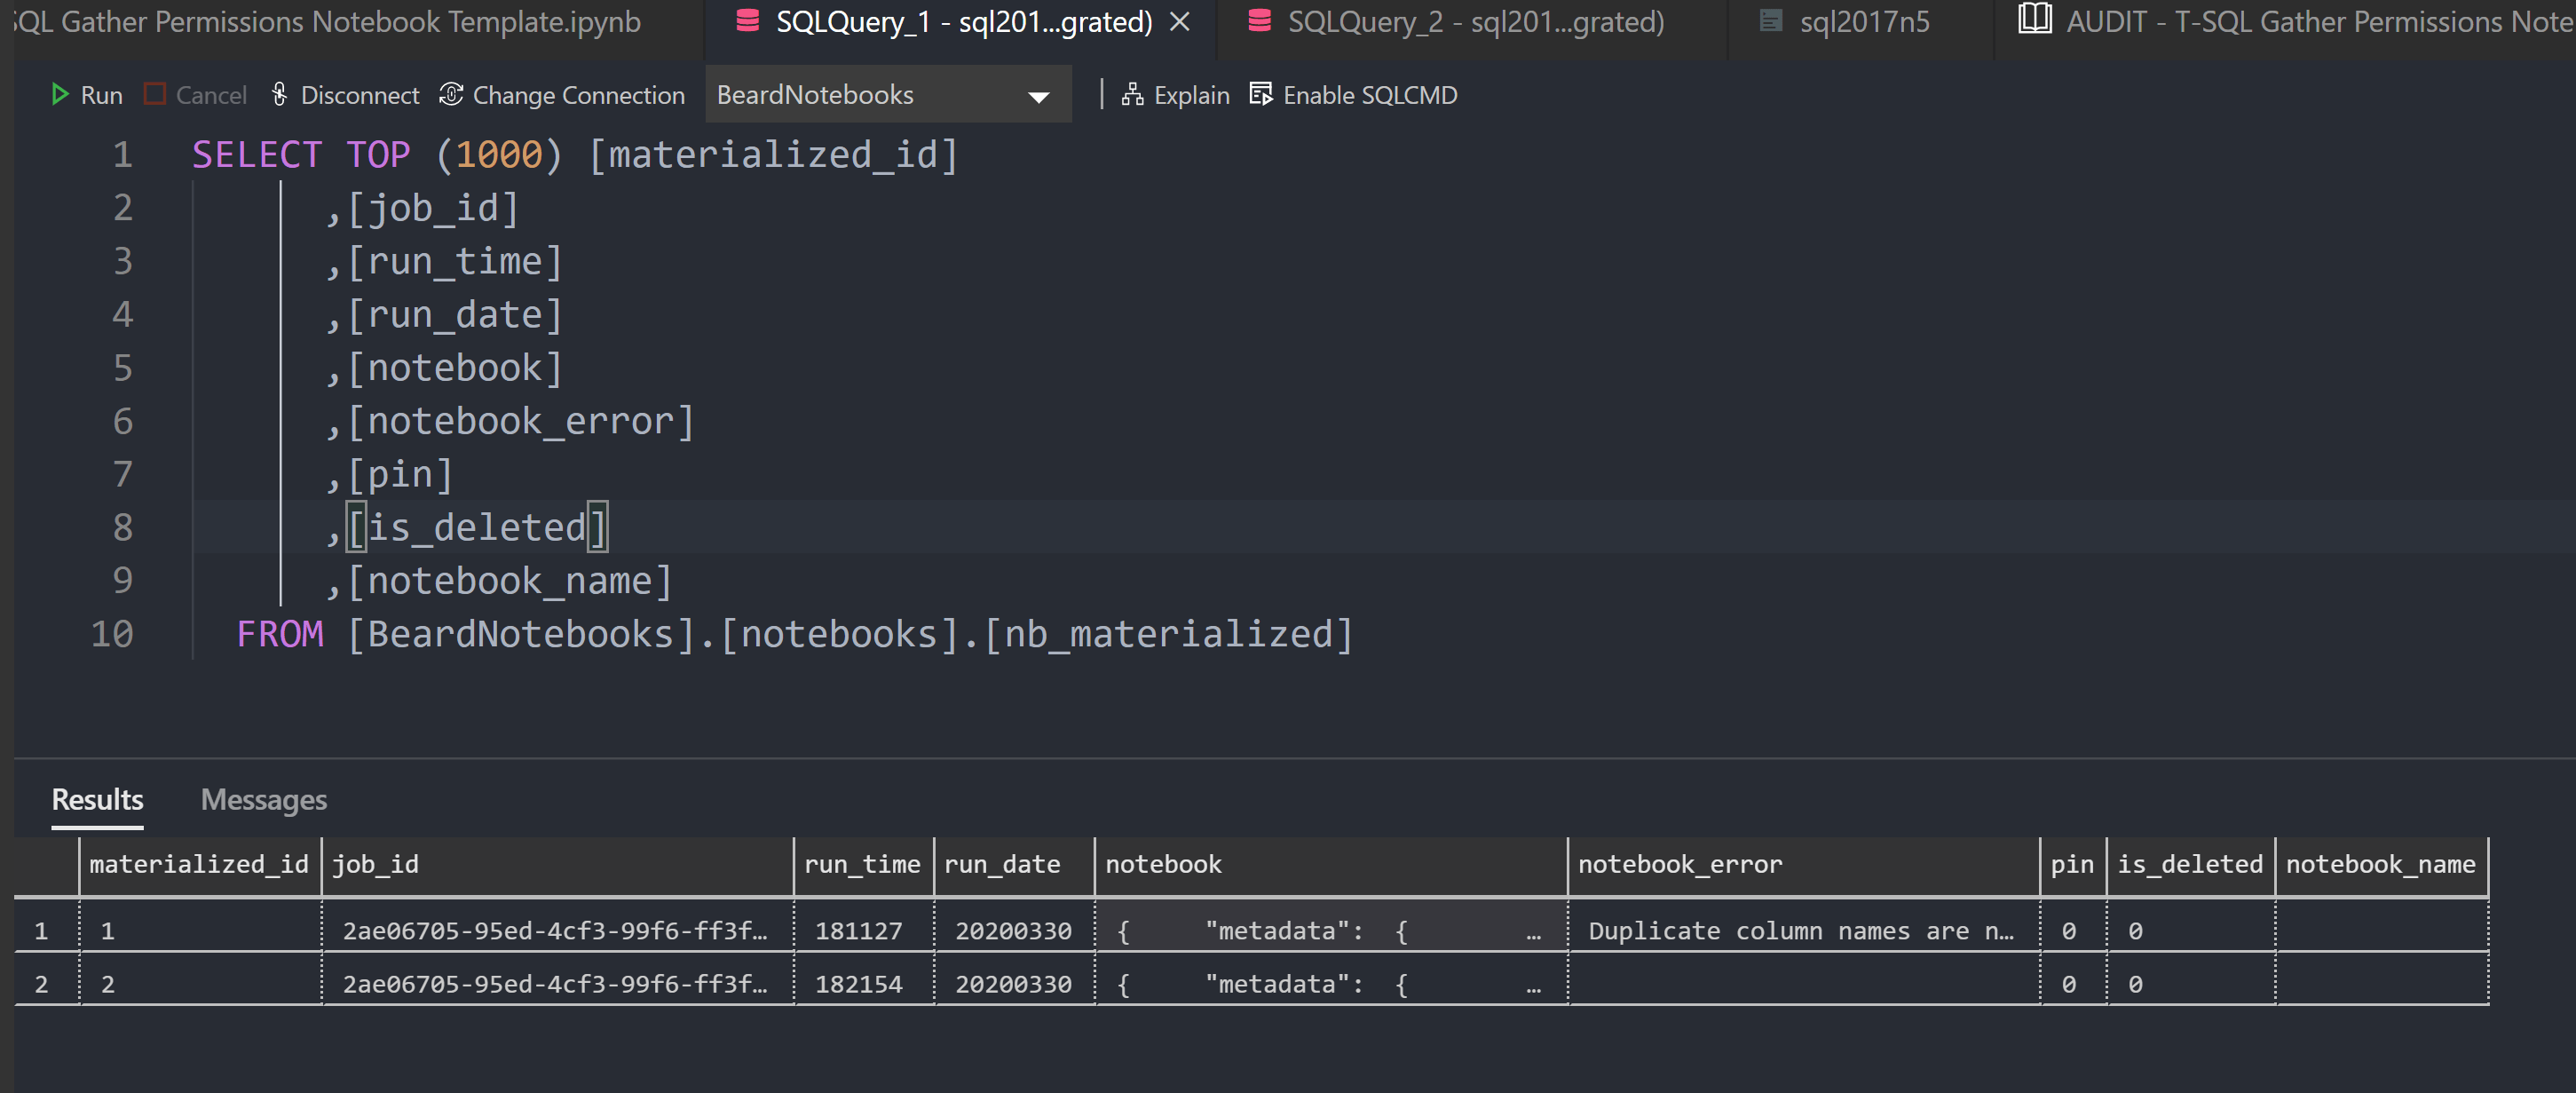
Once the job is created, you will see two tables in the storage database notebooks.nb_materialized and notebooks.nb_template
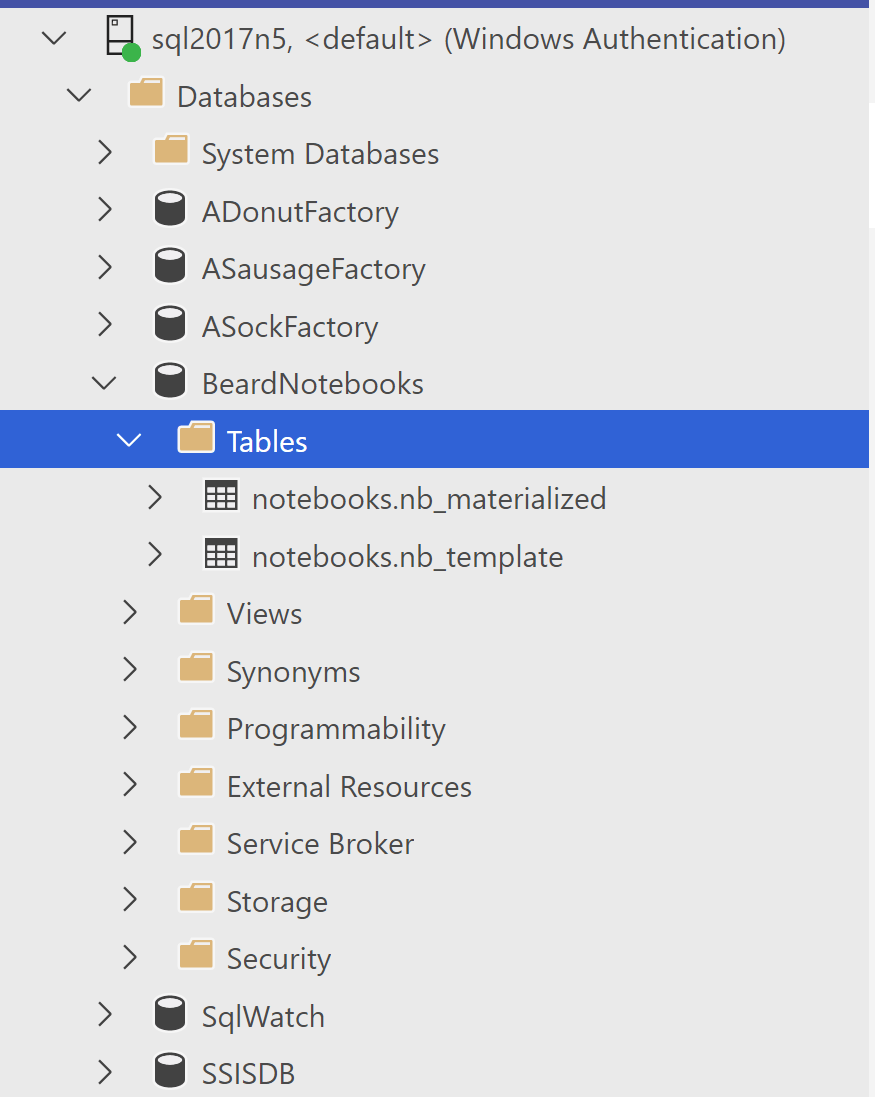
The materialised table is empty right now
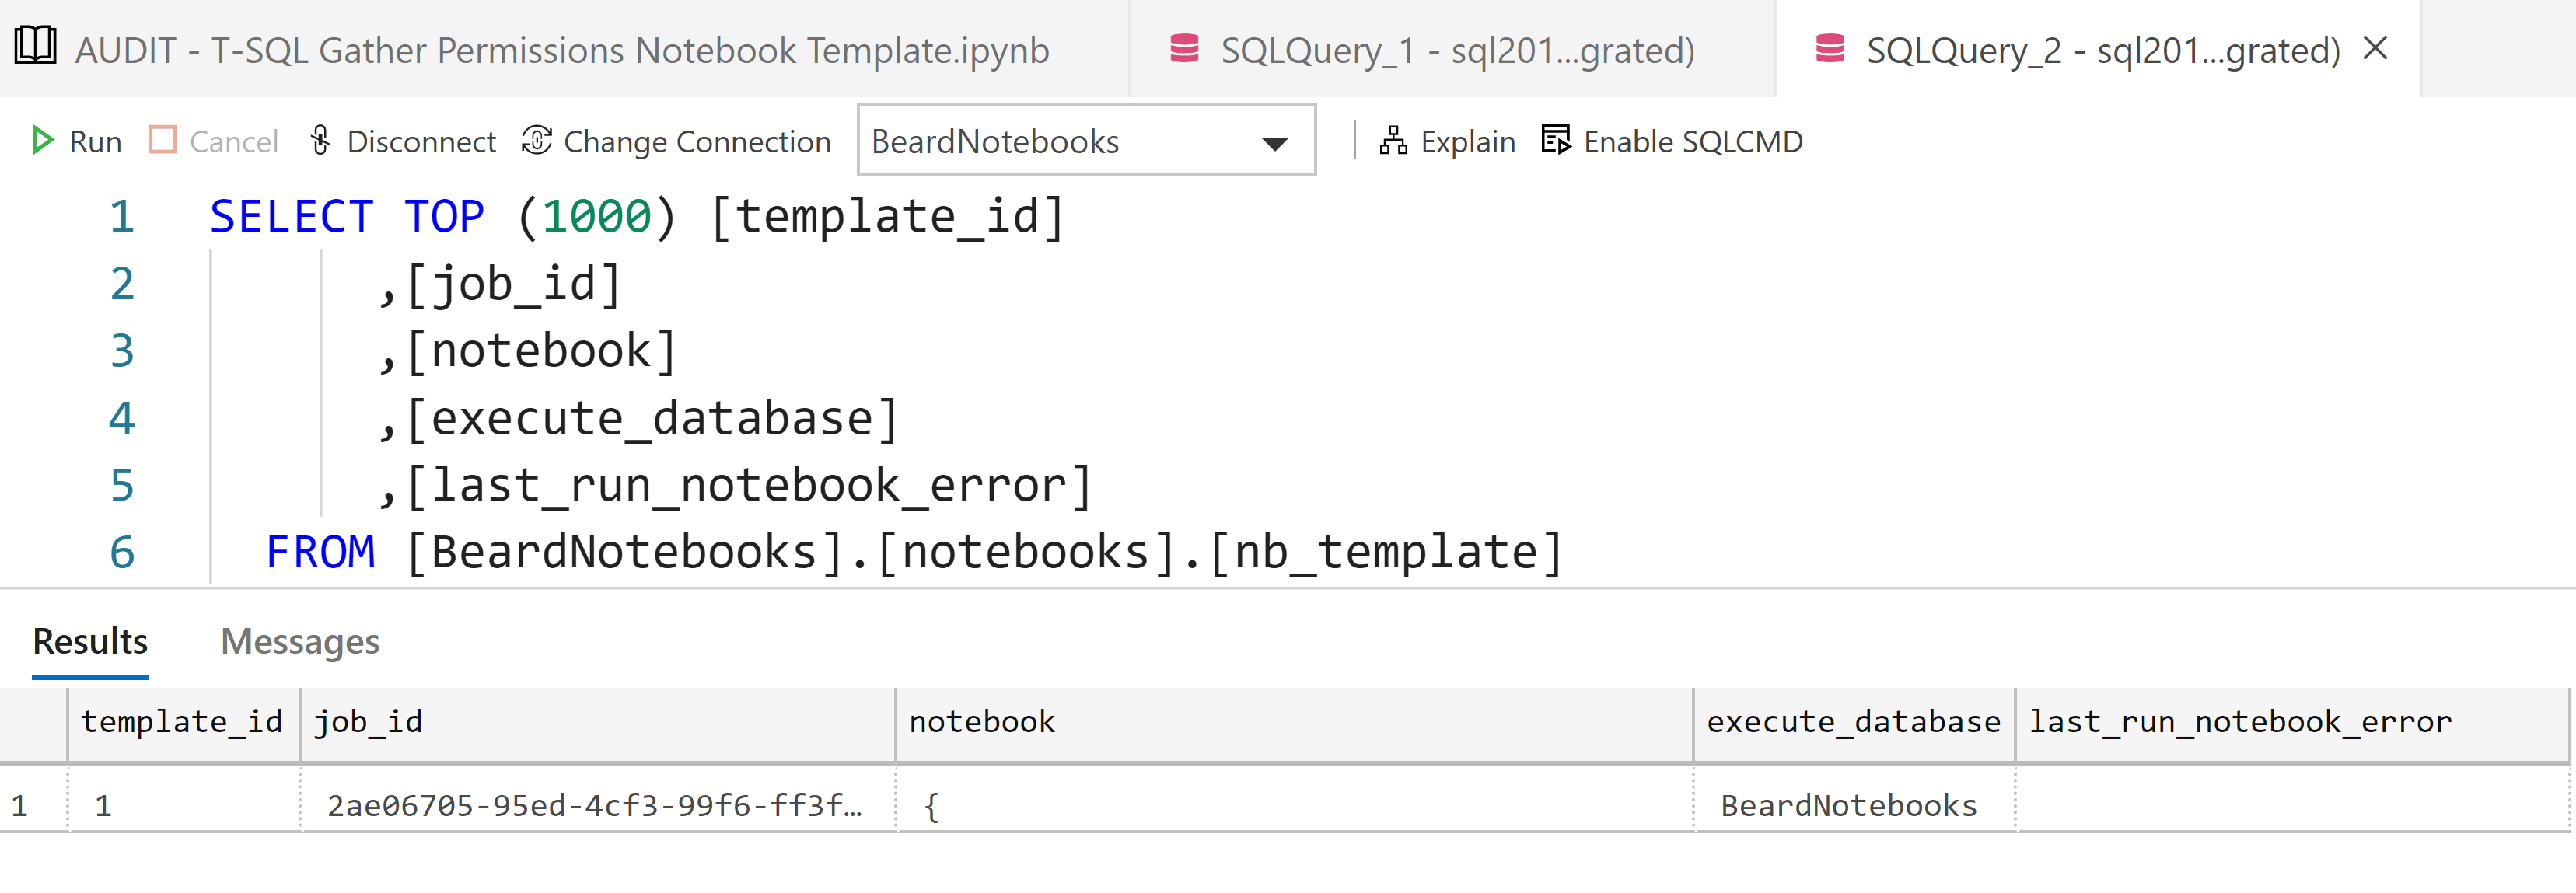
but the template table has a row for the job which includes the notebook in json format.
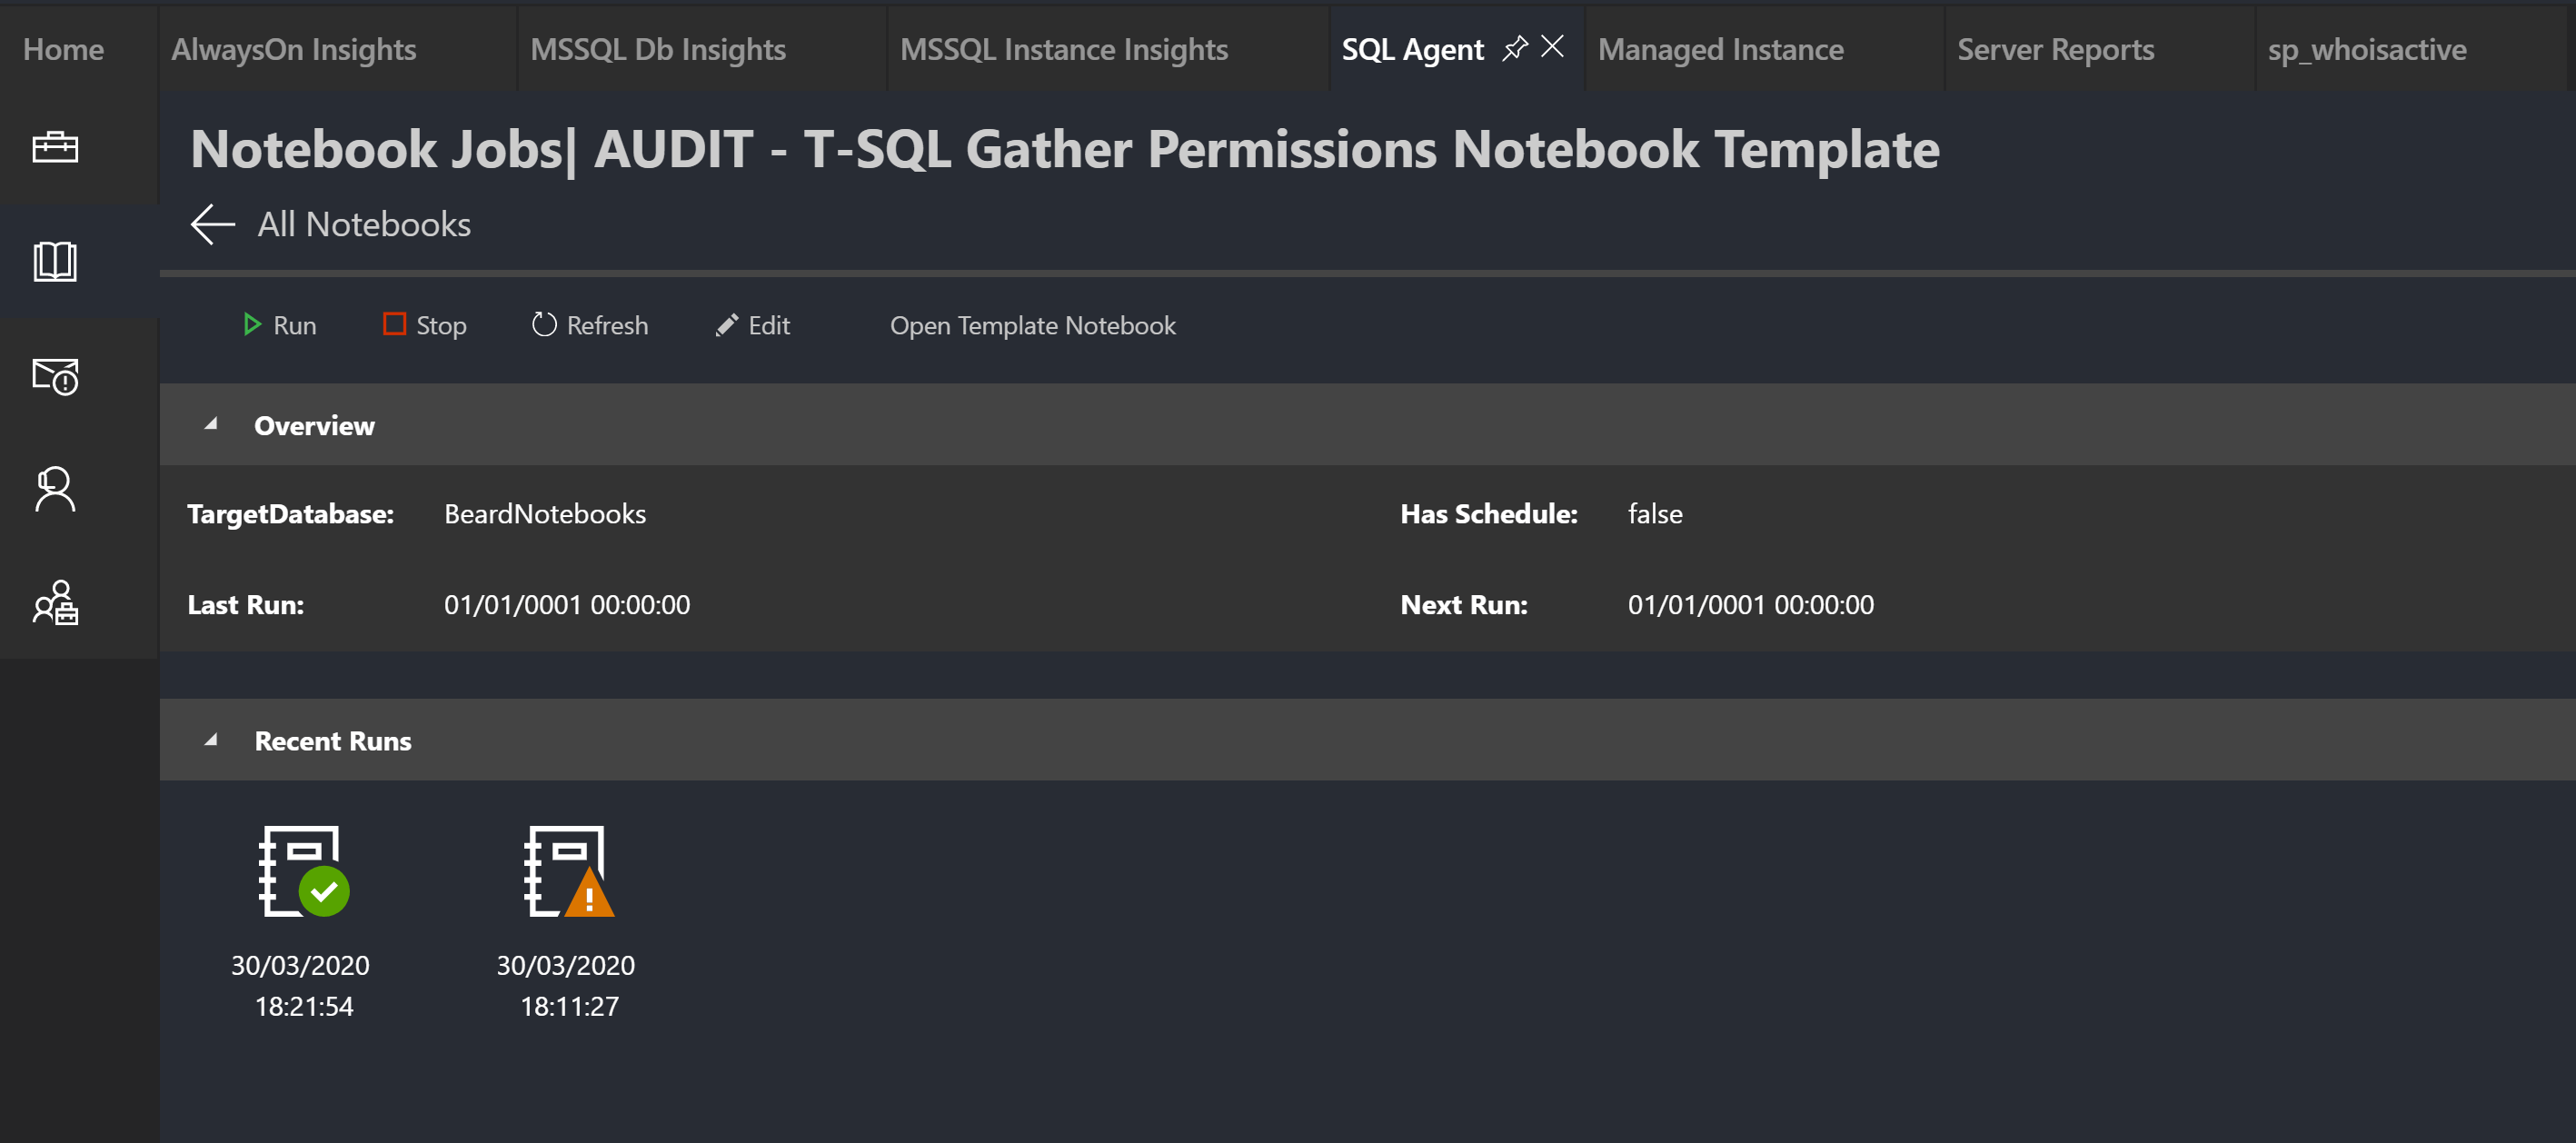
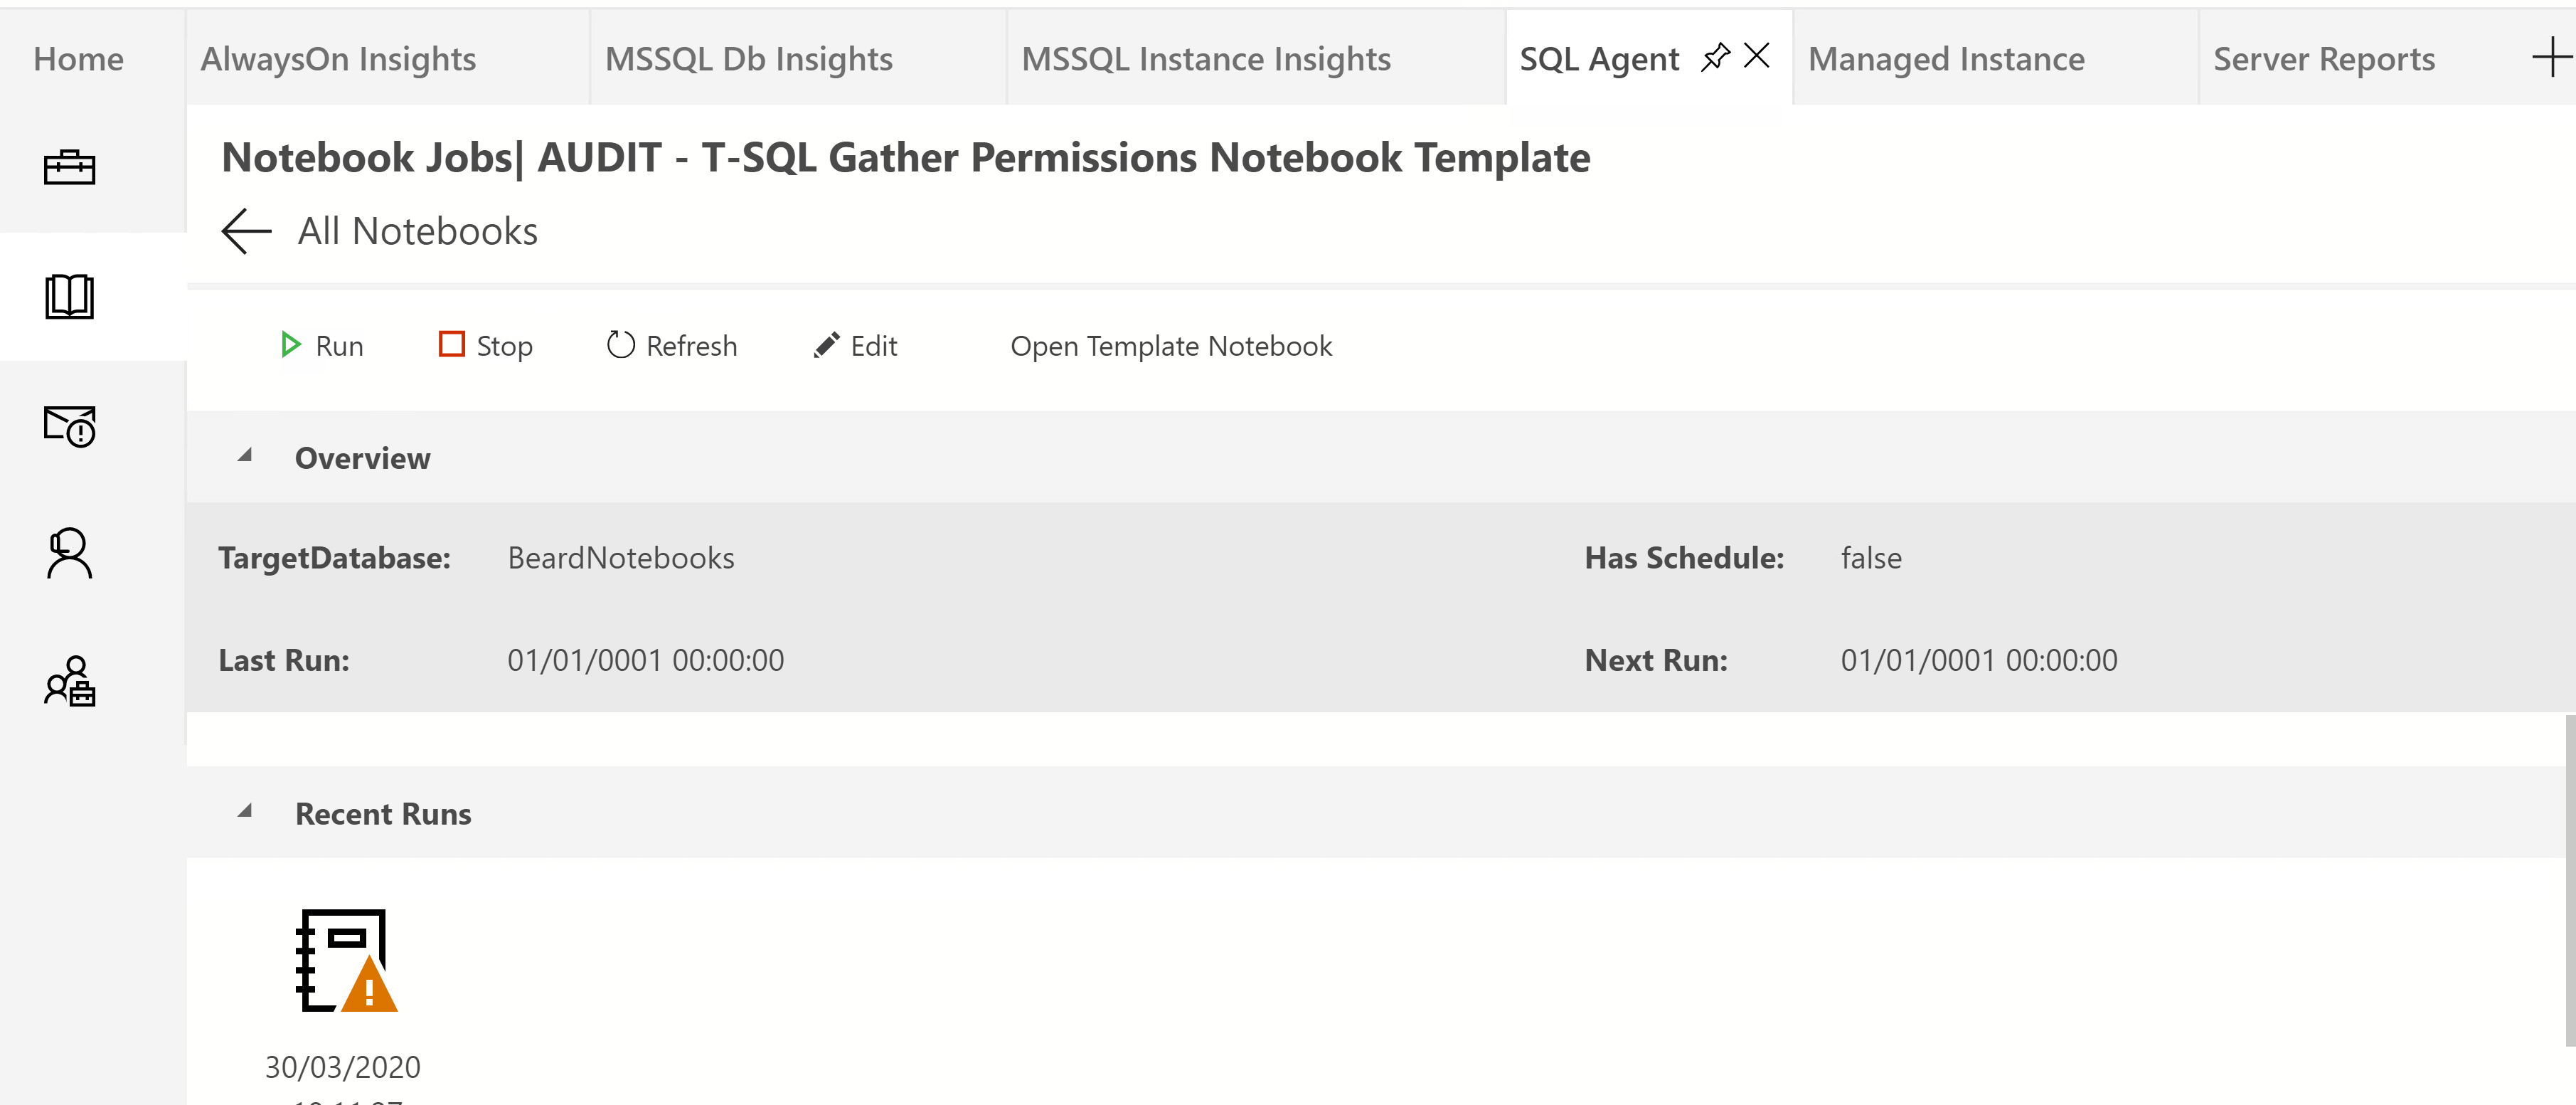
If you click on the jobs in the Notebook Jobs window in the SQL Agent extension, you can see more information about the job run
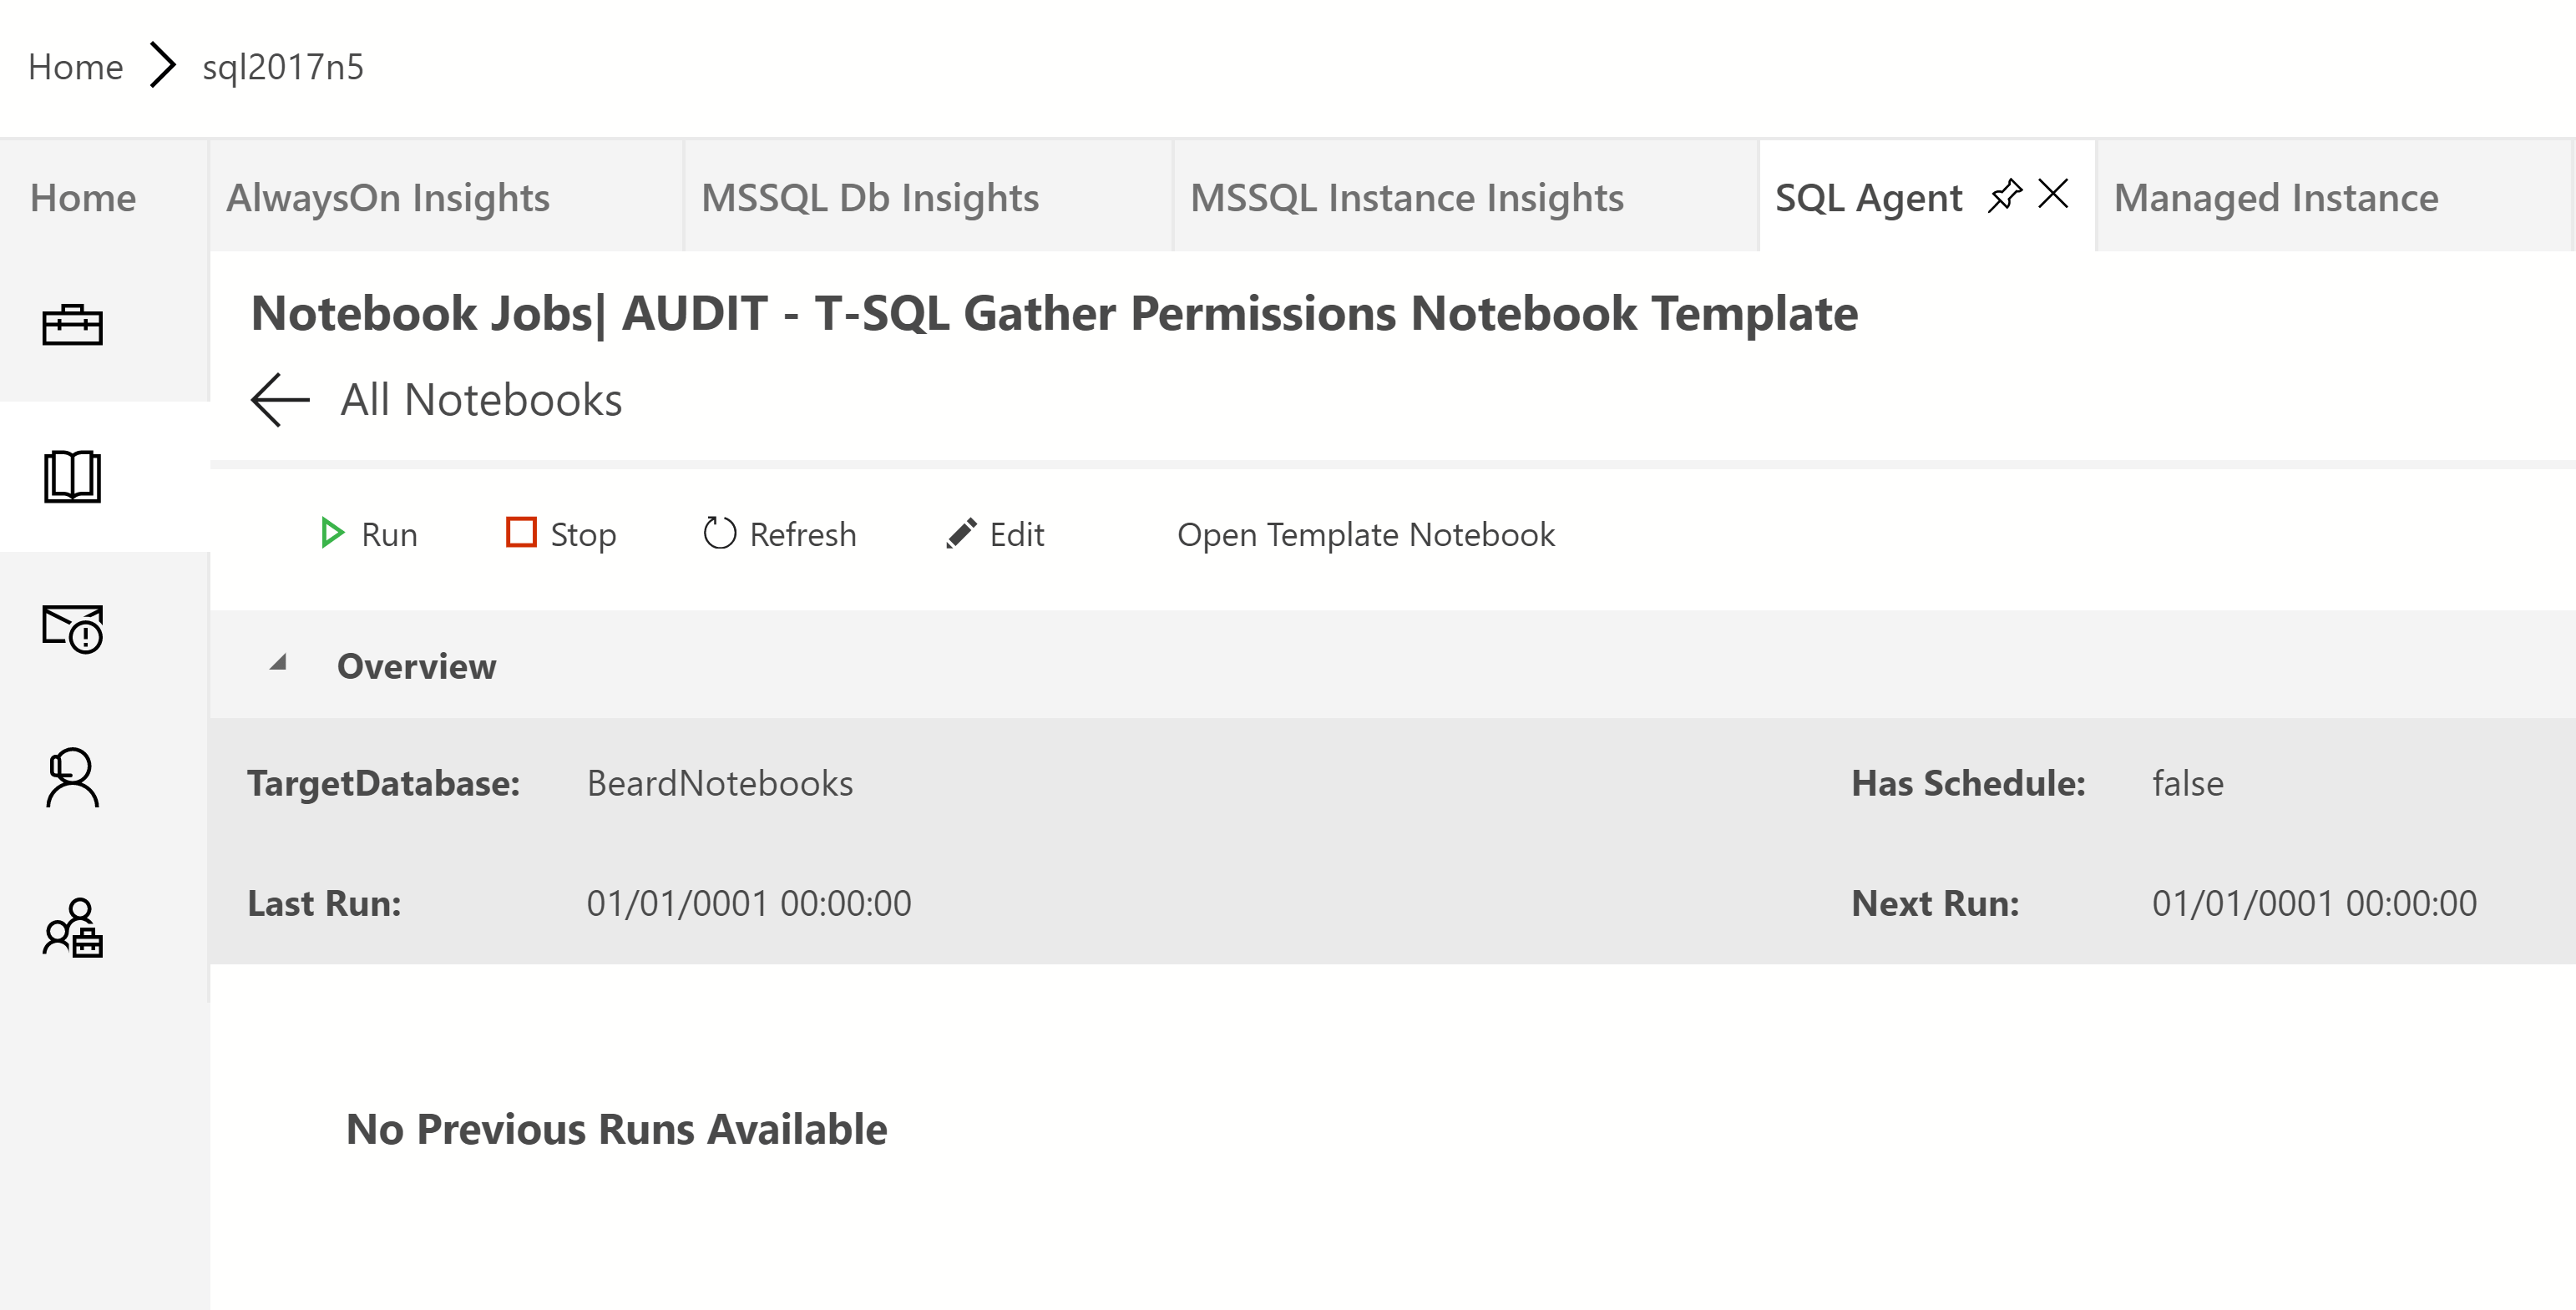
You can also run the job from here. It doesn’t have to be run from here, it is just a normal agent job which you can run or schedule in any normal manner. Running it from here gives a pop-up

You have to refresh to see when the job is finished and it will be red if the job failed, green if it succeeded or orange if some cells failed like this!
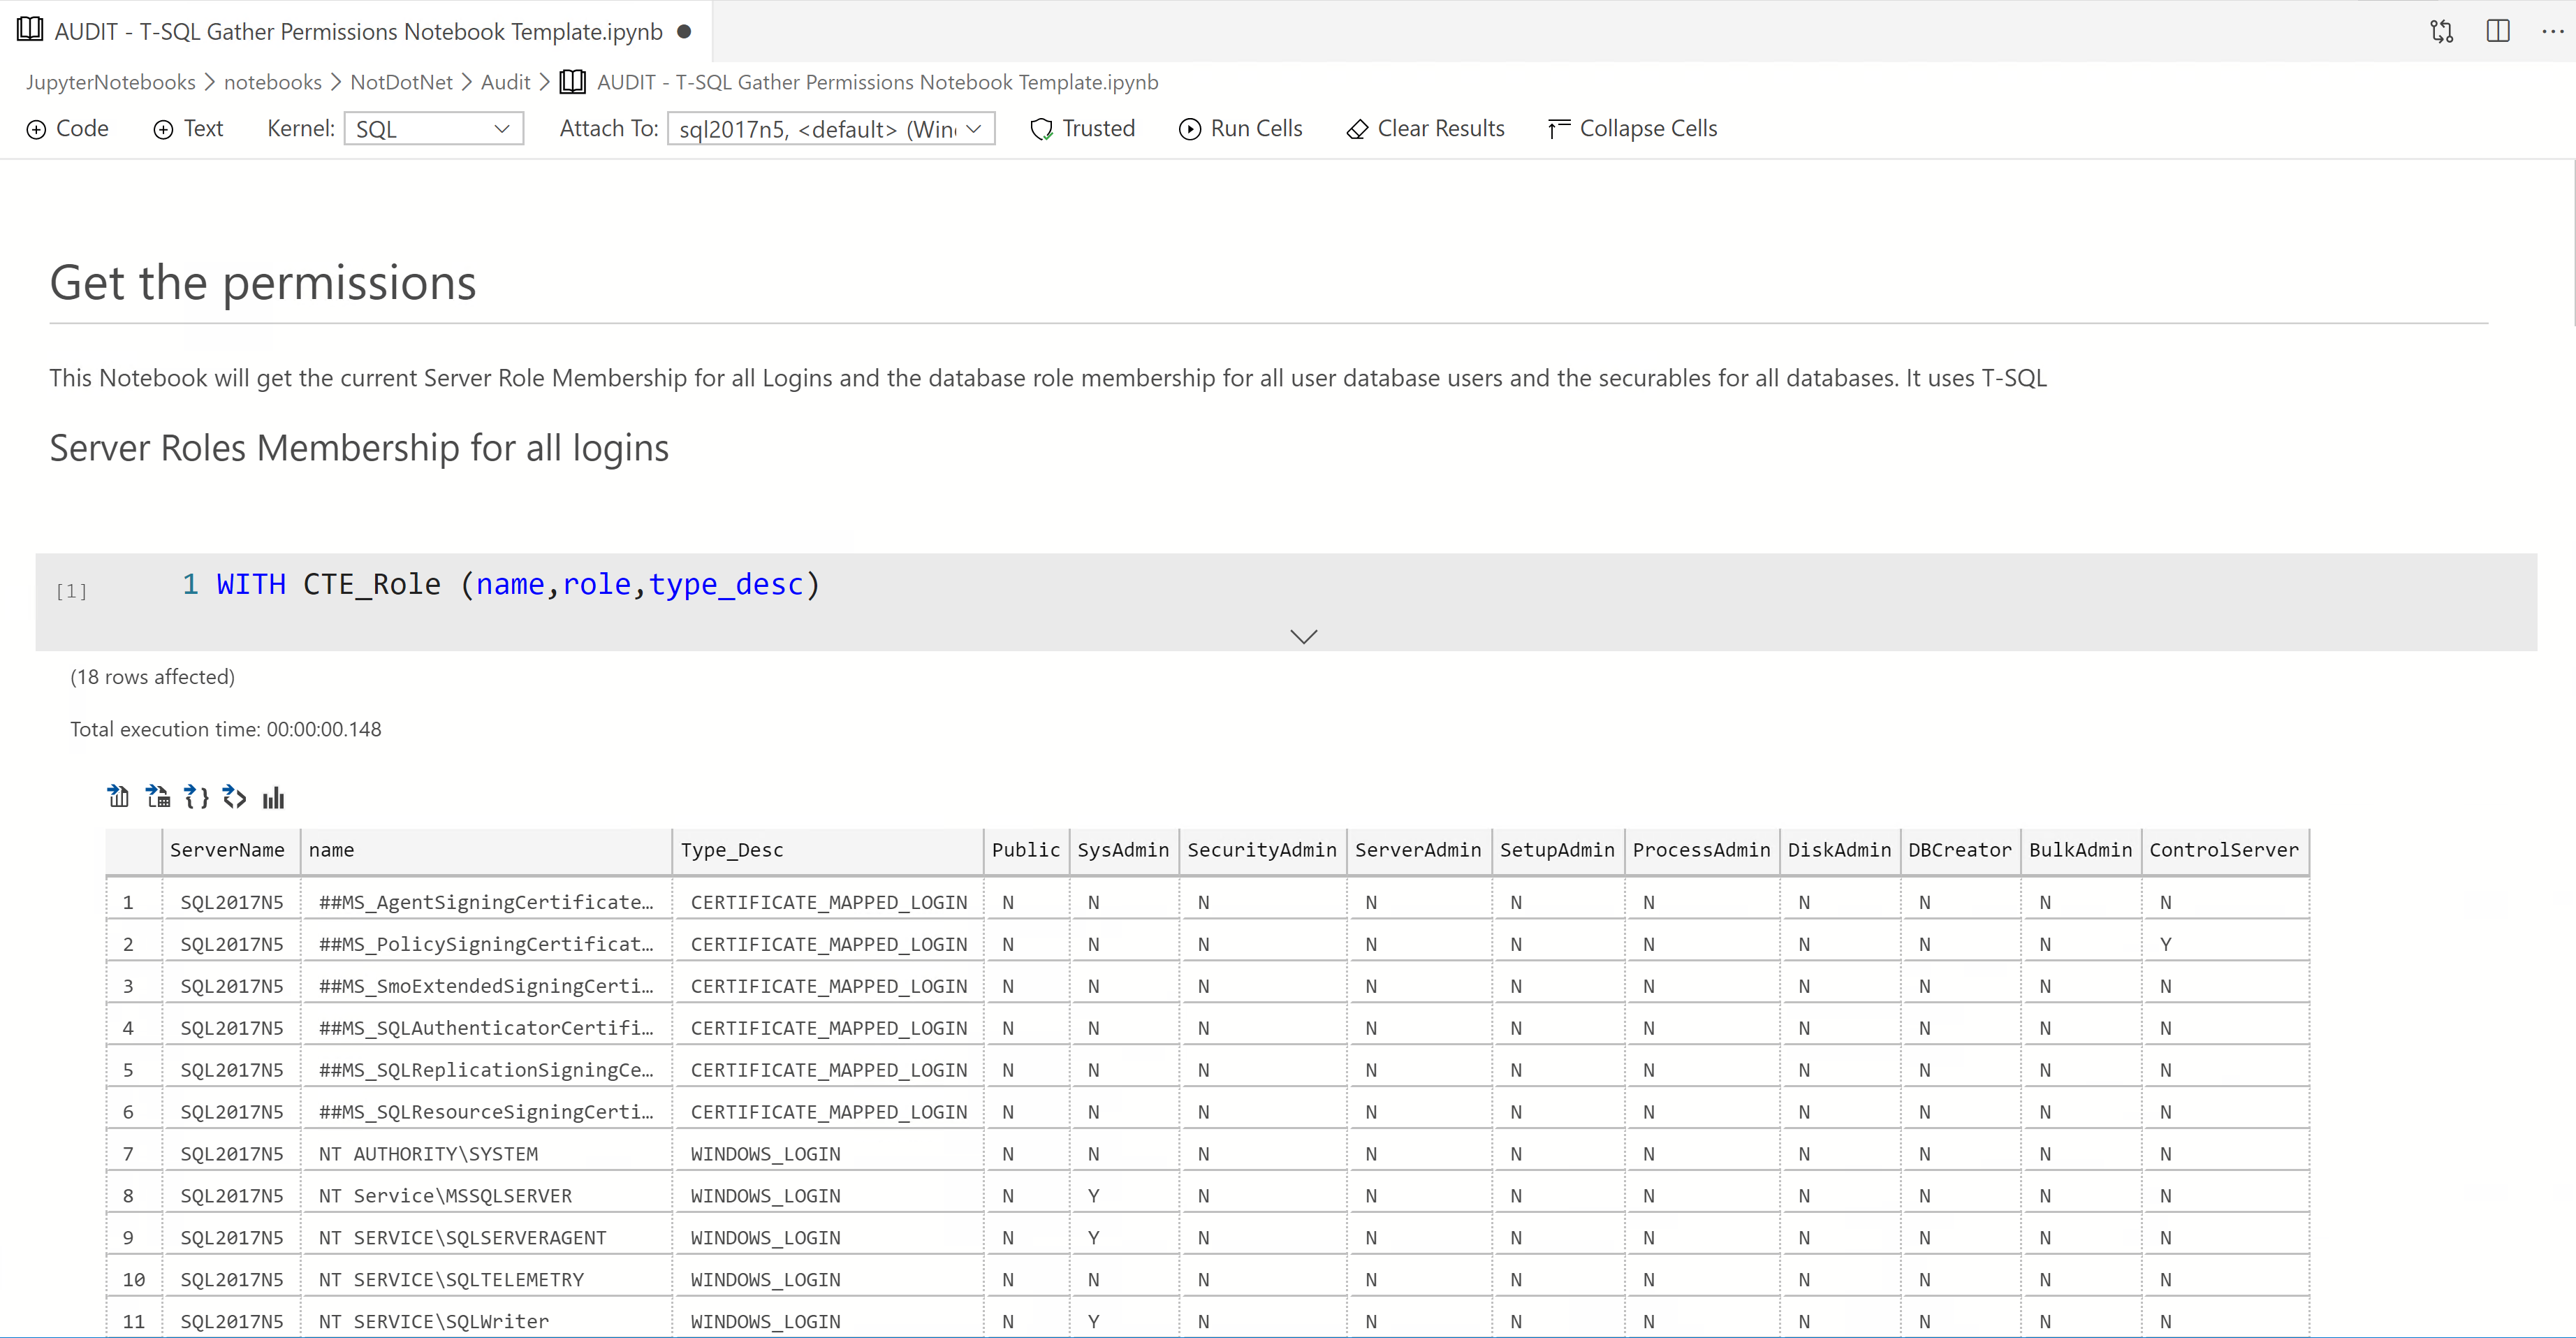
But this is the good bit. Clicking on that icon will open the notebook that was created by that agent job run. Lets see what we get
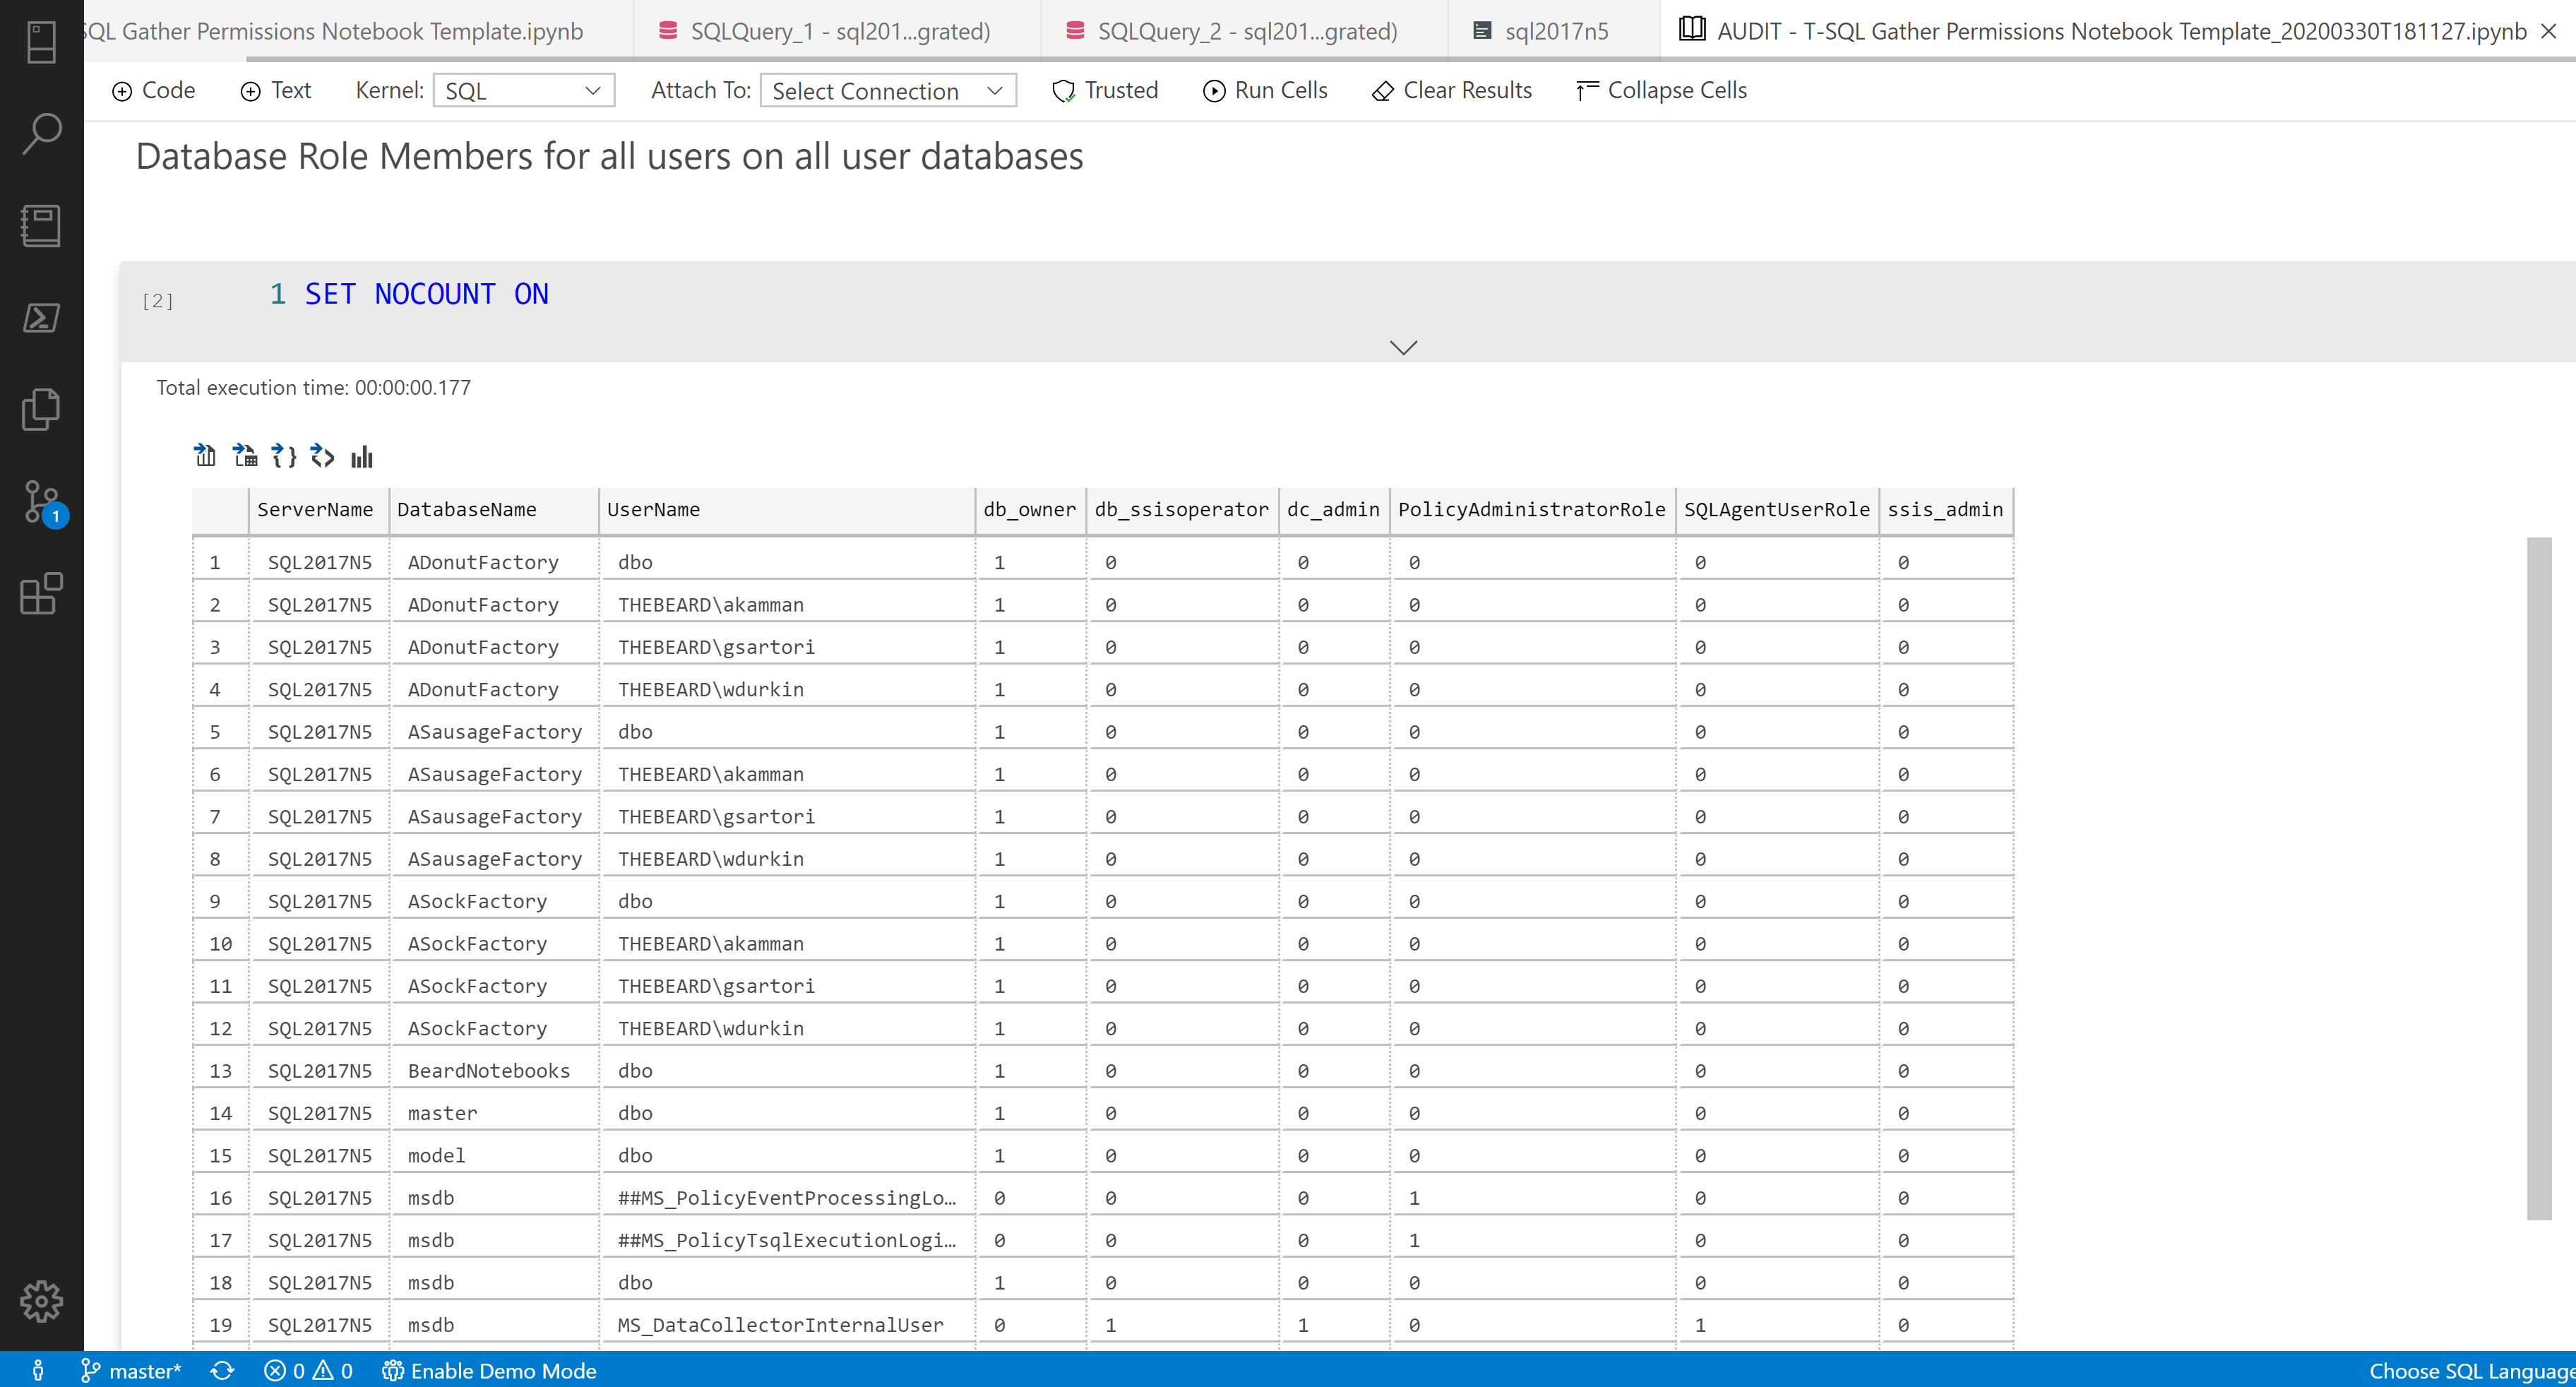
You can see that we have the results of the queries that we wrote in the notebook alongside the documentation (or maybe explanation of the expected results)
If we scroll down a little (and change the theme colour so that you can see the error)
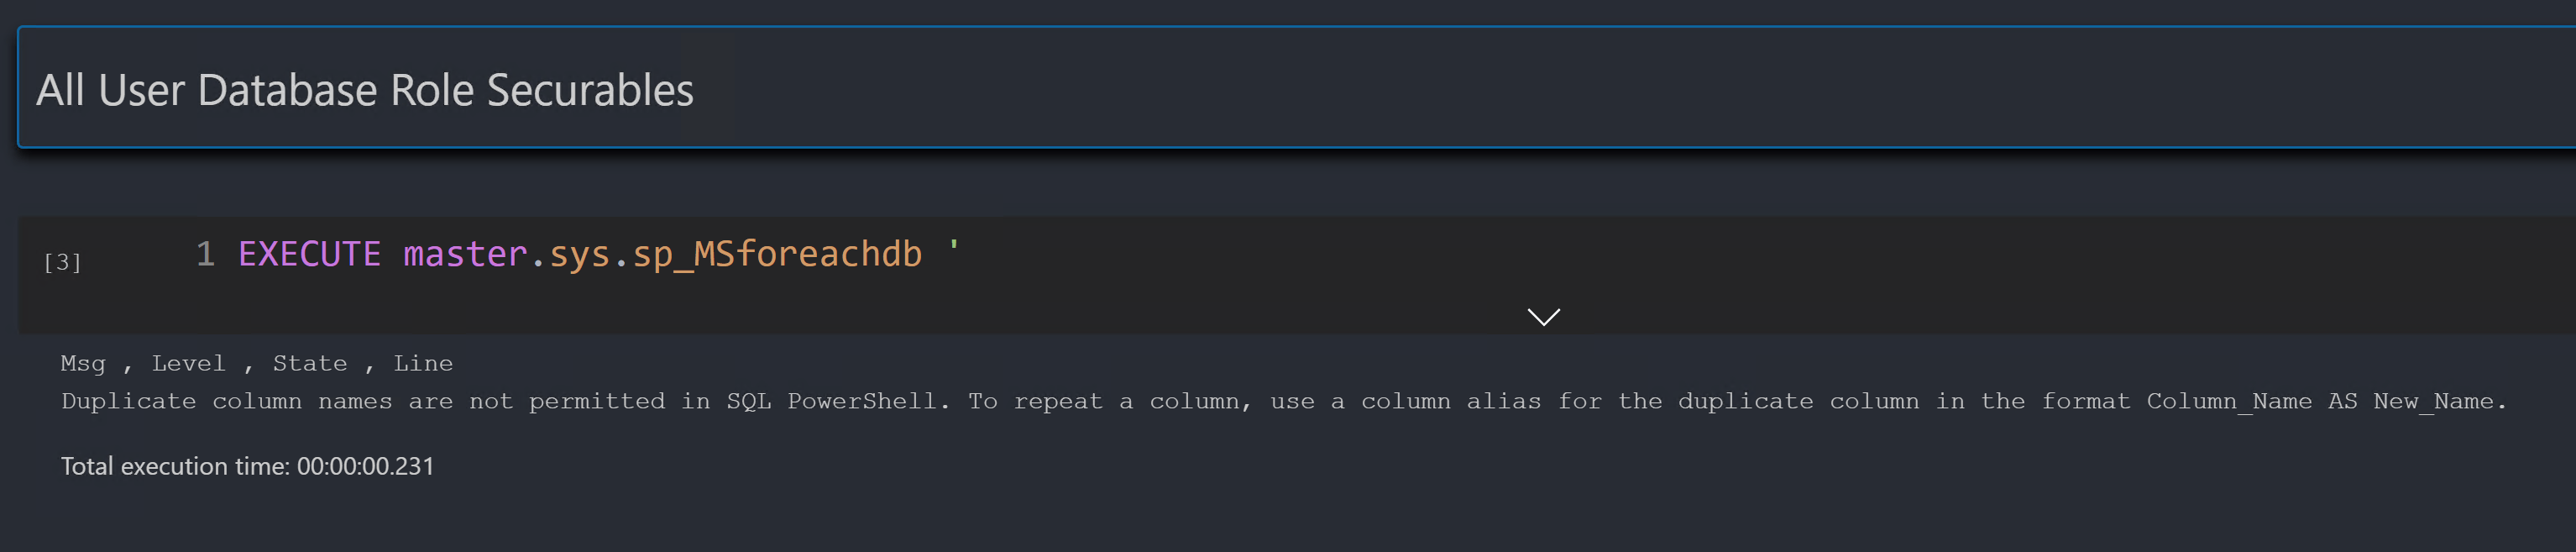
Msg , Level , State , Line Duplicate column names are not permitted in SQL PowerShell. To repeat a column, use a column alias for the duplicate column in the format Column_Name AS New_Name.
We have got an error from running the code via SQL PowerShell which is how the job is run. This error is also inserted into the notebooks.nb_template table
I edited the notebook locally to remove that block of code
Then edited the job and selected the updated notebook
and re-ran the job and got a green tick.

Now I can open the notebook from the latest run, but notice that from this view I can also open the previous notebook.
If I look in the nb_template table, the last_run_notebook_error has cleared
and if I look in the nb materialized table I can see two rows, one for each job run. The error from the first run is also stored in this table. The notebook column has the json for the notebook if you wish to access it in a different manner.
Tomorrow, we will see what the job steps look like and how to make this run on an instance which does not and cannot have the required PowerShell.
Spoiler Alert – May contain dbatools 🙂