Featured image of post MicrosoftFabricMgmt: Workspaces - List, Get, Create, Update, and Remove

MicrosoftFabricMgmt: Workspaces - List, Get, Create, Update, and Remove

Introduction

The workspace is the fundamental unit of organisation in Microsoft Fabric. Everything lives inside a workspace — your lakehouses, warehouses, notebooks, pipelines, reports. Managing workspaces is therefore the first practical skill to build, and MicrosoftFabricMgmt makes it straightforward.

We have already seen Get-FabricWorkspace in the installation post.

Lets explore it in more detail, along with the other workspace management cmdlets: New-FabricWorkspace, Update-FabricWorkspace, and Remove-FabricWorkspace. By the end of this post you will be able to list, get details of, create, update, and remove workspaces in your Fabric tenant using PowerShell.

Getting Workspaces

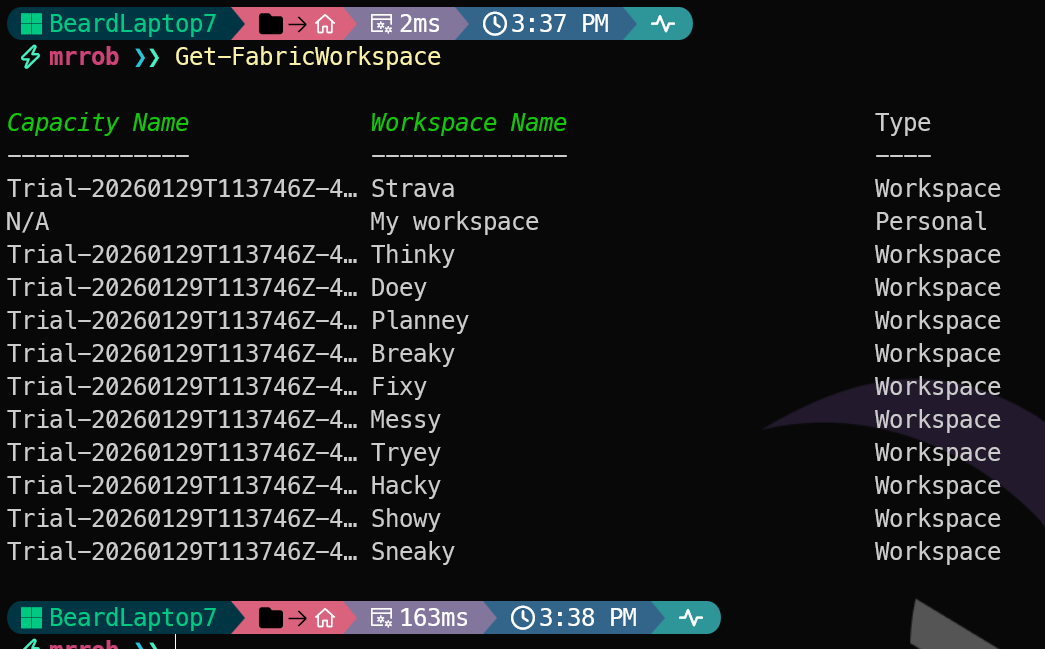
Get-FabricWorkspace is flexible. With no parameters it returns every workspace you have access to:

1
Get-FabricWorkspace

Get-FabricWorkspace output displaying a formatted table with Workspace Name, Capacity Name, and ID columns showing multiple Fabric workspaces

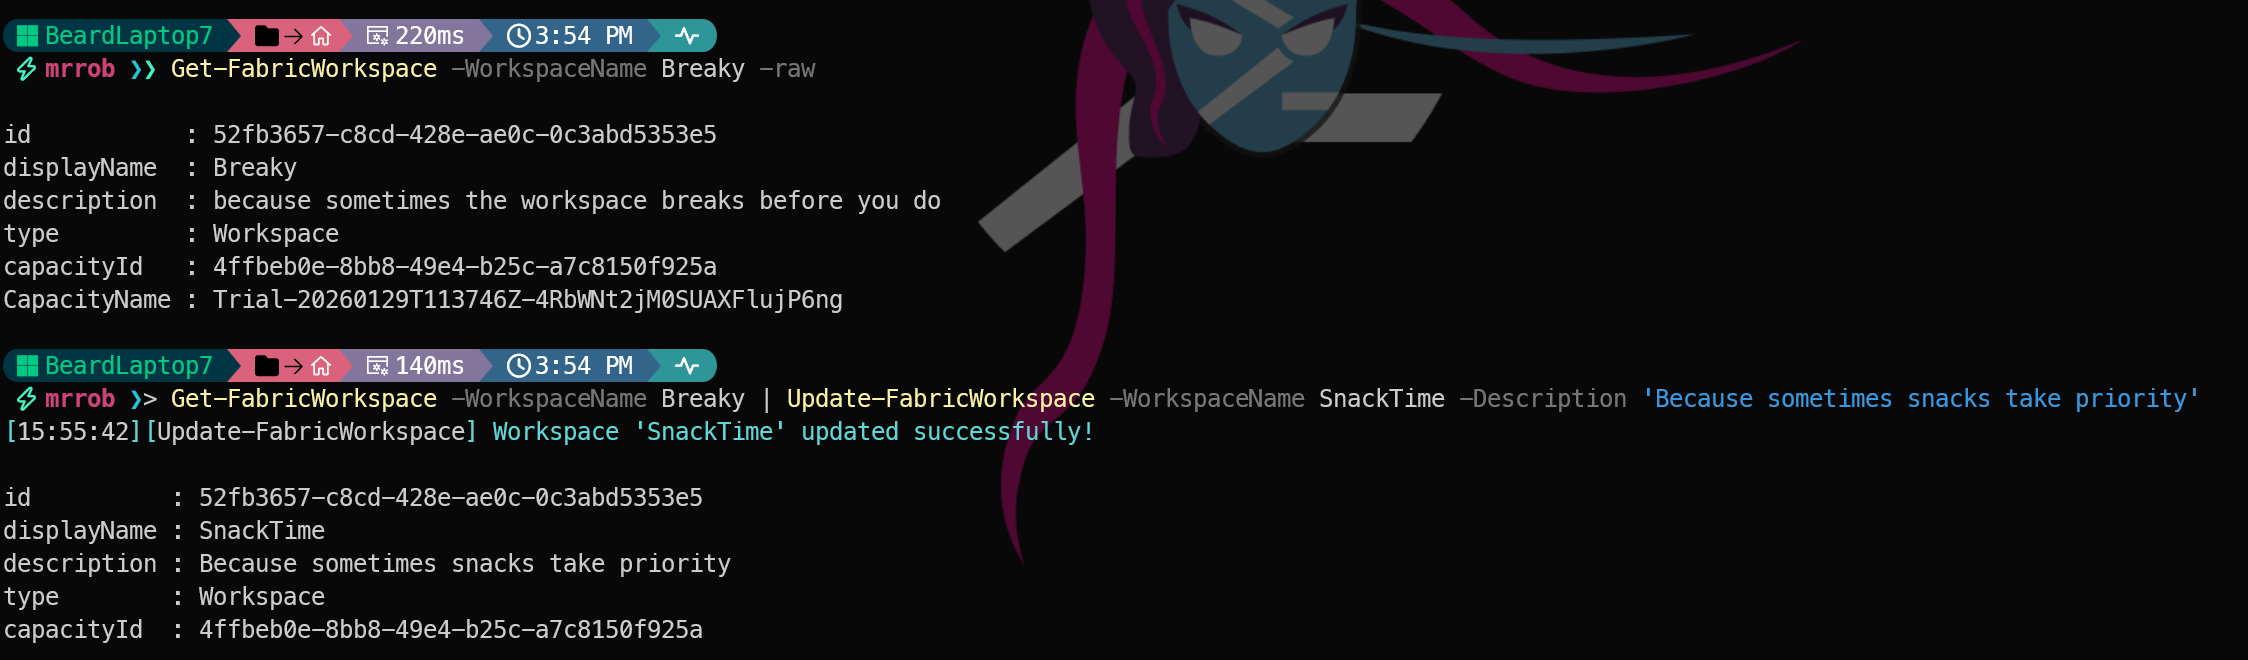
You can filter by name:

1
Get-FabricWorkspace -WorkspaceName Fixy

Or by ID:

1
Get-FabricWorkspace -WorkspaceId "xxxxxxxx-xxxx-xxxx-xxxx-xxxxxxxxxxxx"

Thanks to the intelligent output formatting we looked at yesterday, the results show the Capacity Name, Workspace Name, and other properties in a readable table — no GUID decoding required.

Creating a Workspace

New-FabricWorkspace creates a workspace and returns the new workspace object so you can immediately use its ID in subsequent commands:

1
2

New-FabricWorkspace -WorkspaceName "BlogPost" -WorkspaceDescription "A workspace for testing blog post examples"

New-FabricWorkspace output showing the created workspace details

it has been created without being assigned to a capacity.

Assigning to a Capacity

A newly created workspace has no capacity assigned if you do not specify the Capacity ID.

You can assign a capacity with Assign-FabricWorkspaceCapacity:

1
2
3
4
5
# Get the capacity you want
$capacity = Get-FabricCapacity -CapacityName "My Fabric Capacity"

# Assign the workspace to it
Assign-FabricWorkspaceCapacity -WorkspaceId $workspace.id -CapacityId $capacity.id

You can also specify the capacity when creating the workspace, and this being PowerShell, you can create many workspaces in a single command

 1
 2
 3
 4
 5
 6
 7
 8
 9
10
11
12
13
14
15
16
17
18
19
20
21
22
23
24
25
26
27
28
29
30
31
32
33
34
35
36
37
38
39
40
41
42
43
44
45
46
47
48
49
$workspaces = @(
    @{
        Name = "Thinky"
        Description = 'where the “serious” thinking allegedly happens'
    },
    @{
        Name = "Doey"
        Description = 'for when you might actually get something done'
    },
    @{
        Name = "Planney"
        Description = 'full of plans that may or may not survive contact with reality'
    },
    @{
        Name = "Breaky"
        Description = 'because sometimes the workspace breaks before you do'
    },
    @{
        Name = "Fixy"
        Description = 'the spiritual successor to Breaky'
    },
    @{
        Name = "Messy"
        Description = 'the one you swear you will tidy “later”'
    },
    @{
        Name = "Tryey"
        Description = 'where experiments go to be… attempted'
    },
    @{
        Name = "Hacky"
        Description = 'perfect for demos that are 60% genius, 40% duct tape'
    },
    @{
        Name = "Showy"
        Description = 'the polished one you pretend you always work in'
    },
    @{
        Name = "Sneaky"
        Description = 'for the things you are not ready to talk about yet'
    }

)

$workspaces | ForEach-Object {
    $workspaceName = $_.Name
    $workspaceDescription = $_.Description
    New-FabricWorkspace -WorkspaceName $workspaceName -WorkspaceDescription $workspaceDescription -CapacityId $capacityid
}

This is how I creaed the workspaces in the screenshots for this post. I find it easier to manage them in code, and it makes it easy to recreate them if I accidentally delete one while testing Remove-FabricWorkspace

Updating a Workspace

Use Update-FabricWorkspace to rename a workspace or update its description. You can pipe a workspace object from Get-FabricWorkspace into it, or specify the workspace with -WorkspaceId

1
Get-FabricWorkspace -WorkspaceName Breaky | Update-FabricWorkspace -WorkspaceName SnackTime -Description 'Because sometimes snacks take priority'

PowerShell output showing Get-FabricWorkspace and Update-FabricWorkspace commands updating a workspace named Breaky to SnackTime with description Because sometimes snacks take priority, displaying the updated workspace properties including id, displayName, description, type, capacityId, and CapacityName

Removing a Workspace

Remove-FabricWorkspace removes a workspace. It will ask for confirmation by default:

1
Remove-FabricWorkspace -WorkspaceId $workspace.id

Use -Confirm:$false to skip the prompt in automation scripts:

1
Remove-FabricWorkspace -WorkspaceId $workspace.id -Confirm:$false

Or pipe from Get-FabricWorkspace:

1
$workspaces | ForEach-Object {Get-FabricWorkspace -WorkspaceName $_.Name | Remove-FabricWorkspace -Confirm:$false}

PowerShell output showing Get-FabricWorkspace and Remove-FabricWorkspace commands removing workspaces

A Practical Example: Dev, Test, Prod

Here is a pattern I use for creating a standard set of workspaces for a project:

1
2
3
4
5
6
$capacityId = (Get-FabricCapacity -CapacityName "My Fabric Capacity").id
$projectName = "DataPlatform"

foreach ($env in @("dev", "test", "prod")) {
    New-FabricWorkspace -WorkspaceName "$projectName-$env" -WorkspaceDescription "$projectName $env environment" -CapacityId $capacityId
}

Consistent, repeatable, and documented in code. That is the PowerShell way.

Tomorrow

Next in this series we look at one of my favourite aspects of MicrosoftFabricMgmt — the PowerShell pipeline. How cmdlets are designed to flow together, and how you can write powerful, idiomatic automation with very little code.

However, tomorrow will be a different blog post which I am super excited to share.

You can find all of the blog posts about MicrosoftFabricMgmt here - MicrosoftFabricMgmt Blog Posts

Built with Hugo
Theme Stack designed by Jimmy