Introduction
Yesterday I introduced the MicrosoftFabricMgmt module and explained what it can do. Today we are getting hands on — installing the module, sorting out dependencies, and making your first connection to Microsoft Fabric.
By the end of this post you will have the module installed, be authenticated, and have your first list of Fabric workspaces in your terminal.
Prerequisites
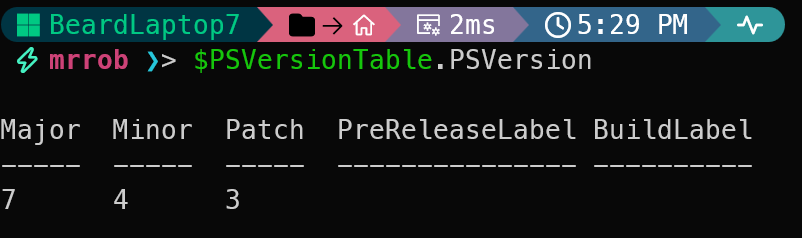
MicrosoftFabricMgmt requires PowerShell 7 or later. It will not work on Windows PowerShell 5.1. If you are still on 5.1, now is a great time to upgrade. You can download PowerShell 7 from here.
You can check your version with:
| |
Installing the Module
Installing from the PowerShell Gallery is the recommended approach:
| |
The module has dependencies that will be installed automatically:
| Module | Minimum Version | Purpose |
|---|---|---|
| PSFramework | 5.0.0 | Logging and configuration |
| Az.Accounts | 5.0.0 | Azure authentication |
| Az.Resources | 6.15.1 | Azure resource management |
| MicrosoftPowerBIMgmt | 1.2.1111 | Power BI integration |
If you have already installed the module and want to update to the latest version:
| |
Once installed, verify it is available:
| |

Authentication
Before any cmdlet will work you need to authenticate. This is done with Set-FabricApiHeaders.
For interactive use — which is what we will cover today — this triggers a browser authentication flow using your Microsoft account.
| |
You will need your Tenant ID. You can find this in the Azure portal under Azure Active Directory, or by running:
| |
I like to store mine as a secret so I do not have to hardcode it in scripts. I use the Microsoft.PowerShell.SecretManagement module for this:
| |
After running Set-FabricApiHeaders, your browser or a window will open and prompt you to sign in.
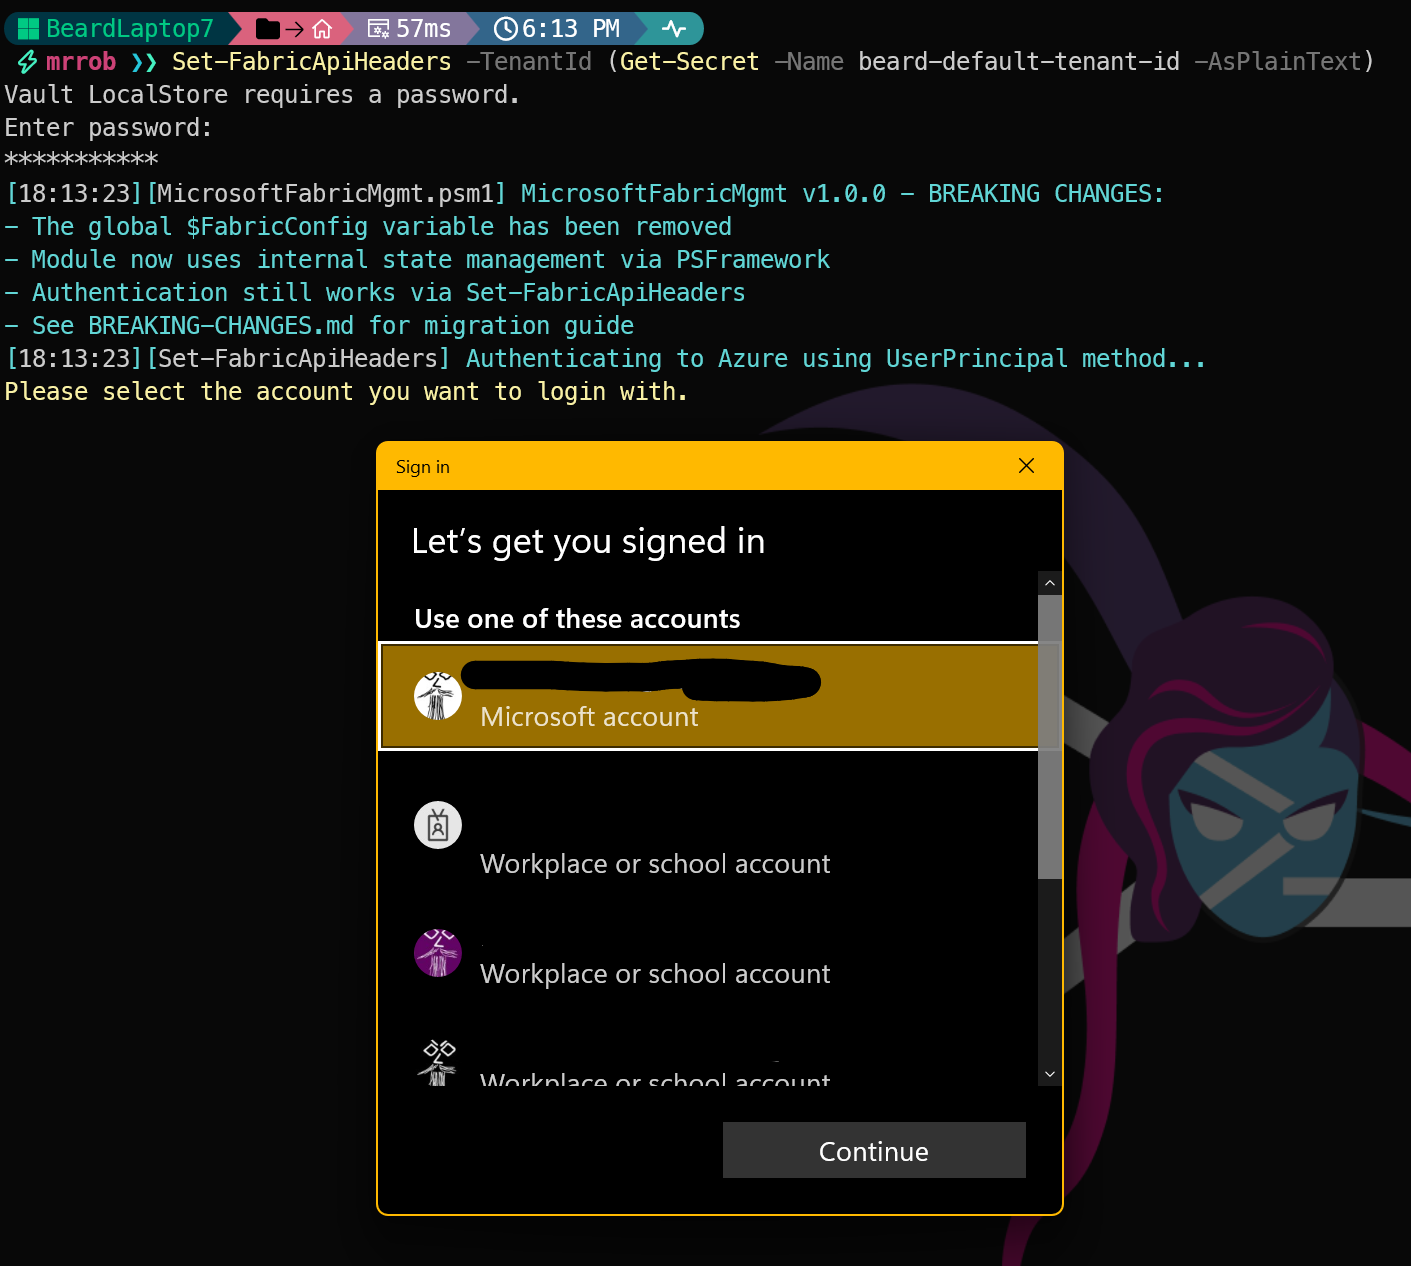
Once authenticated, the module stores your token securely for use in future commands in this session. It will also show how long the token is valid for, so you know when you will need to re-authenticate.

When the token expires, you will need to re-authenticate, any MicrosoftFabricMgmt commands will inform you with a helpful message.

Breaking Changes
You will also notice when importing that you get some pretty blue text informing about breaking changes. This is because this version of the module contains some breaking changes from the previous version
What About Service Principals and Managed Identity?
The module also supports Service Principals (ideal for CI/CD pipelines and scheduled tasks) and Managed Identity (ideal for workloads running on Azure VMs, Azure Functions, or Azure DevOps agents). We will cover those in a dedicated post later in the series. For now, interactive authentication is the way to go.
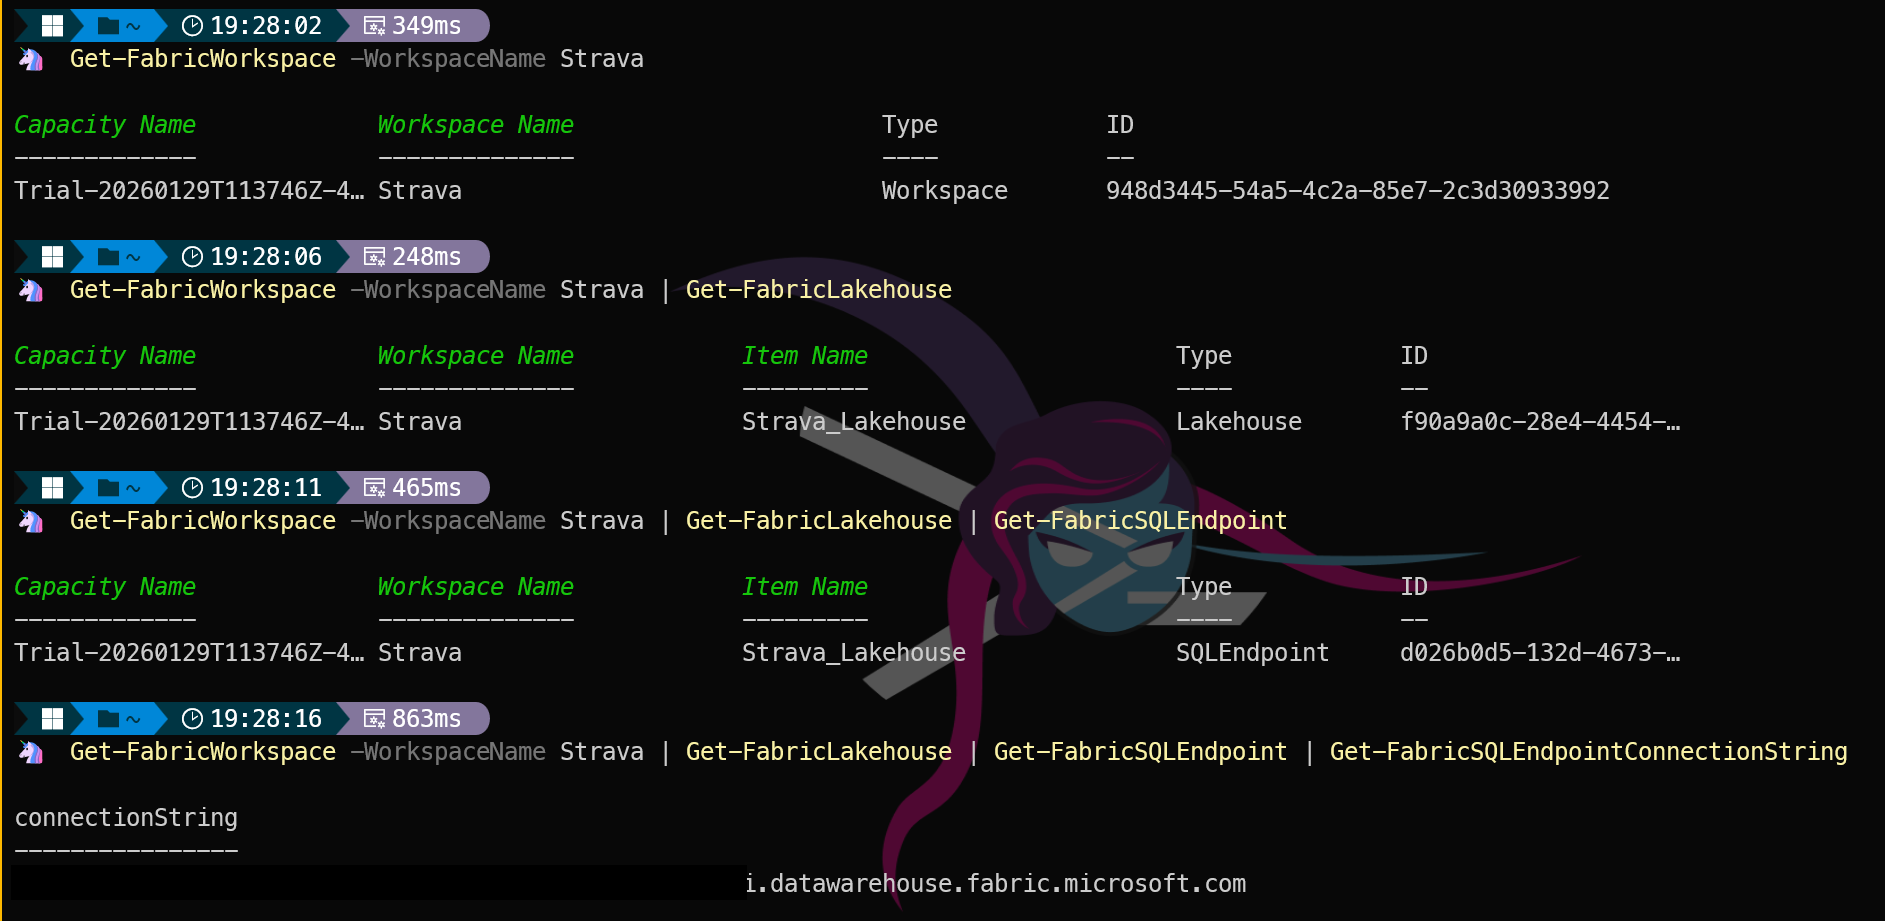
Your First Commands
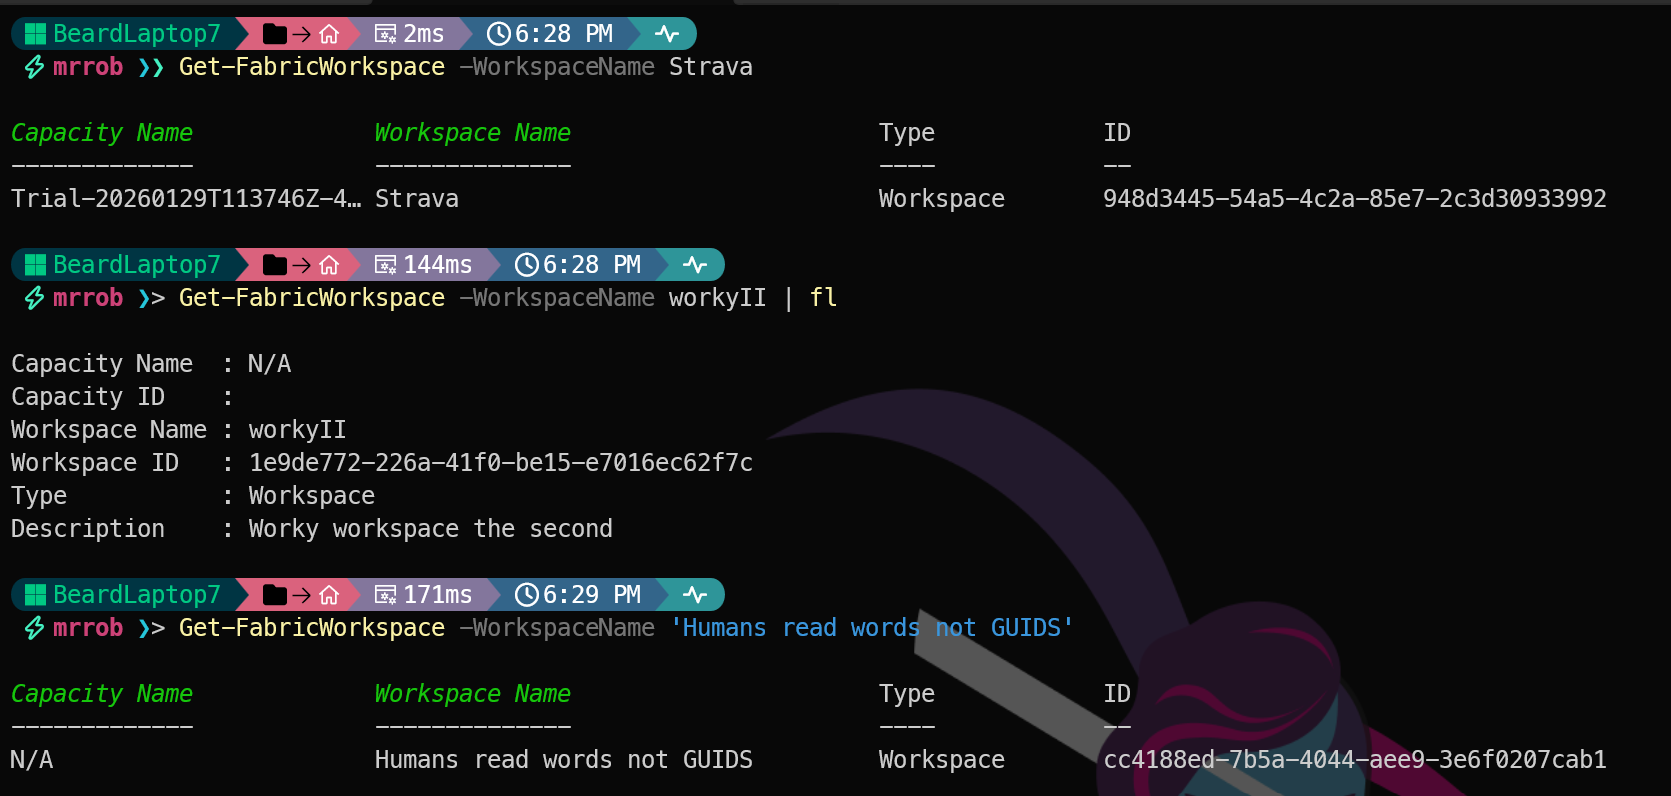
With authentication sorted, let us make sure everything is working:
| |
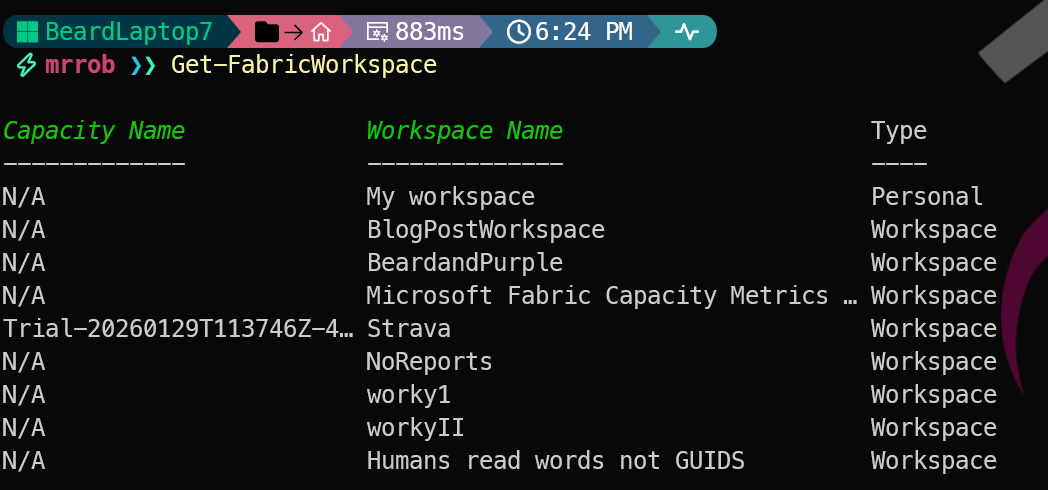
You should see your workspaces listed with their display names. Notice how the output shows the Capacity Name alongside the workspace details — not raw GUIDs. That is the intelligent output formatting built into the module, and it is the subject of tomorrow’s post.
| |
Confirming Module Configuration
PSFramework powers the module’s configuration system. You can inspect all the configuration settings with:
| |
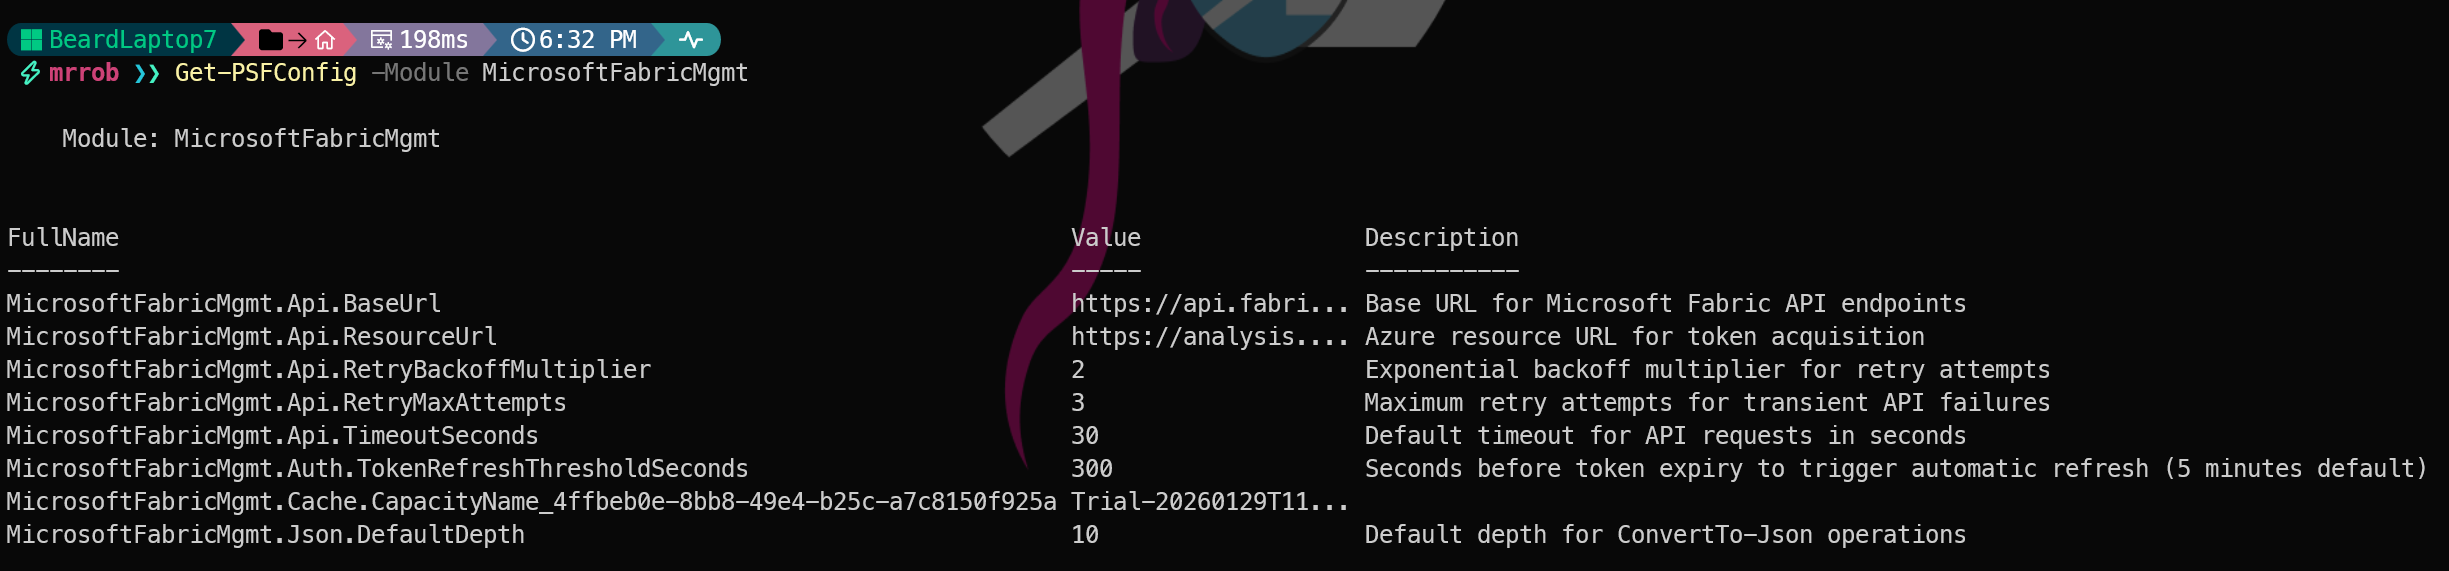 This shows things like the API base URL, timeout settings, retry attempts, and backoff multiplier. You can adjust these if needed — for example, if you want more retry attempts for a flaky network:
| |
You Are Ready
That is it! The module is installed, you are authenticated, and you have your workspaces. Tomorrow we look at something that makes this module stand out — the intelligent output formatting that turns GUIDs into names and makes your results actually readable. See you then.
You can find all of the blog posts about MicrosoftFabricMgmt here - MicrosoftFabricMgmt Blog Posts