
Broken Link
It started with a message from Mikey Bronowski ( Blog Twitter )
Now this means that you get to see my awesome 404 page which makes me laugh every time! It is not a very good look though and does not help people who are reading the blog.
Why do something manual when you can automate it
This blog is running on GitHub Pages via a repository. Every time a change is pushed to the repo a GitHub Action runs which rebuilds the jekyll site and makes it available.
So the easy thing to do is to edit the code to add the corrected link, push the change and have GitHub Pages do its thing. If I wanted to validate it first then I could use docker and containers as discussed in these two blog posts Running GitHub Pages locally or Running GitHub Pages locally with a Remote Theme (this site has a remote theme). Then I could see the changes locally before pushing them to the repository.
But my brain didn’t work in that way. Instead it thought “Hmmm maybe I could do this in the browser in GitHub Codespaces and then it could work locally as it will have a dev container (development container) configuration and VS Code will just open that in Docker itself, no need for running docker commands manually and I can write blog posts anywhere there is a browser or VS Code”
The most wonderful Jess Pomfret Blog Twitter and I delivered a dbatools Training Day at SQL Bits this year which we developed and ran using dev containers. We also presented a session at the PowerShell Conference Europe about using dev containers so I had a little knowledge of how it can be done.
How easy is it ?
It’s super super easy. Surprisingly easy.
Open a codespace for your repository
First I went to the repository for my website and opened a codespace by clicking on the green code button and creating a codespace

Add the development container configuration
Using CTRL SHIFT + P to open the command palette and typing codespaces and choosing the Add Development Container Configuration Files
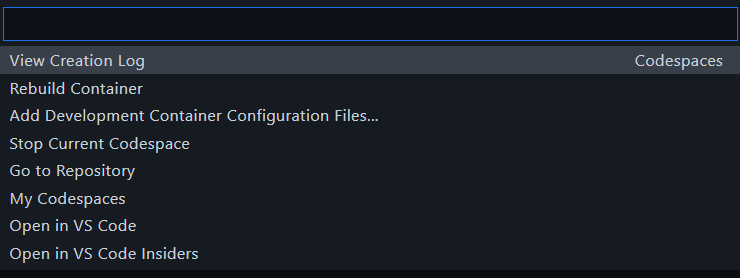
and follow the prompts
- Show All Definitions
- Jekyll
- bullseye (or buster if you use Apples)
- lts
The config files are created
This will create a .devcontainer directory with
- devcontainer.json
- Dockerfile
- post-create.sh
Which will do all that you need. You can stop here. You will just need to run jekyll serve to start the website.
Automatic regeneration
To make it automatically regenerate. I added
bundle exec jekyll serve --force-polling
to the end of the post-create.sh file. This will automatically start the website and regenerate it everytime I make a change :-)
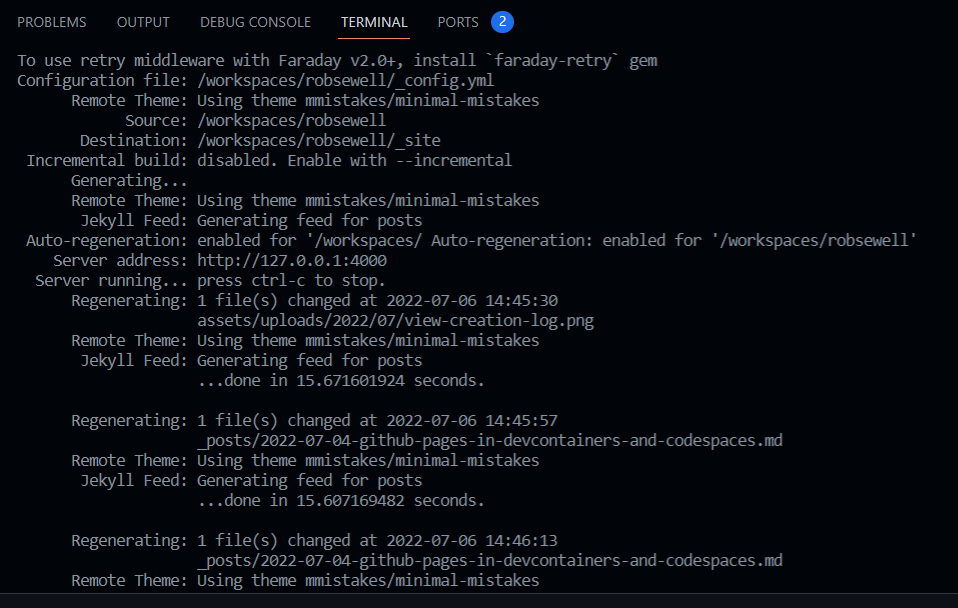
View the logs
You can watch the logs of the regeneration with View Creation Log from the command palette - Use CTRL SHIFT + P to open it. Then you can see the log output in real-time.
Open the website “locally”
To open the website from inside the devcontainers the ports are exposed via the configuration. In the browser in codepaces there is a port tab and a button to press to open the website and show the updates that you have written.
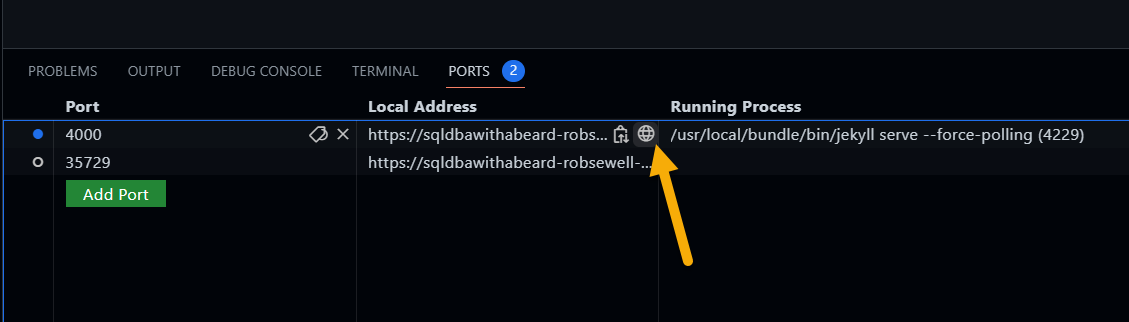
If you click that you get a live view of the website so that you can validate that it works.
And VS Code?
This showed it being created in codespaces in the browser, you can have the same effect in VS Code by adding a .devcontainer directory and copying the files from the vs code dev containers repo
The rest is pretty much the same except the url!

Rather Have Video ?
If you prefer video then you can find one on Youtube showing the same process.