
Starting working out?
It is important to keep a healthy body and mind, especially when my life is so sedentary these days. Getting exercise is good for both. This blog post has nothing to do with exercise though (apart from maybe exercising the mind)
Project Bicep
Bicep is a language for declaring and deploying Azure Resources. Like Terraform it enables you to define your infrastructure as code.
WHy use Bicep instead?
I really like being able to control infrastructure with code. I have used Terraform to deploy infrastructure and almost exclusively on Azure. I have created and altered many environments for clients over the past couple of years using Terraform. I have also used ARM templates but found them confusing and unwieldly to use.
Existing State
Terraform will deploy the required changes to your infrastructure by comparing the existing state which is stored in a state file with the expected state which is created by running the plan command. If someone alters the Azure resource via the portal, Azure CLI or Azure PowerShell all kinds of mayhem can occur normally failure in deployment and time spent troubleshooting. It is possible to use the import command in Terraform to get the existing resource state into the state file so that the comparison is performed against the existing state of the resource but this requires a lot of manual intervention.
Bicep deploys the changes by comparing the existing state of the Azure resources with the expected state in the code. This, for me, is a super benefit and reduces the complications of those type of errors.
Latest API support
Terraform resources have a lag between features or properties from Azure being made available and those features or properties being incorporated into the Terraform resource. This has lead to me requiring my deployments to have additional Azure CLI, Azure PowerShell or worse both steps to achieve what I need.
Bicep immediately supports all preview and GA versions for Azure Services, I don’t have to wait and all the things I can do are available to me.
Authoring
I love Visual Studio Code and there is a super extension that makes authoring a joy.
What If Support
I have written before about the importance of WhatIf for PowerShell functions and how to implement it and Bicep has What If for deployments so that you can validate that the code you have written will perform the tasks that you expect.
Deployments recorded in Azure
The changes that I make with Bicep are recorded in Azure and I can find them in the deployments for the Resource Group
Cost
Bicep is free :-)
Deploy an Azure SQL Database Rob
OK, let’s see an example. I would like to deploy an Azure SQL Database into a Resource Group. I will need an Azure SQL Server resource and an Azure SQL Database resource. The Azure Templates site has the examples that I need. The Azure SQL Server page shows the Bicep code I need and the explanations of the expected values.
| |
I create a file with a .bicep extension in VS Code
and add only the required values. (NOTE - this is just an example and I would never recommend that you would put the password for anything in a file in plain text, we will cover how to handle secrets later. )
| |
Validate the deployment with WhatIf
I created an empty Resource Group for my test
| |
Next, I am going to check that the code that I have written will perform the actions that I expect. I am hoping to get
- An Azure SQL Instance called beardsqlrand01
- In the location North Europe
- With an admin login and password as stated in the file (NO Don’t ever do this in Production)
I do this using the Azure PowerShell command New-AzResourceGroupDeployment and give it the Resource Group Name and the path to the file
| |
The first thing this does is check the status of the resources in the resource group

then it provides a list of what it will do. In this example there is only one resource.
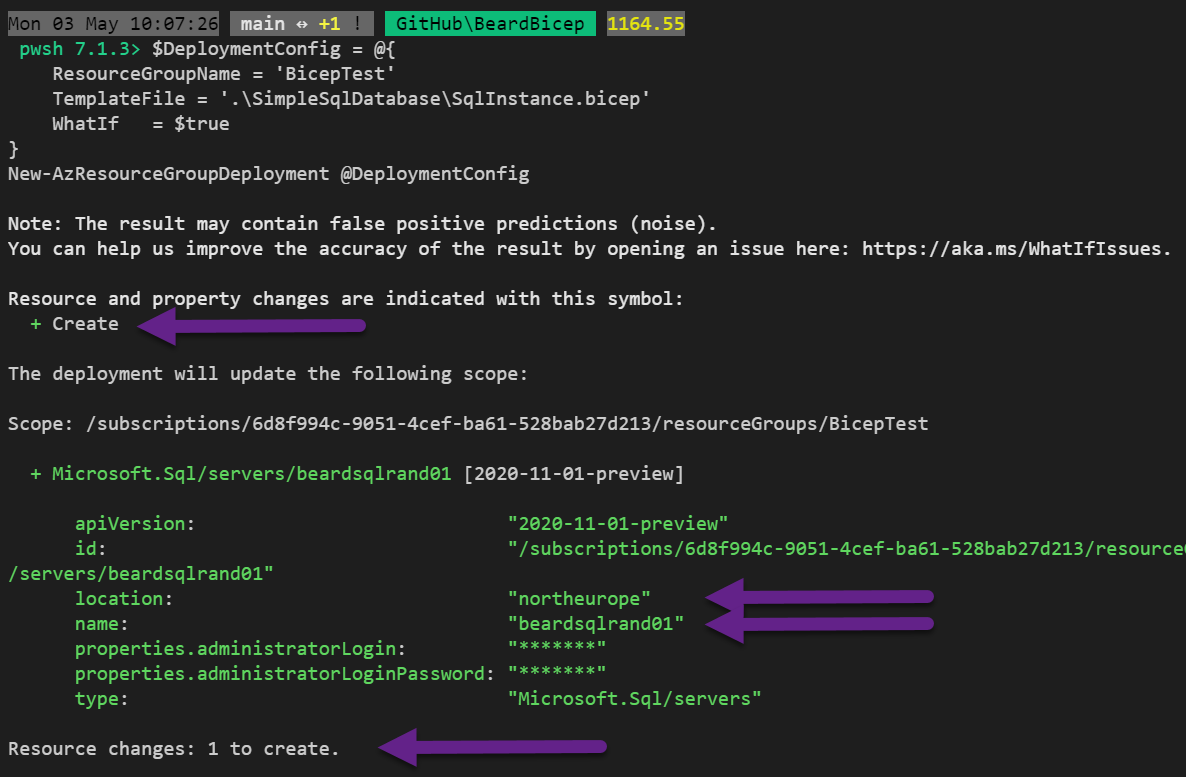
This tells us that there will be a creation of 1 resource and that the values are as I expect them. As I am happy with that I can then deploy the infrastructure by changing the WhatIf value to false
| |
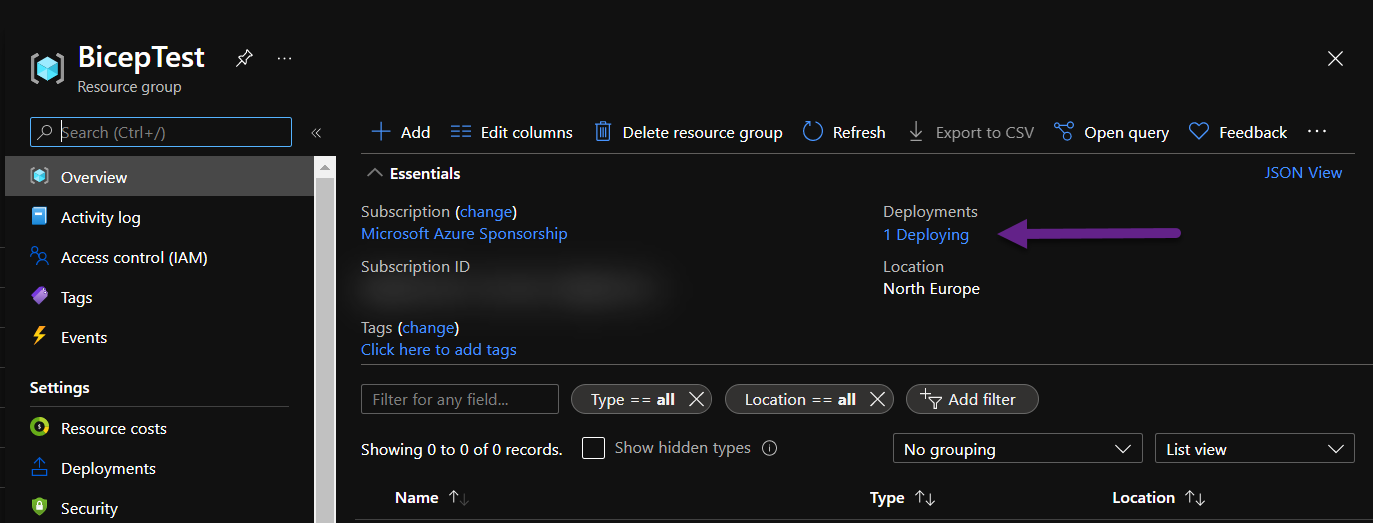
Deployment can be seen in the Azure Portal
If I look in the Azure Portal, I can see the deployment is happening.
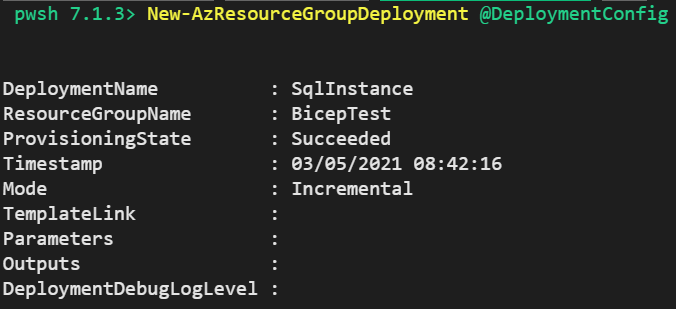
Once it has finished I get an output on the screen
and when I look in the portal at the deployment
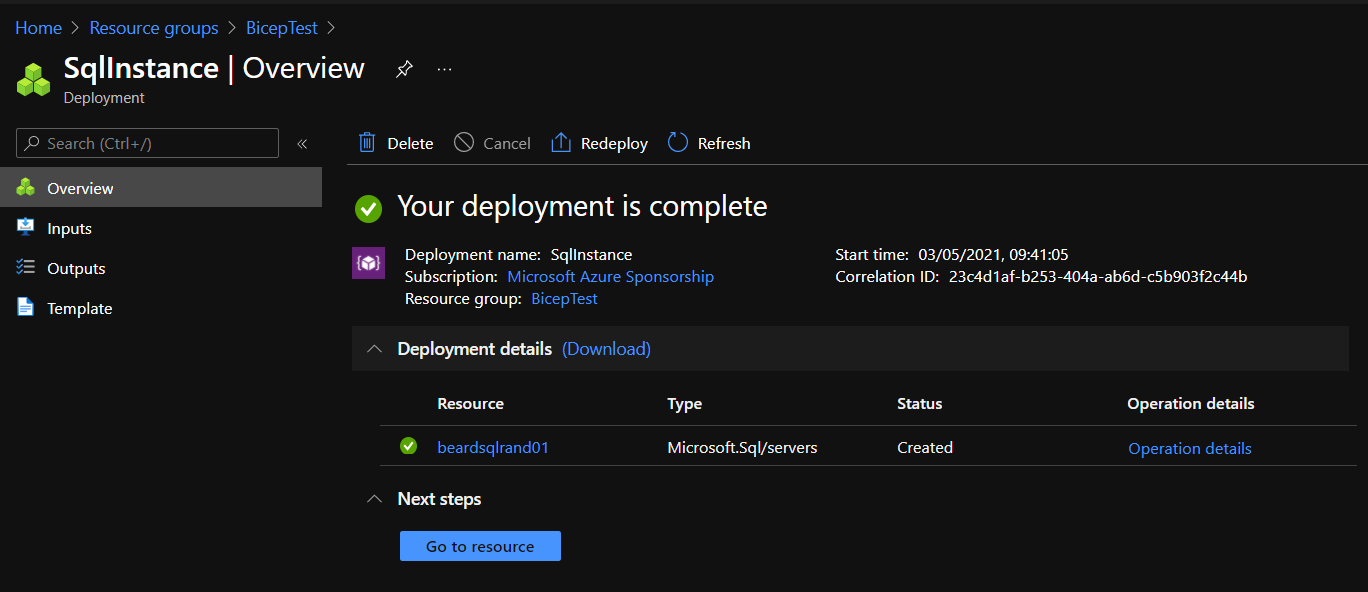
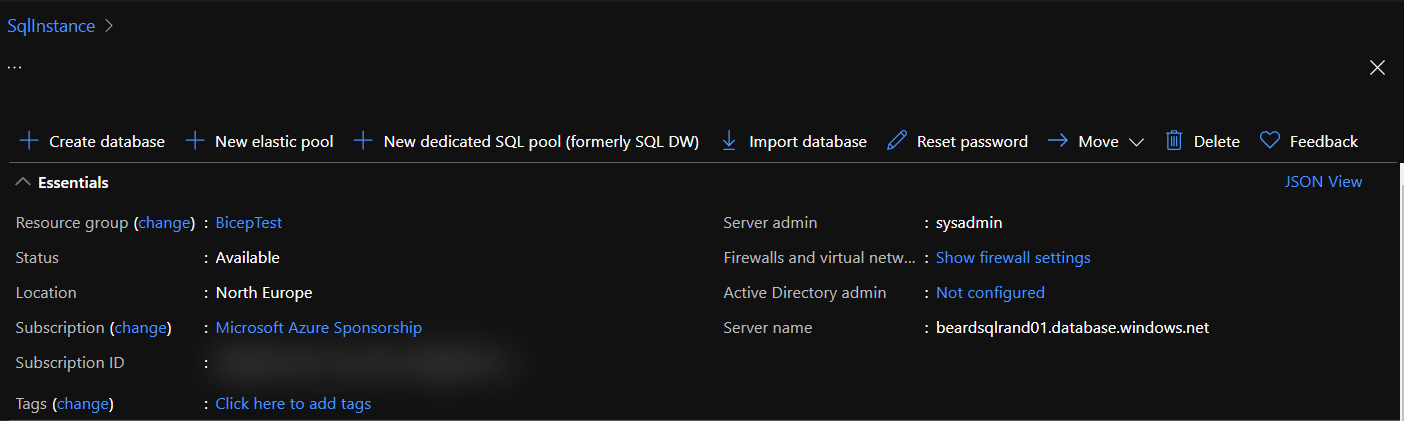
and my resource has been created
Add a database
I have my Azure SQL Instance, next I need a database. I look up the resource information and add the required information to my bicep file.
| |
This is a super simple example. The database resource is defined within the SQL Instance resource with a name and a SKU.
We validate it in exactly the same way as before. This time we will see that we can incrementally add or change resources to our deployment and validate what will happen.
| |
This time the result looks a little different as we already have a resource in the Resource Group.
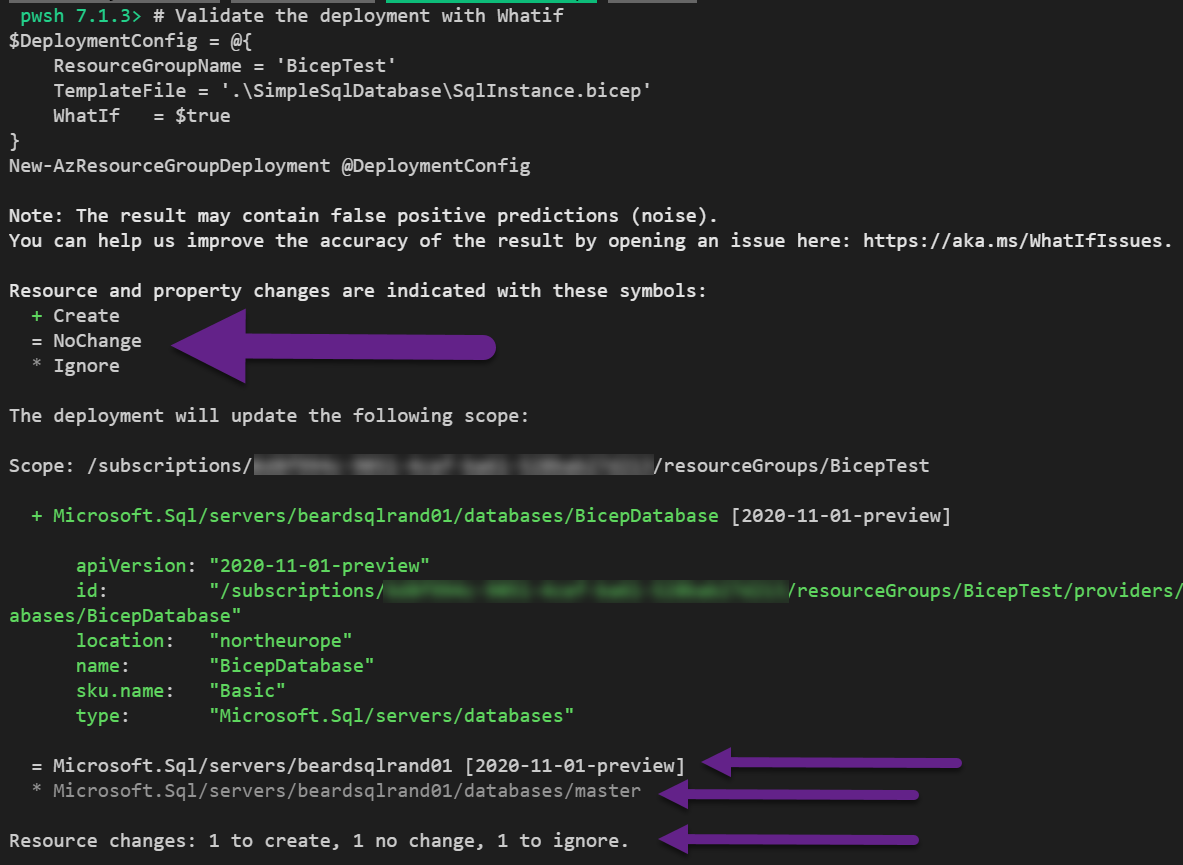
At the top it gives you three types of changes
- Create
- NoChange
- Ignore
It shows at the bottom that the changes are
Resource changes: 1 to create, 1 no change, 1 to ignore.
This tells you that it will create the Azure SQL Database, it will not change the Azure SQL Server and there is no change to the master database.
I am happy with that validation, so I deploy the changes, again using the same code as before.
| |
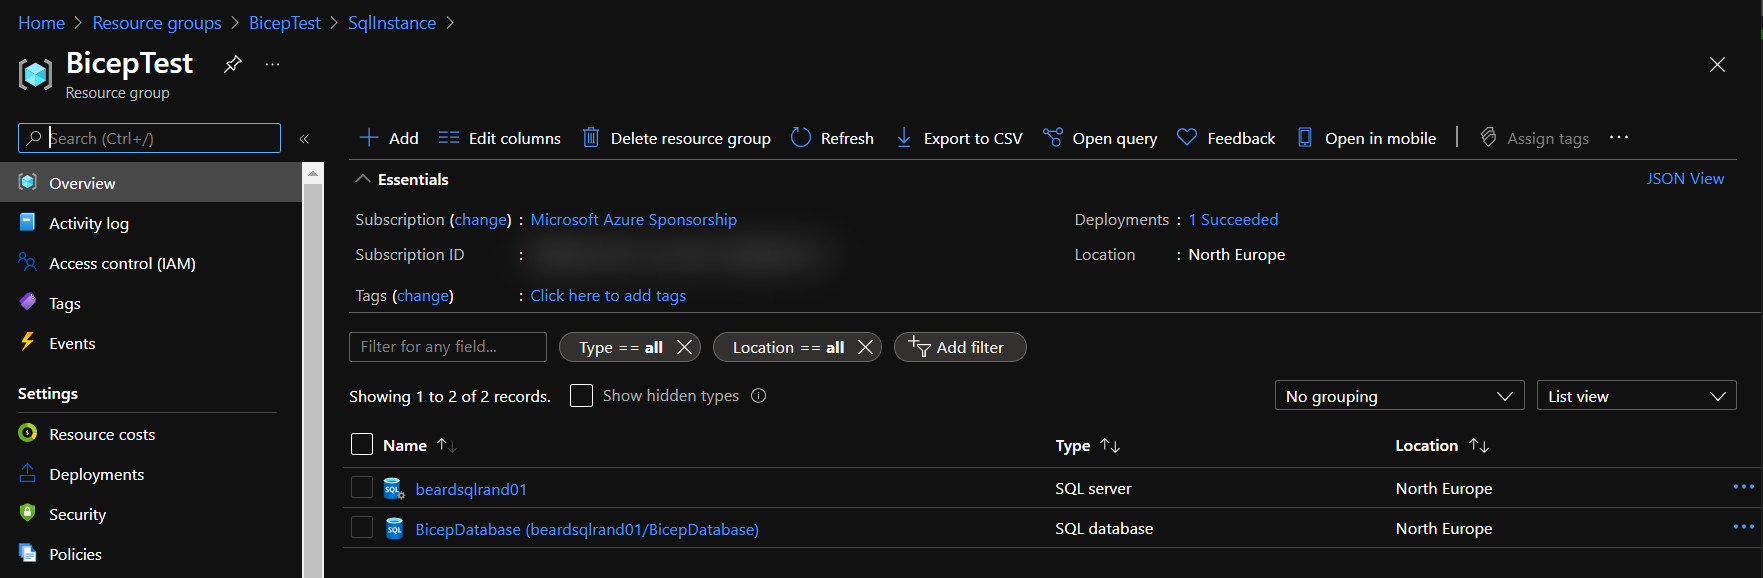
If I look in the portal I can see the deployment
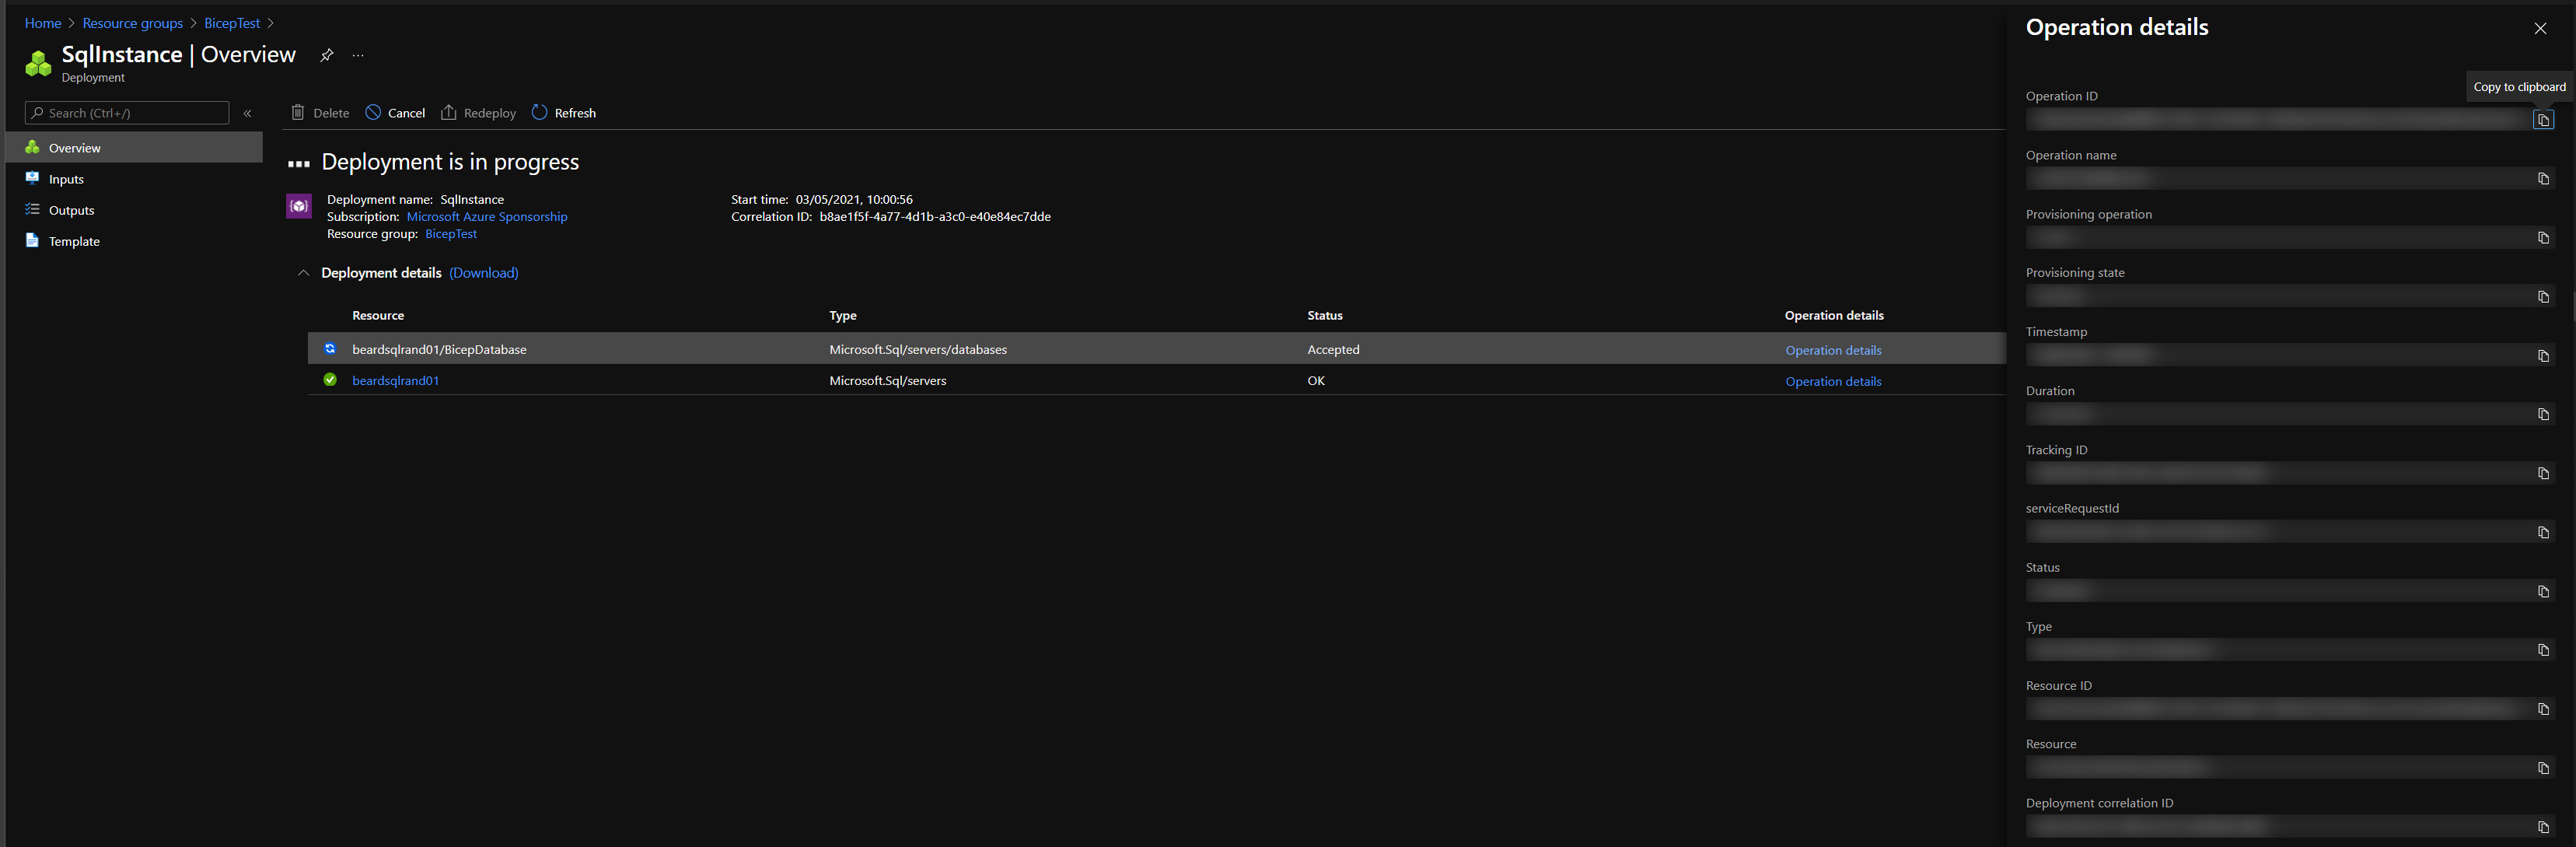
and once it has completed I can see the database in the Portal
Thats all there is to Bicep.
- Find the resource information in the docs
- Define your deployment in code
- Validate your deployment with WhatIf
- Deploy your changes
Remove the Resource Group
Now that my test has finished I will remove the Resource Group. If you are following along, this is how to do that
| |
All of the code
I have added all of the code for this blog post to my GitHub here https://github.com/SQLDBAWithABeard/BeardBicep/tree/main/SimpleSqlDatabase so that you can follow along.
Next steps
Now that you have an introduction to Bicep and can see how useful and powerful it can be, we will expand on this in the following blog posts.