This weekend (10 December 2016), I went to Slovenia for a SQL Saturday. As always, it was an amazing event well organised by Mladen Prajdic, Dejan Sarka, and Matija Lah in a fabulous setting amongst fabulous scenery. I highly recommend it and, also, Ljubljana is a wonderful place to be in December with all the lights and markets.

Whilst I was there I was asked by someone if you could deploy data science virtual machines in Azure with PowerShell. I said I was sure that it could be done and agreed I would write a blog post, so here it is.
According to the Azure documentation
The Data Science Virtual Machine running on a Windows Server 2012 contains popular tools for data exploration, modeling and development activities. The main tools include Microsoft R Server Developer Edition (An enterprise ready scalable R framework) , Anaconda Python distribution, Jupyter notebooks for Python and R, Visual Studio Community Edition with Python, R and node.js tools, Power BI desktop, SQL Server 2016 Developer edition including support In-Database analytics using Microsoft R Server. It also includes open source deep learning tools like Microsoft Cognitive Toolkit (CNTK 2.0) and mxnet; ML algorithms like xgboost, Vowpal Wabbit. The Azure SDK and libraries on the VM allows you to build your applications using various services in the cloud that are part of the Cortana Analytics Suite which includes Azure Machine Learning, Azure data factory, Stream Analytics and SQL Datawarehouse, Hadoop, Data Lake, Spark and more.
I have created a function to wrap around the process to make it easier for none PowerShell people to do this. There are a series of steps to follow below and you should be able to create a machine in about 10 minutes once you have completed the pre-requisites.
Enable Programmatically Deployment
First, an annoyance. To be able to deploy Data Science virtual machines in Azure programmatically you first have to login to the portal and click some buttons.
In the Portal click new and then marketplace and then search for data science. Choose the Windows Data Science Machine and under the blue Create button you will see a link which says “Want to deploy programmatically? Get started” Clicking this will lead to the following blade.

Click Enable and then save and you then move to PowerShell 🙂
Azure PowerShell Cmdlets
Follow the instructions here to install the Azure PowerShell modules. In the examples you see here I am using Windows 10 and PowerShell version 5.1.14393.479 and I installed the Azure modules using the Install-Module method
Get the script
To install a data science VM, we’ll use the New-WindowsDataScienceVM.ps1 script. In this script, I’m using version 1.2, but any version of this script published in PowerShell Gallery is fine.
To install the New-WindowsDataScienceVM script from the PowerShell gallery, type:
Install-Script New-WindowsDataScienceVM
For more information about using the PowerShellGet cmdlets to install scripts and modules from PowerShell Gallery, read this page. The PowerShellGet modules is included in PowerShell 5.0 and later on Windows 10, but you can install PowerShellGet for PowerShell 3.0 and 4.0. If you cannot connect to the gallery or prefer not to install the module, you can also find the script on GitHub.
Login to Azure
You can login to Azure using the command
Login-AzureRMAccount
which will pop-up a prompt for you to log into Azure

Enable Simple Mode
The New-WindowsDataScienceVM function comes with a Simple switch parameter.
If you use -Simple, the function prompts you only for the admin username and password for the virtual machine. It creates a randomly-named, standard_DS1_v2-sized machine in the ukwest data centre with standard, locally redundant storage in a randomly named Resource Group. All of the required objects have random names, too. If that is not what you want, there is more information at the end of this post. I am considering offering a pop-up to choose location in Simple Mode. Let me know here if that would be something you would like
To create a simple data science VM, run:
New-WindowsDataScienceVM -Simple
Enter Local Admin Password
When you run the function, it prompts for a local admin username and password to log into the virtual machine. The password must have 3 of the following 1 Upper case, 1 lower case, I special character and 1 number. Don’t lose it, you will need it.

Grab a cuppa, creating your VM and its resources will take 5 – 10 minutes. (In my testing it reliably took between 7 and 8 minutes) The screen will look like this

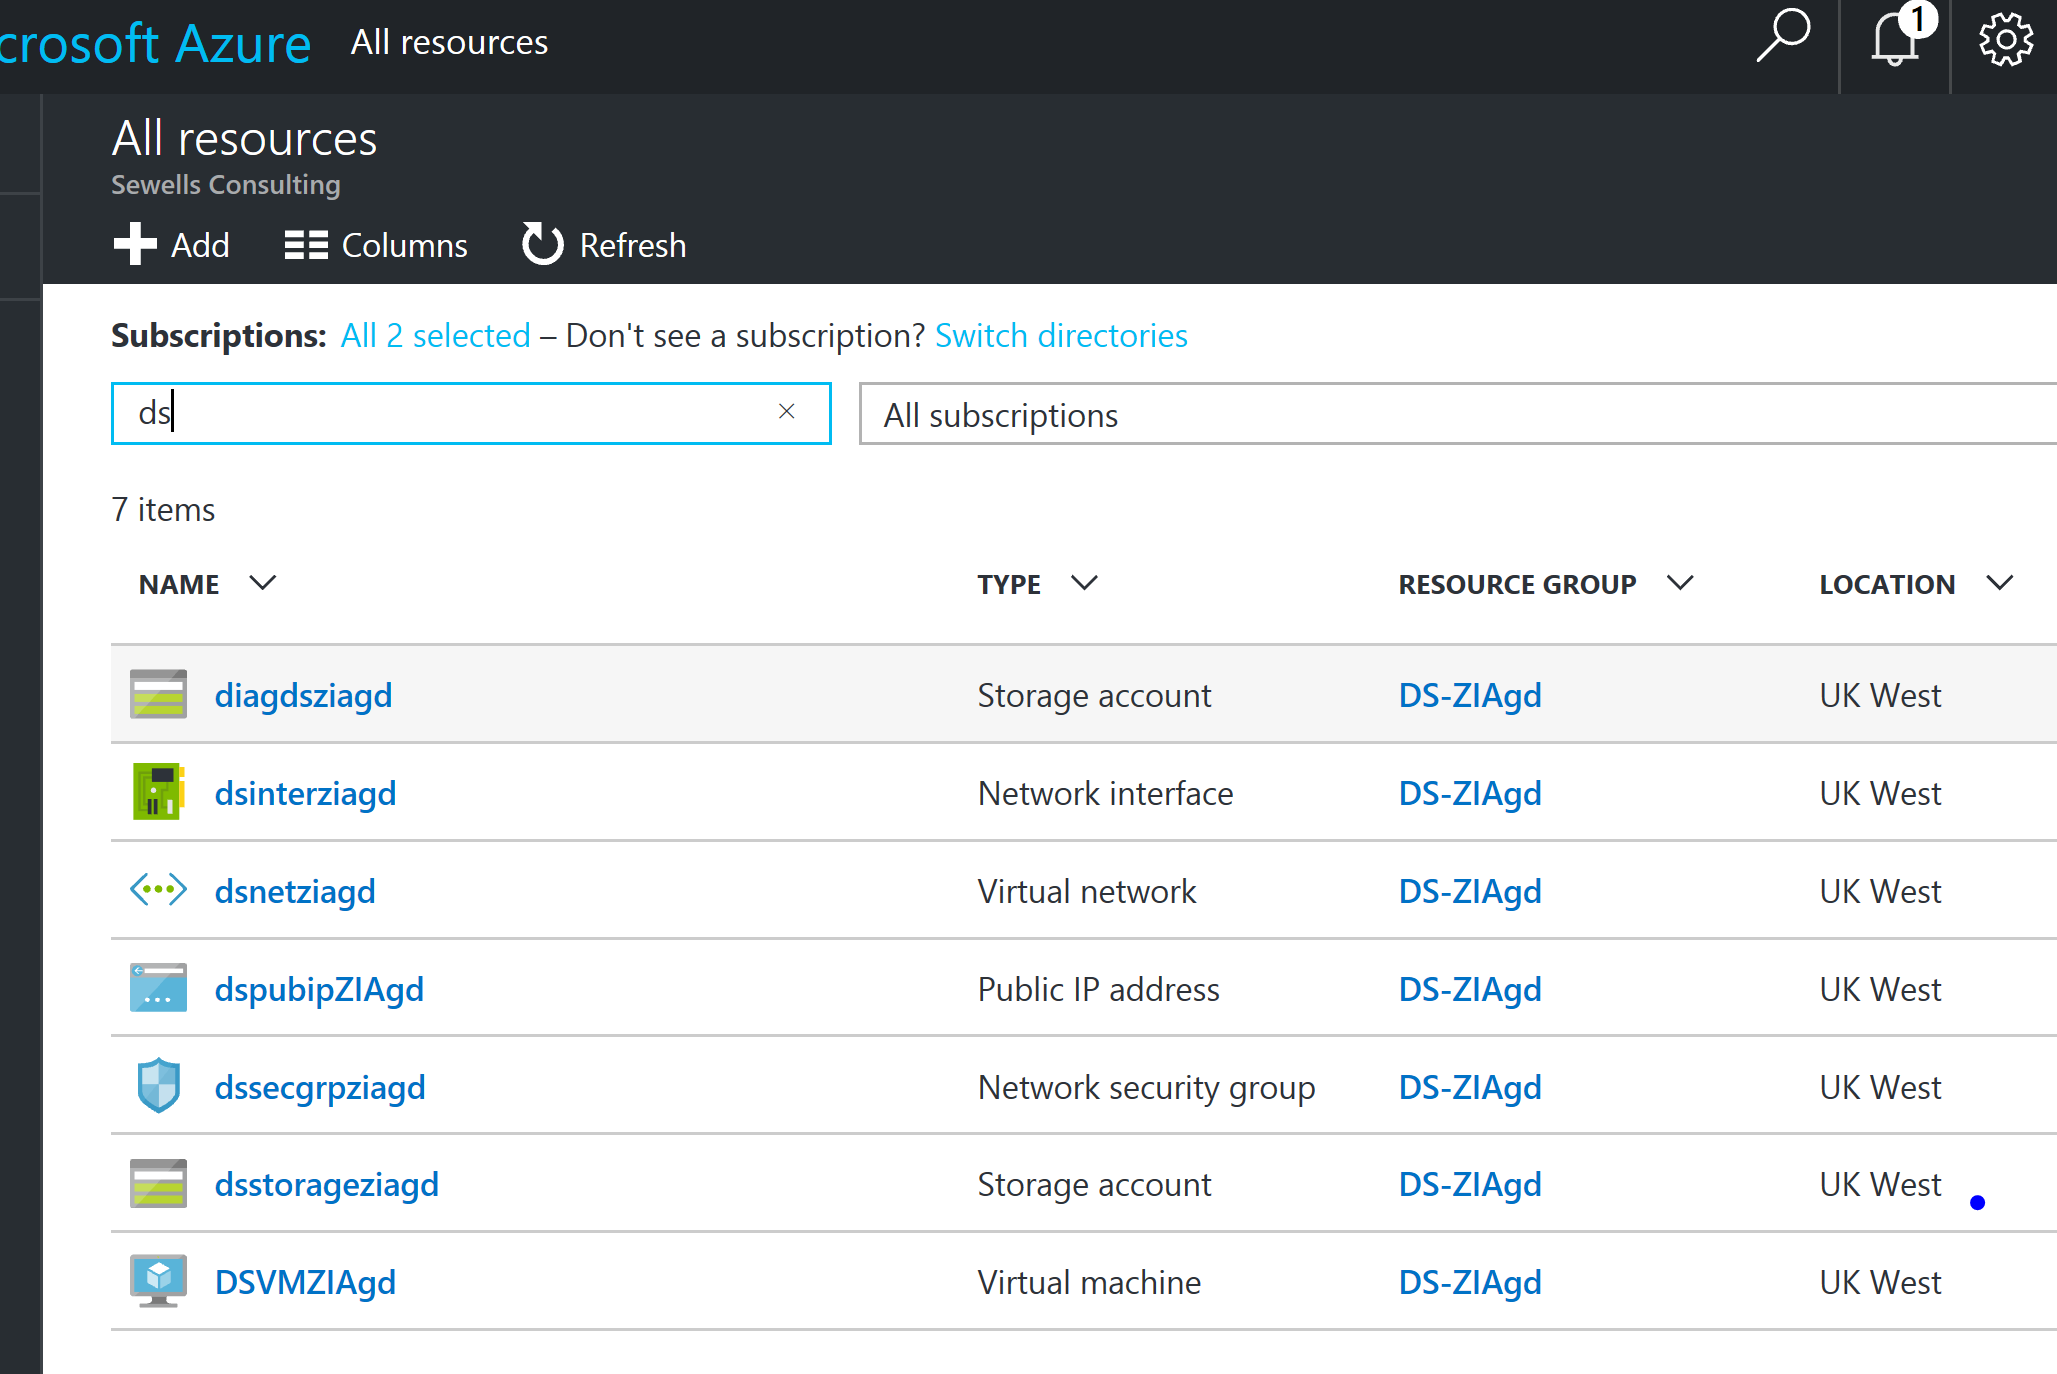
When the script has finished running you will have deployed a set of resources like this
Login to the Virtual Machine
Copy and paste the correct code from the output at the end of the script to launch the RDP session and save the RDP file to your documents folder for later use.
Or you can find the Virtual machine name in the portal or by running
Get-AzureRmVM -ResourceGroupName <ResourceGroup> | Where-Object {$_.Name -like 'DSVM*'}
You can then use the code below to download a RDP file and log into the virtual machine using this code
Get-AzureRmRemoteDesktopFile -ResourceGroupName <ResourceGroup> -Name <VMName> -LocalPath C:\WIP\DataScienceVM.rdp -Launch

You will need to login with the local admin account you set up previously, which means that you will need to click on more choices and then the machinename\Username. In this case the machine name is DSVMZIAgd
You can copy the correct Virtual Machine name and Username from the output at the end of the script.

If you have forgotten your password, you can reset it in the Portal.
Enjoy the Data Science Virtual Machine
You are then logged in and can carry on. Once the Azure PowerShell modules and script are installed you would be able to have a machine up and running within 10 minutes.

Cleaning Up
To remove the resource group and ALL resources in the resource group, including the data science VM, run:
Remove-AzureRmResourceGroup -Name <ResourceGroup> -Force
This will remove ALL resources in that resource group, so be careful if you have deployed anything else.
Customising the Deployment
If you want to use different settings for the deployment or want to script the creation of a number of machines, you can run
Get-Help New-WindowsDataScienceVM -Full
and see all the options and further examples. Any questions please feel free to comment