Creating a New Data Saturdays Event
There’s a new process to create a Data Saturdays Event page, so I thought I would write an explanation and a run through
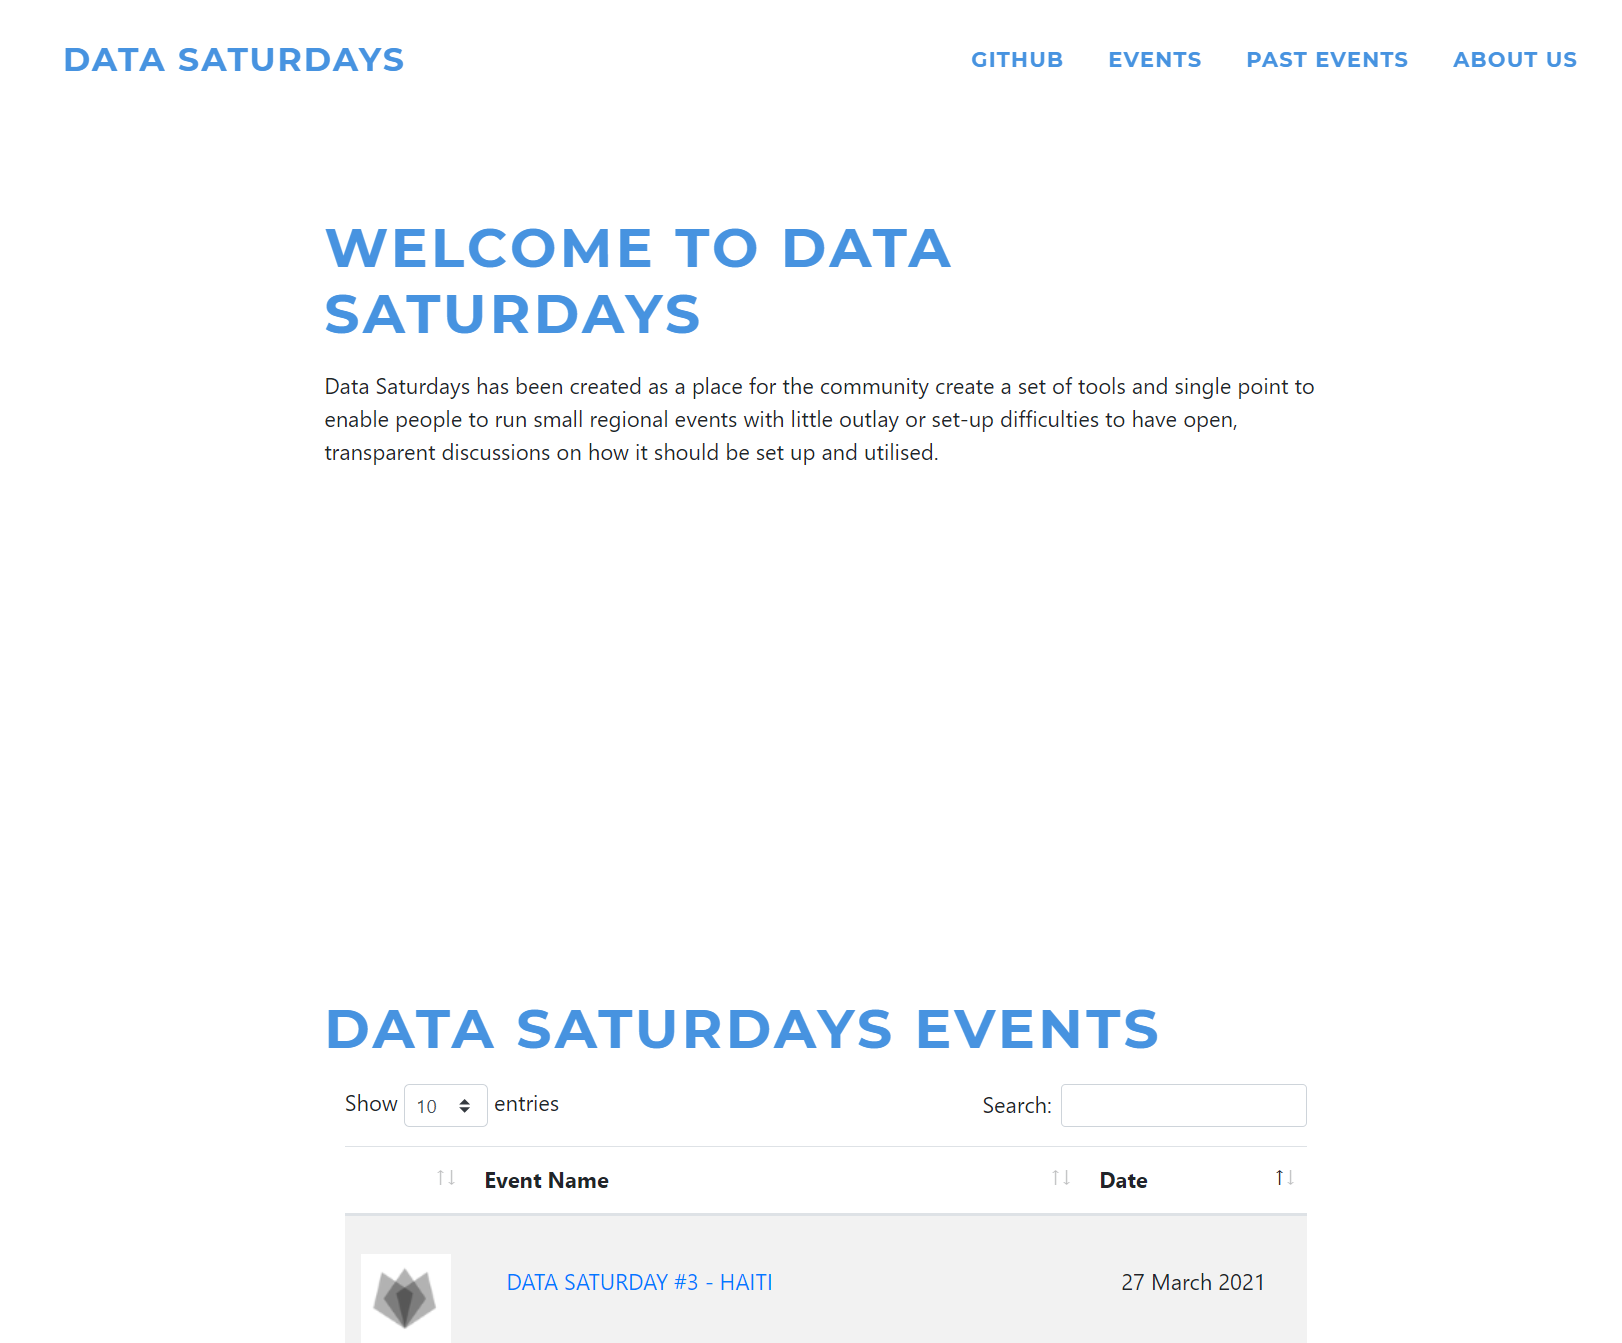
What is Data Saturdays ?
Firstly, not everyone will know what a Data Saturday event is, so lets start with that. There are two parts to it.
A Data Saturday is an event that provides (usually free) training and information sessions about Azure Data and SQL Server. At present they are hosted online.
The Data Saturdays resource is an open-source repository which enables event organisers to easily build a web presence as an entry point into their event. It integrates with other free event management solutions such as Sessionize enabling Call For Speakers, easily integrating the schedule, room links and speaker walls. The website is https://datasaturdays.com
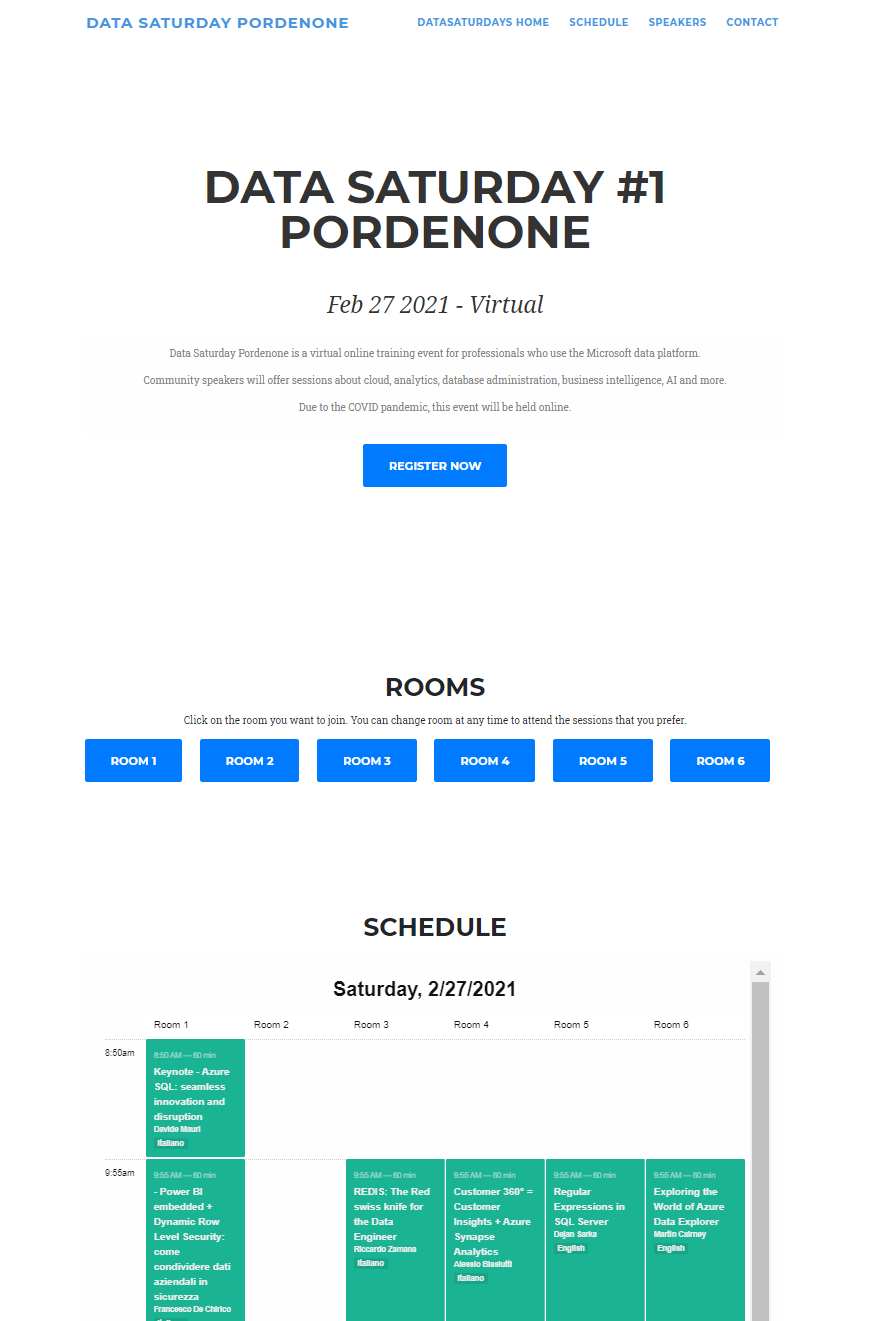
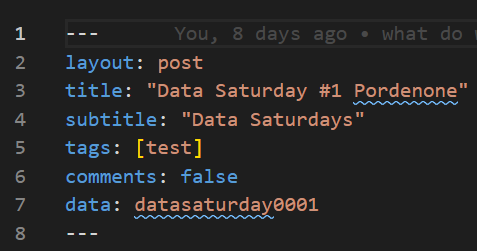
Here is a screenshot of the first Data Saturday “in” Pordenone.
The marvelous Gianluca Sartori and I started this to enable Pordenone to hold an event. We open-sourced the code and hosted it in the SQL Collaborative GitHub organisation alongside community tools such as dbatools with a MIT licence so that it is free for anyone to use and to collaborate with. The website is hosted on GitHub Pages which generates static pages using Jekyll. We figured that this not only enabled a quick free solution but also offered opportunities for people to enrich their skills by collaborating.
We wanted to include other community leaders to assist with guiding the project and we were proud that everyone we asked to be involved accepted. The people who are Admins of the project (who can approve changes to the code and therefore the website) in addition to Gianluca and I are : -
- Steve Jones
- Monica Rathbun
- Randolph West
- Johan Ludvig Brattås
- Andy Mallon
- Elizabeth Noble
- Warwick Rudd
- Matt Gordon
We have now enabled 10 Data Saturday events to exist, which we still think is amazing! However with growth comes challenges.
Creating an event the old way
The old method of creating an event involved the organiser providing the required information and an admin creating the static HTML page. Copying and pasting, ensuring that the template stayed the same but the detail was altered. Of course, when things are done manually humans can make errors and we made errors. The beauty of hosting the website in code in GitHub is that we can quickly change the code when we notice and fix them but this was not ideal.
Automation Automation AUTOMATION !
I love automation, I get a real buzz out of taking manual monotonous tasks and automating them. I looked at the process we were following and took the bait and decided to automate it. I have created a data-driven process for creating and updating the event web-page and the rest of this blog post is an accompaniment to the official documentation in the Wiki in the Data Saturdays GitHub repository. I might also blog about how I did it.
If you wish to just watch a video, you can find that here
Creating a New Data Saturday Event
How do you create a new event? The steps are laid out in the wiki
Tooling
We suggest that you use Visual Studio Code as the editor to make these changes. Visual Studio Code is a superb free lightweight cross-platform code editor. To reduce the frustration we also suggest that you add the YAML Extension to Visual Studio Code as this will help to identify any problems with YAML.
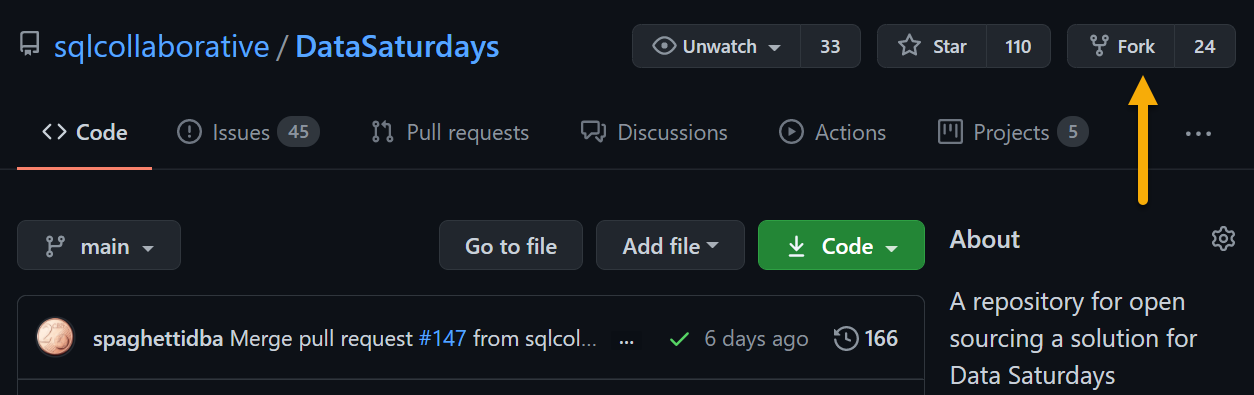
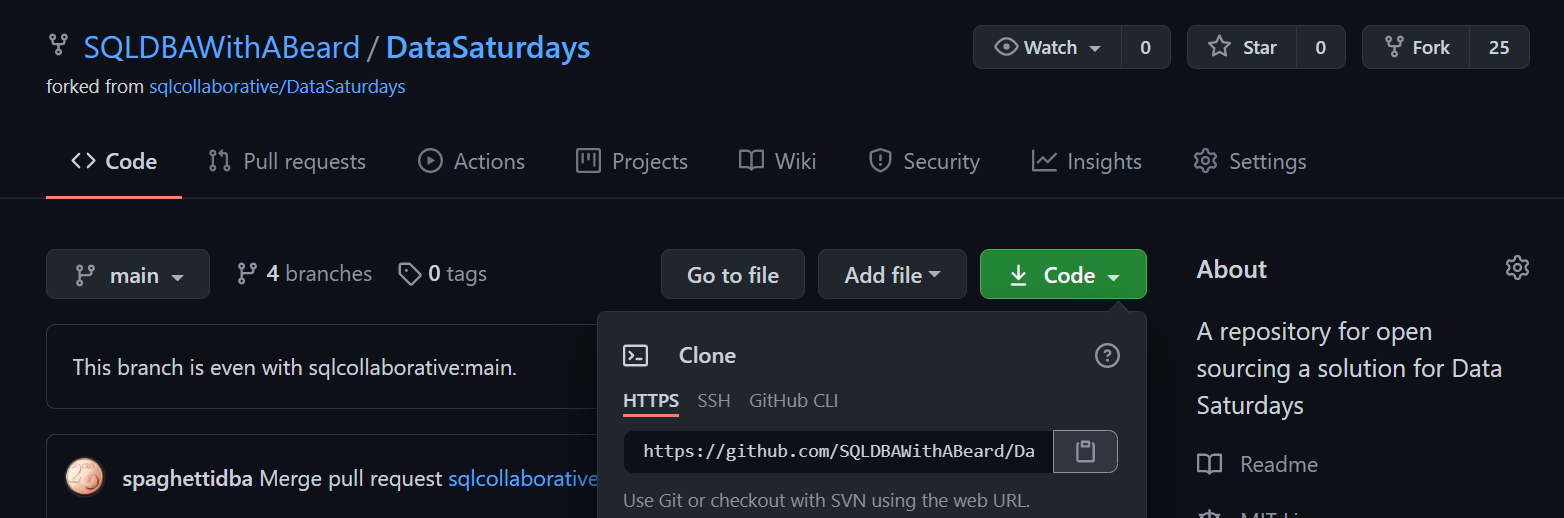
Fork the Data Saturdays Repository
I have previously written a blog post that explains how to contribute to an open-source repository which you can also use as reference for some of these steps
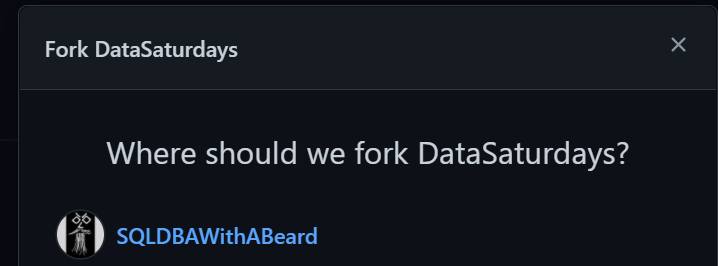
We are using GitHub as the source control for the website, so you will need to signup for a GitHub account if you do not have one already. This is free. Once you have that, navigate to the Data Saturdays repository and click on the Fork button
It will ask you where you want to fork it and you should choose your own GitHub account
It will only take a few seconds and you will have a fork of the repository in your own account.
Clone the Repository to your machine
To work with the code, you need to clone it to your own machine (There are other options like codespaces which I love, but we will leave that for another time) Click on the green Code button and copy the URL using the button
then in Visual Studio Code CTRL + SHIFT + P will open the Command Palette and search for clone

If you do not see Git:Clone you will need to install git from https://git-scm.com/downloads
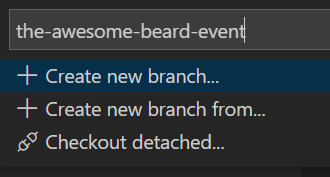
Create a new branch
You create a new branch to hold your changes by clicking on the branch name in the bottom left
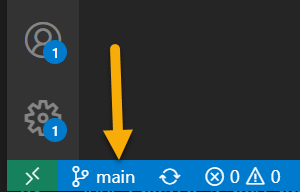
and give it a new name
Create the Markdown File
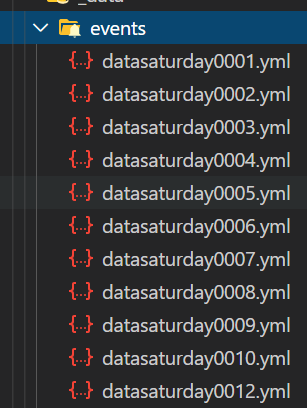
Now you can start to create the data for your event. First you need to see what the next available number is. Check the _data/events directory to see what has gone before you.
In the _posts directory, create a new file with the following naming convention YYYY-MM-DD-datasaturdayXXXX.md where XXXX is the next number available. An example name is 2021-06-12-datasaturday0007.md
In the file you place the following content
| |
The 3 dashes are important to keep. The name must be in double quotes and the data must match your number. It should look like this.
Save the file.
Create the data file.
This is the most important file. This file is the one that will feed the page that you use. This is the file that you will update as your event timeline progresses.
In the _data/events directory create a new file named datasaturdayXXXX.yml (The XXXX is your number again) example datasaturday0007.yml
In this file paste all the following
| |
Now you have to fill in your own data. The fields have explanations in them, the wiki has descriptions and you can always refer back to this blog post also. Some are obvious like name and date, some will take a little thought like description and some you won’t have yet like your Sessionize API URLs.
This file can be altered any time that you like during your event timeline as more information becomes available or you wish to change things. Each time, you can create a Pull Request to the Data Saturdays repository but before that It is really important that you check your YAML.
Once your data file is ready
Check your YAML
If you have followed our advice and used Visual Studio Code and the YAML extension then you can check that your YAML is correctly formed by looking at the problems tab
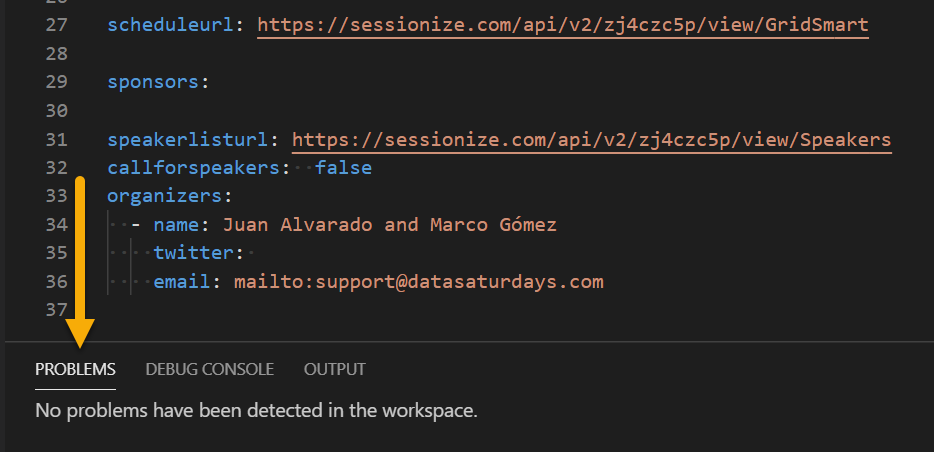
The example above has no problems so the YAML is correct. If it is not you will see
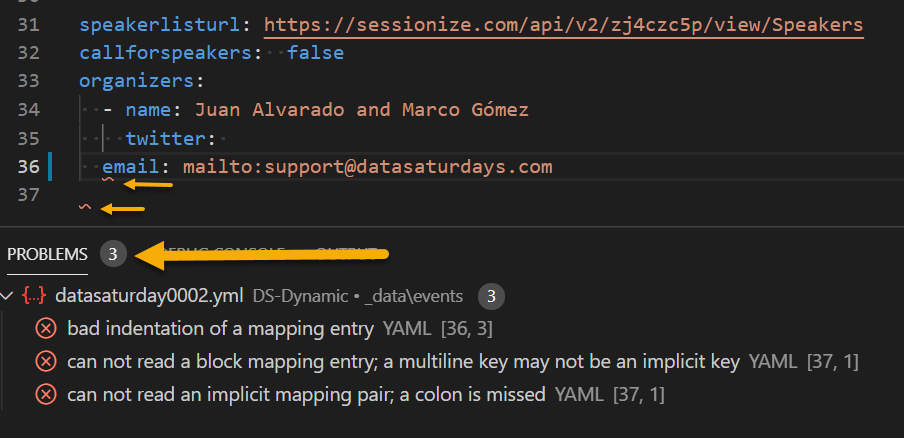
Normally with YAML the problem is spaces, try to line up the text until the problem goes away.
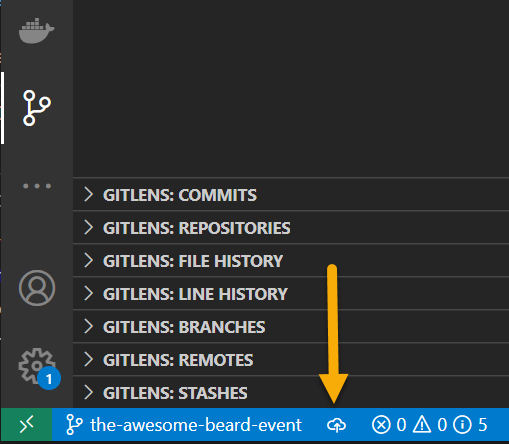
Sync your local repository with GitHub
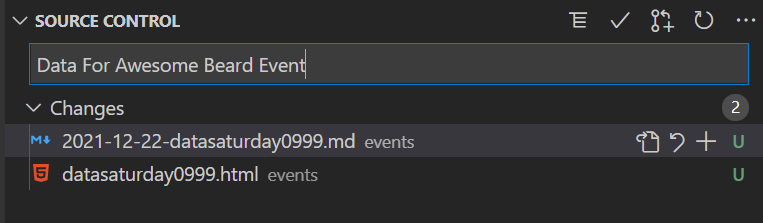
Once your changes have been made, you will need to commit them with a commit message. We suggest that it is something relevant to your event
Then you will need to press the publish button in Visual Studio Code to publish this branch to GitHub
Create a Pull Request in the Data Saturdays Repository
Last step is to create a Pull Request. Open your browser at your local GitHub repository. You will see a green button saying compare and pull request.
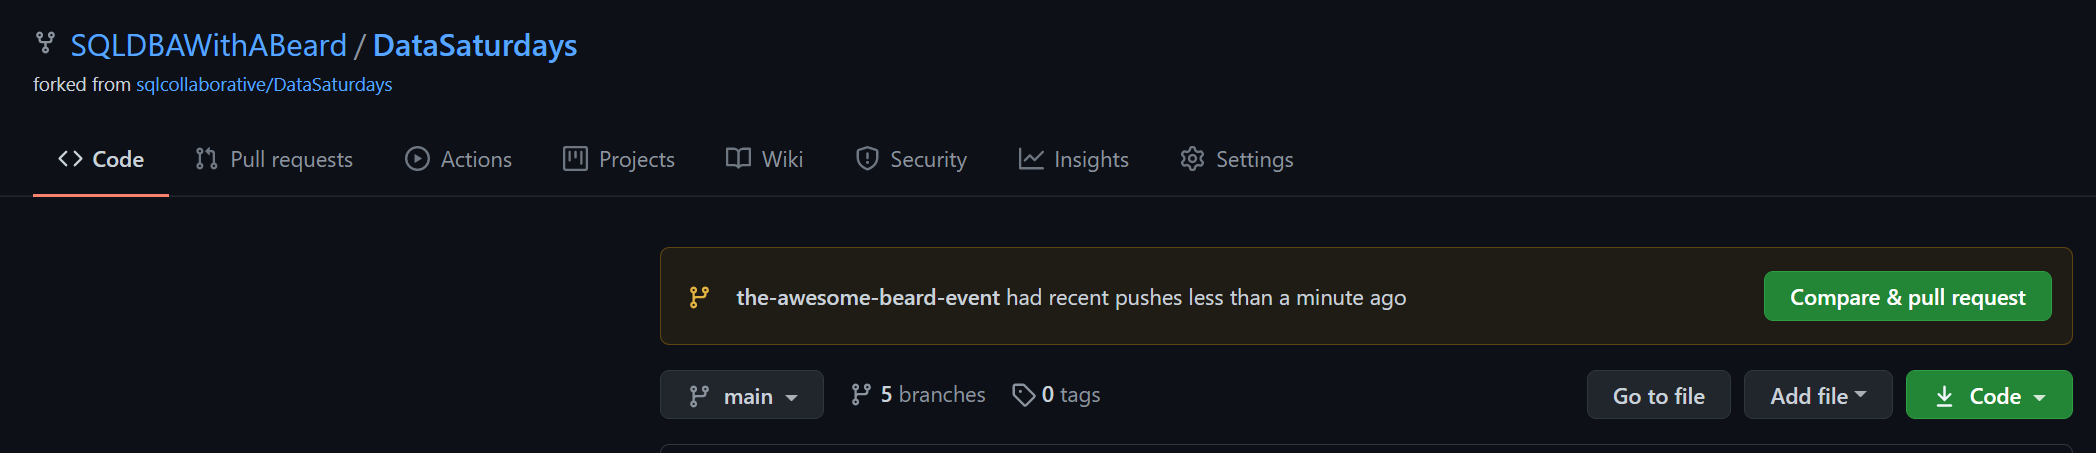
When you click that it will automatically open a pull request for you. Add some details about who you are and your event and an admin will then review it and merge it. Once it has been merged, the site will be rebuilt and will include your new event page.
Continue to update your event
AS you progress along your event timeline, you will need to edit the data file and create a new Pull Request. You will do this
- When you get a new sponsor
- When you have enough volunteers
- When your Call for Speaker closes
- When your event is published and you have your SpeakerWall and Schedule API URLs from Sessionize
- To add links to your virtual rooms
- To add your feedback links
- After your event has finished
As you change those things, create new Pull Requests, and they are merged, your event page will be updated.