Introduction
Microsoft Fabric is a low friction unified analytics platform that brings together data engineering, data integration, data warehousing, data science, real-time analytics, and business intelligence.
Fabric Workspace
A Fabric workspace is a container for all your Fabric assets, such as datasets, dataflows, notebooks, and reports. It allows you to organize and manage your Fabric resources effectively.
How do you create a Fabric Workspace?
There are several ways to create a Fabric workspace, including using the Fabric portal, Fabric CLI, using the Fabric Terraform provider
What is FabricTools?
We are going to use FabricTools, a PowerShell module that simplifies the management of Microsoft Fabric resources. FabricTools provides cmdlets to create, update, and delete Fabric workspaces and other resources. It has been developed by the community, particularly
Ioana Bouariu Frank Geisler Tiago Balabuch
It is available on GitHub.
How do you install FabricTools?
To install the FabricTools module from the PowerShell Gallery:
| |
Create a Fabric Workspace with PowerShell
First you need to connect to your Fabric account using the Connect-FabricAccount cmdlet. This cmdlet will prompt you to sign in with your Microsoft account. I like to use a secret to store my tenant ID, so I can use it in my scripts without hardcoding it. You can use the Get-Secret cmdlet from the Microsoft.PowerShell.SecretManagement module to retrieve the secret.
| |
Next, you can create a Fabric workspace using the New-FabricWorkspace cmdlet. You need to specify the name of the workspace, the capacity id that it will be assigned to, and optionally a description.
| |
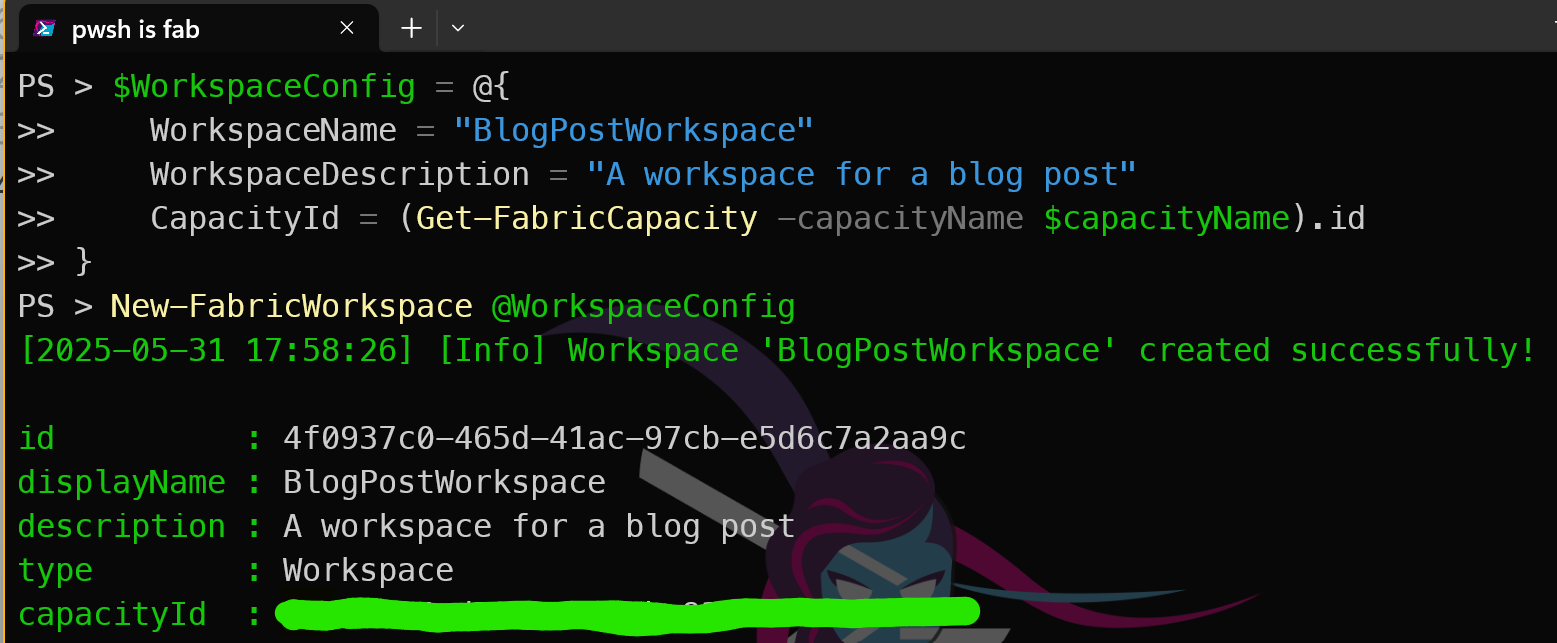
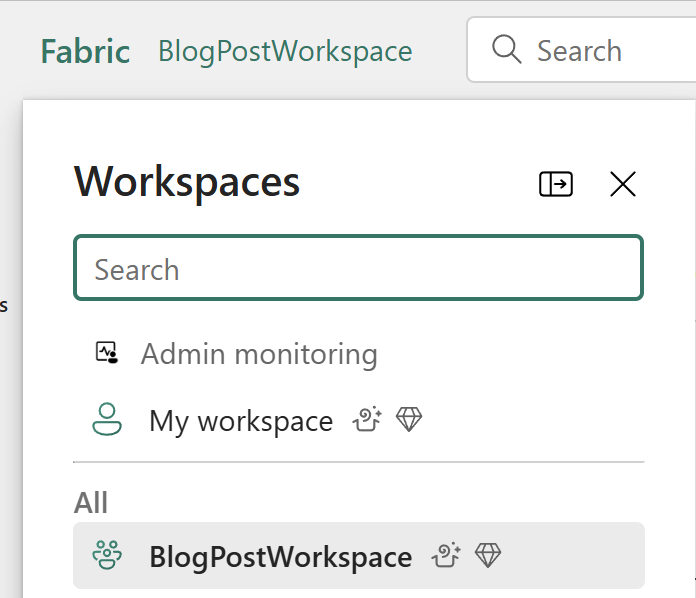
and bingo! You have created a Fabric workspace using PowerShell. You can now use this workspace to create and manage your Fabric assets. You can see it in the Fabric portal under the Workspaces section.
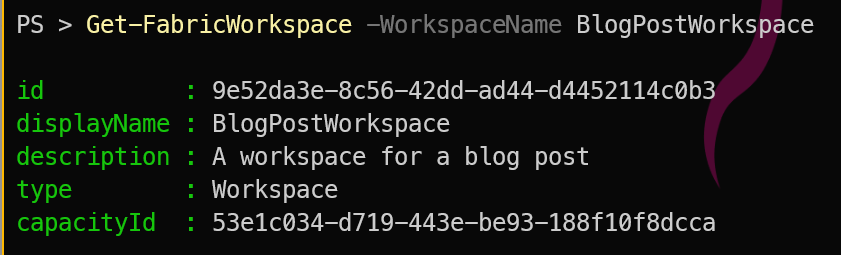
and you can also use the Get-FabricWorkspace cmdlet to retrieve the details of the workspace you just created.
| |
This will return the details of the workspace, including its ID, name, description, and capacity ID.
Conclusion
A beginner-friendly guide to creating a Microsoft Fabric workspace using PowerShell. This method is particularly useful for automating the creation of workspaces in a consistent and repeatable manner using PowerShell.